---
title: Resource & Statistical Tracking System (RSTS)
description: Event tracking
---
[Skip to content](https://kb.arms.com/dhq/resource-statistical-tracking-system-rsts#main-content)
English
Show submenu for translations
Open main navigation
Close main navigation
- English
Show submenu for translations
- Contact us
Contact us
How can we help you?
- There are no suggestions because the search field is empty.
1. [DHQ](https://kb.arms.com/dhq?hsLang=en)
2. [User Guides](https://kb.arms.com/dhq/user-guides?hsLang=en)
3. [Event Tracking](https://kb.arms.com/dhq/user-guides?hsLang=en#event-tracking)
# Resource & Statistical Tracking System (RSTS)
**Resource & Statistical Tracking System (RSTS)**
Created by Greg Katz, Modified on Mon, 28 Apr, 2025 at 1:02 PM by Greg Katz
RSTS has been created for small agencies without access to a CAD system, providing the ability to track events and activities.
**Note: Your agency may be setup differently than what is shown below but the concept should be similar**
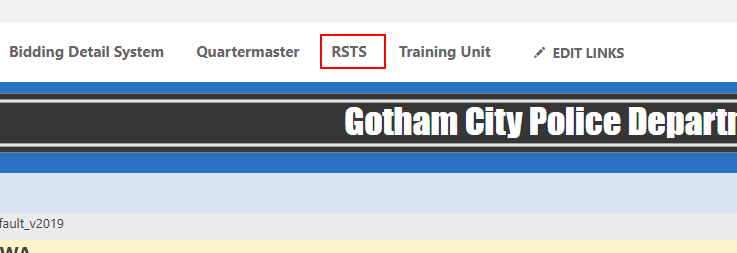
From your DHQ homepage click on **RSTS**
RSTS will open with the current activity and event log displayed (may be agency specific)
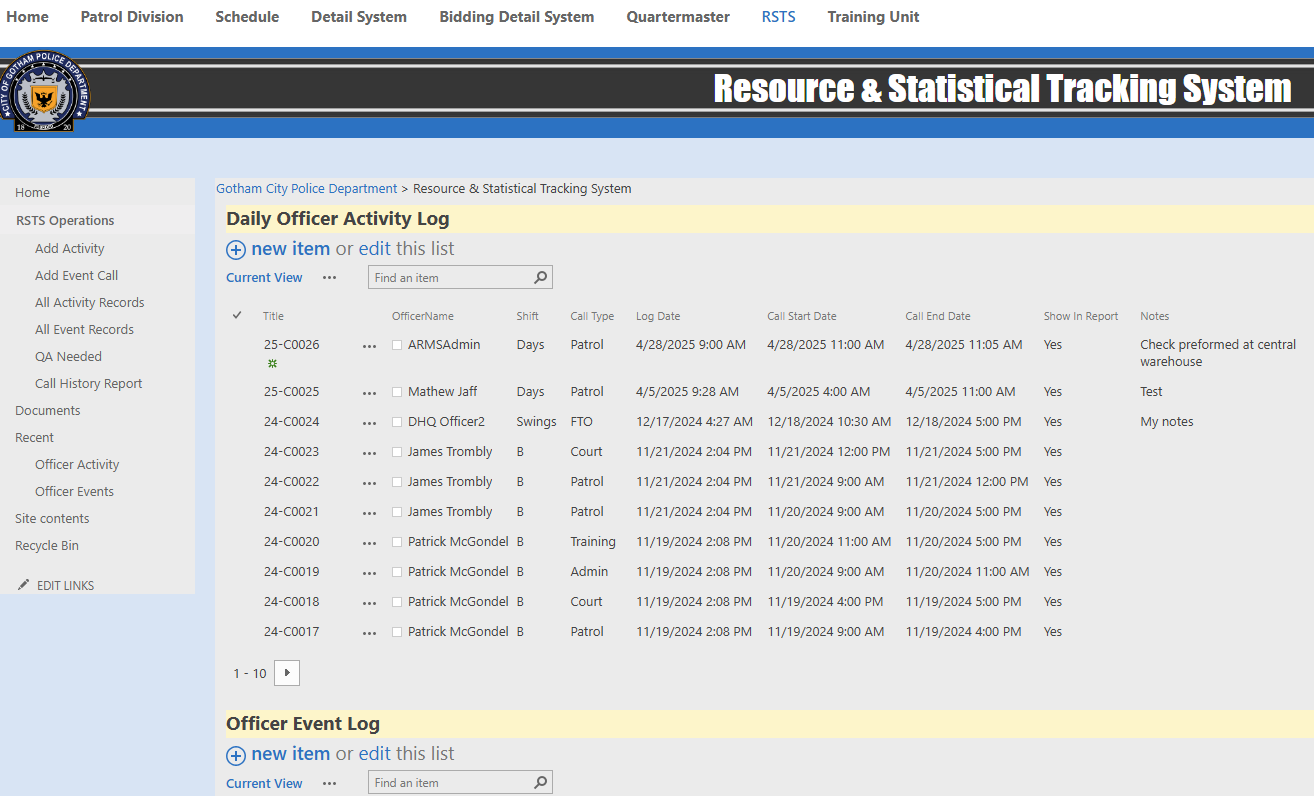
There are two different types of entries a user can add:
- Events - Calls for Service
- Activities - Officer initiated (building/location checks), or directed (traffic enforcement, community policing, etc)
**Adding an Activity**
Click on **Add Activity** in the left side navigation or **New Item** above the Activity Log
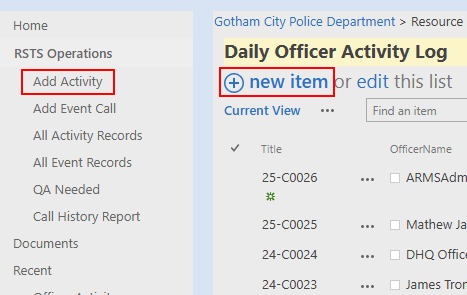
The Activity form will display as shown below
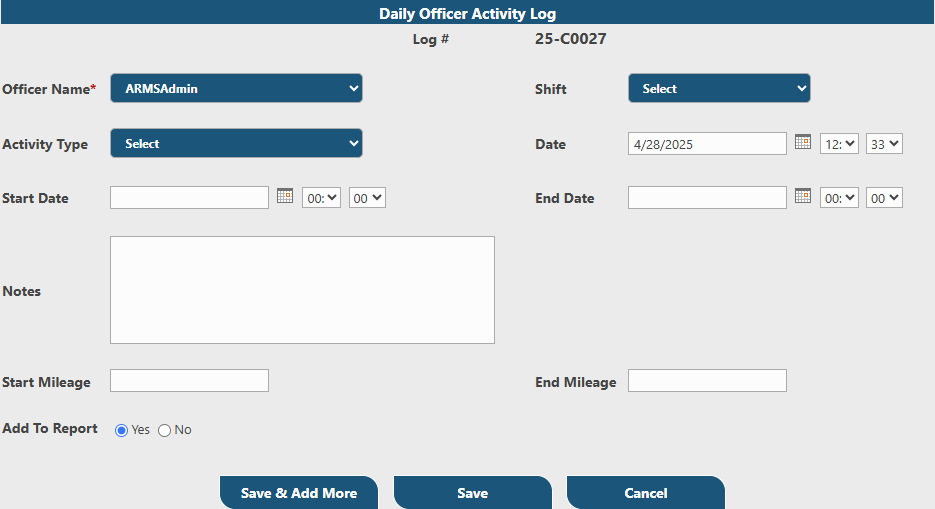
When starting a new activity, the current, logged in user will be backfilled in the **Officer Name** field (this can be edited, if needed).
The last selection on the form, **Add to Report**, defaults to **Yes**. By selecting **No**, the entry will not appear in the **Call History Report** (see below)
Once the user is done filling in all the appropriate fields, click save to add the entry into the **Activity Log**.
**Adding an Event**
Click on **Add Event** in the left side navigation or **New Item** above the Activity Log
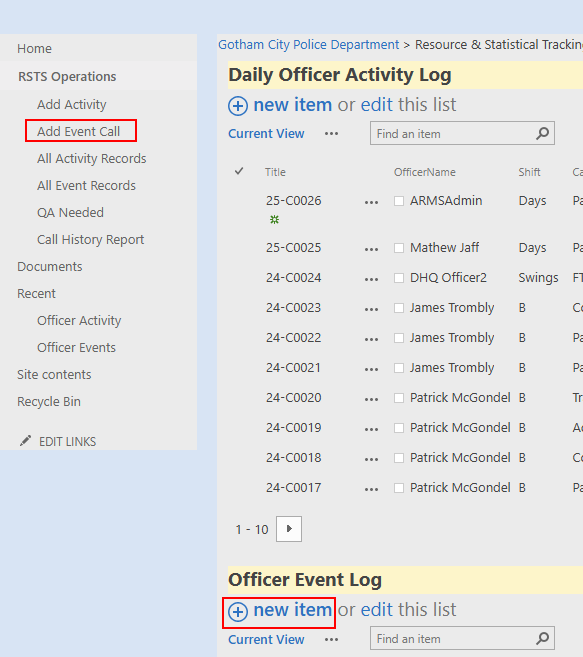
The Event form will display as shown below
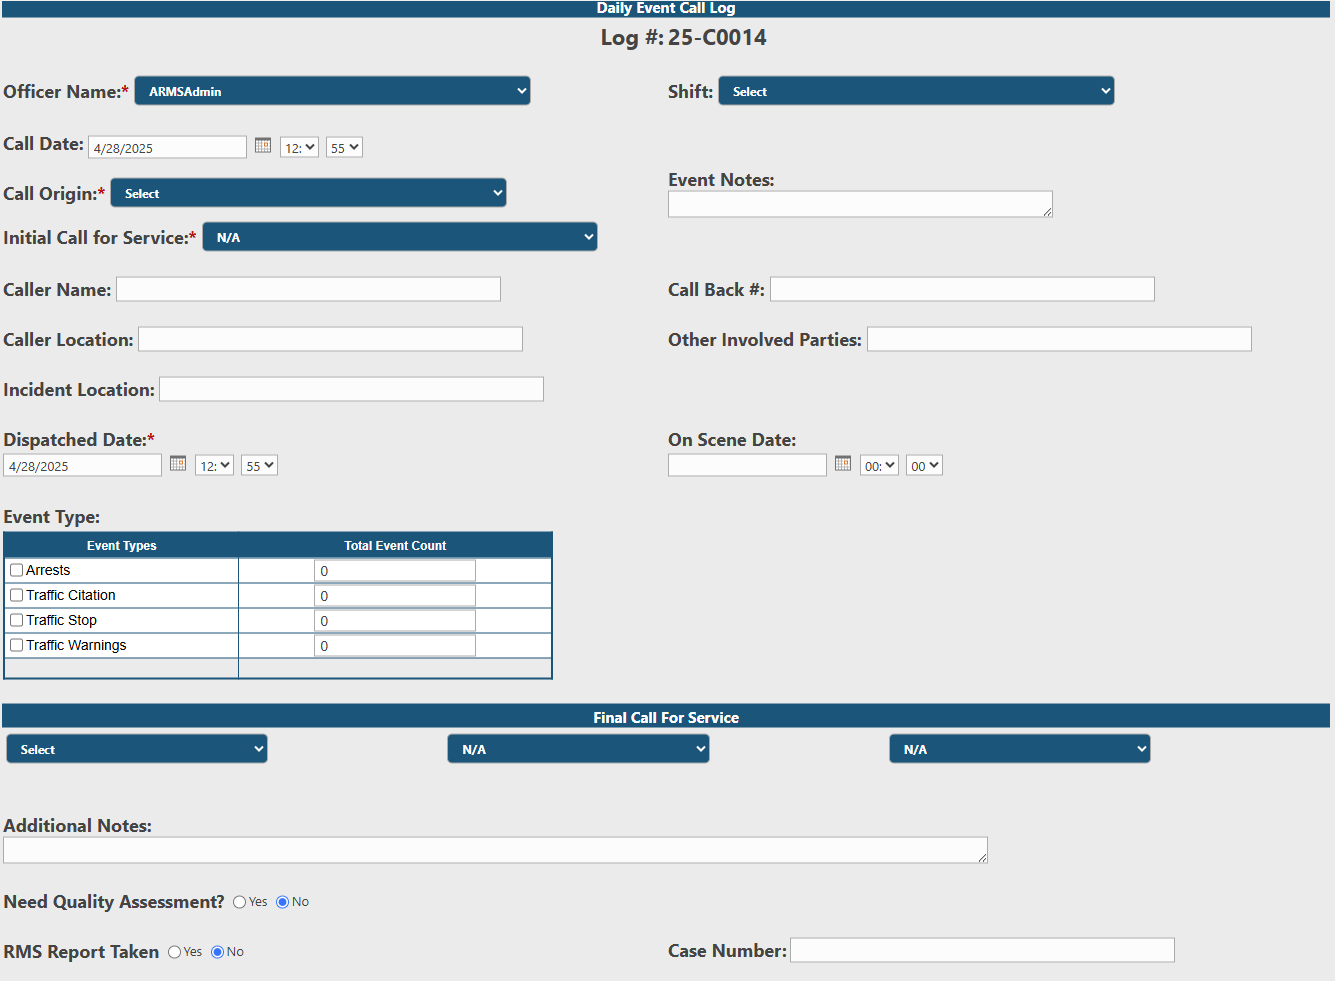
When starting a new activity, the current, logged in user will be backfilled in the **Officer Name** field (this can be edited, if needed).
The top section contains the basic facts of the event like times, location and caller name. **Event Type** acts as a classification for the event and can be broken down in the **Call History Report** (See below).
In the bottom section, **Final Call for Service**, you may select up to three codes related to the event for tracking and reporting.
If the event needs to be reviewed for Quality Assurance later, the user can select **Yes**. Selecting **Yes** will ensure that the event is displayed in the **QA Needed** list (See below).
If an RMS report is to be completed, the user may select **Yes** to **RMS Report Taken** and specify the **Case Number.**
Click **Save** to add the Event to the database.
**Viewing and Editing the Activity and Event Lists**
Click **All Activity** or **All Events** to display completed historical lists
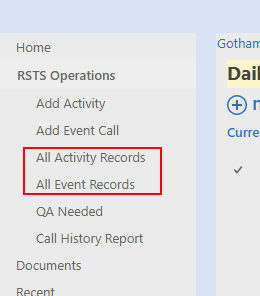
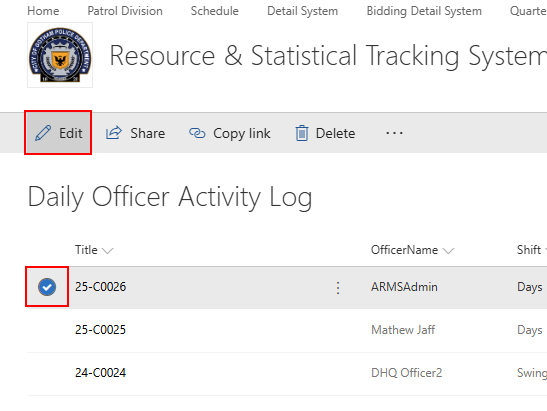
Once a list is open, a record can be opened by clicking on the case number or edited by selecting the row and by clicking **Edit.**
**Quality Assurance List**
Click on **QA Needed** to view all events flagged for QA
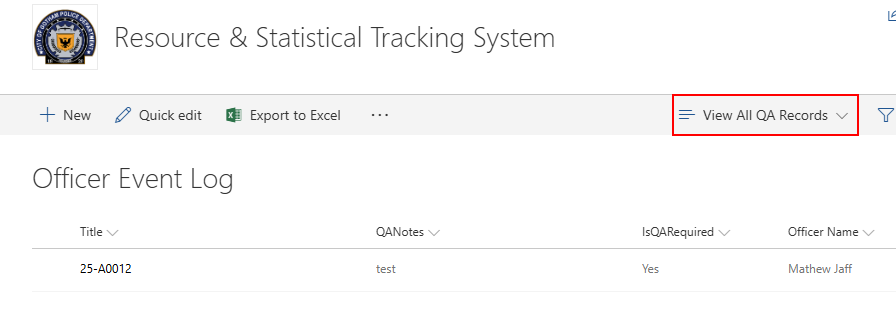
Once the list is open, a record can be opened by clicking on the case number or edited by selecting the row and by clicking **Edit** as was shown earlier**.**
**Call History Report**
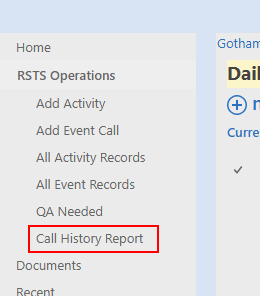
Click on **Call History Report** in the left side navigation
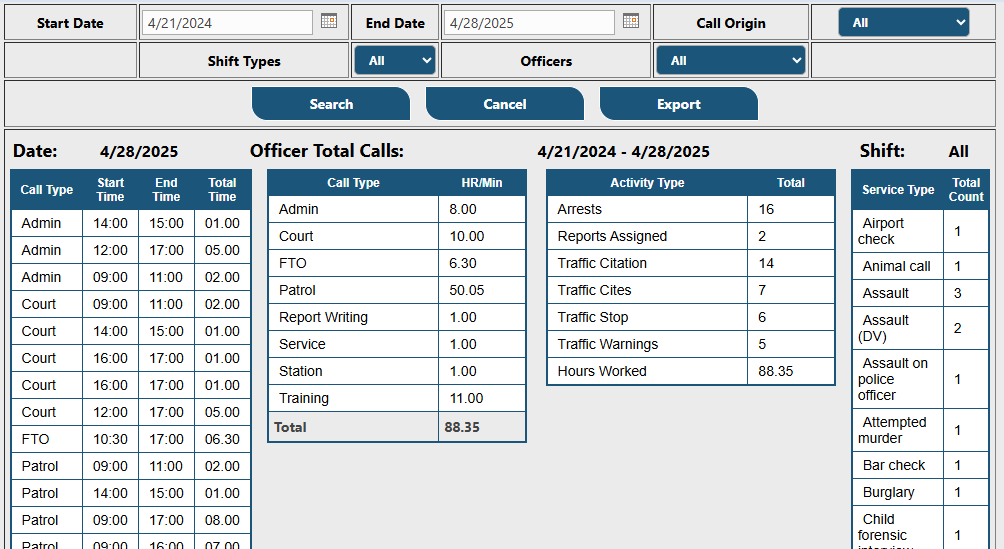
The **Call History Report** form will open.
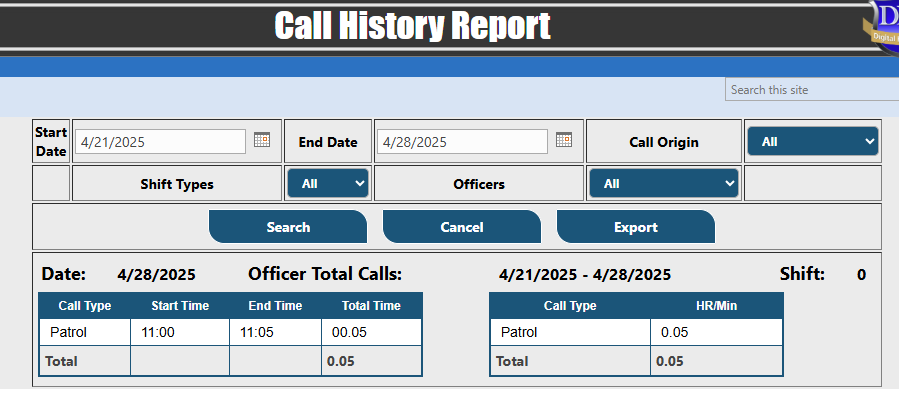
The user can search by date, Officer, shift and call origin. The report will display all the searched data.
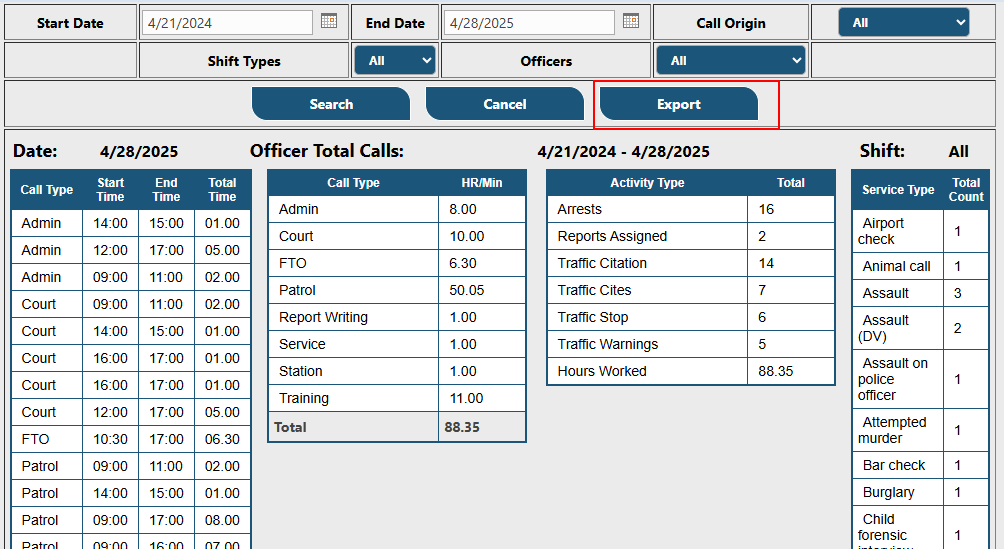
To export the searched data to a CSV file, click **Export**.
- [Administration Guides](https://kb.arms.com/dhq/administration-guides?hsLang=en#main-content)
- [AWA Roll Call](https://kb.arms.com/dhq/administration-guides?hsLang=en#awa-roll-call)
- [Cruiser Check](https://kb.arms.com/dhq/administration-guides?hsLang=en#cruiser-check)
- [Detail Bidding](https://kb.arms.com/dhq/administration-guides?hsLang=en#detail-bidding)
- [Document Sign Off](https://kb.arms.com/dhq/administration-guides?hsLang=en#document-sign-off)
- [Forms Based Authentication](https://kb.arms.com/dhq/administration-guides?hsLang=en#forms-based-authentication)
- [Microsoft Office Settings](https://kb.arms.com/dhq/administration-guides?hsLang=en#microsoft-office-settings)
- [Mobile App](https://kb.arms.com/dhq/administration-guides?hsLang=en#mobile-app)
- [Office 365/Azure Connection](https://kb.arms.com/dhq/administration-guides?hsLang=en#office-365-azure-connection)
- [Passwords](https://kb.arms.com/dhq/administration-guides?hsLang=en#passwords)
- [Permissions](https://kb.arms.com/dhq/administration-guides?hsLang=en#permissions)
- [Personnel Cards](https://kb.arms.com/dhq/administration-guides?hsLang=en#personnel-cards)
- [Smart Police](https://kb.arms.com/dhq/administration-guides?hsLang=en#smart-police)
- [Scheduling](https://kb.arms.com/dhq/administration-guides?hsLang=en#scheduling)
- [Training](https://kb.arms.com/dhq/administration-guides?hsLang=en#training)
- [Quartermaster](https://kb.arms.com/dhq/administration-guides?hsLang=en#quartermaster)
- [Register New User](https://kb.arms.com/dhq/administration-guides?hsLang=en#register-new-user)
- [User Guides](https://kb.arms.com/dhq/user-guides?hsLang=en#main-content)
- [AWA Roll Call](https://kb.arms.com/dhq/user-guides?hsLang=en#awa-roll-call)
- [Cruiser Check](https://kb.arms.com/dhq/user-guides?hsLang=en#cruiser-check)
- [Event Tracking](https://kb.arms.com/dhq/user-guides?hsLang=en#event-tracking)
- [Messaging](https://kb.arms.com/dhq/user-guides?hsLang=en#messaging)
- [Mobile App](https://kb.arms.com/dhq/user-guides?hsLang=en#mobile-app)
- [Safe Watch](https://kb.arms.com/dhq/user-guides?hsLang=en#safe-watch)
- [Smart Police](https://kb.arms.com/dhq/user-guides?hsLang=en#smart-police)
- [Scheduling](https://kb.arms.com/dhq/user-guides?hsLang=en#scheduling)
- [Training](https://kb.arms.com/dhq/user-guides?hsLang=en#training)
- [Quartermaster](https://kb.arms.com/dhq/user-guides?hsLang=en#quartermaster)
- [Document Sign Off](https://kb.arms.com/dhq/user-guides?hsLang=en#document-sign-off)
- [DHQ Modules](https://kb.arms.com/dhq/dhq-modules?hsLang=en)
[](http://arms.com)
[mailto:email@email.com](mailto:email@email.com)
Copyright © 2026, End2End Public Safety