
“How To”
User Guide:
Bench Warrant
Add Case Details
Once the Receiving page is filled out and the Add/GoTo button has been clicked the user will be brought to the Case Details page.
Note: If the Court was selected on the Receiving page the user will be brought directly to the File details page, and the Case Details page will be skipped.
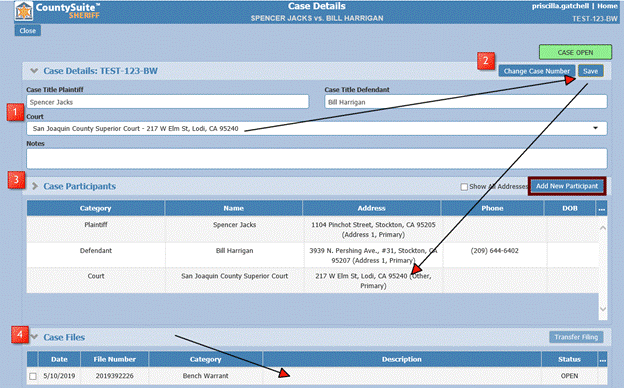
- Select the Court and click Save to add the court as a contact to the Case Participants section. The user can also change the Case Title if there are any typos/changes necessary from when the title was first created on the Receiving page.
- The Case Number can also easily be updated on this page if there was an error with the initial entry on the Receiving page. NOTE: If a file and services were accidentally put on the wrong case number, contact the Teleosoft Support team to move the file and services to the correct case number.
- Click on any existing contact to be taken to the Contact Details page where additional addresses, phone #s or completely new contacts can be added (see Contact Details section)
- Click anywhere in the file number section under Case Files to enter the File Details page. If multiple files are added under the same case number this is where they would all be listed to distinguish which file is the most recent one.
Add File Details
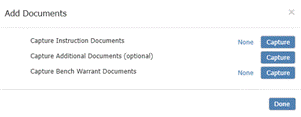
If the Instructions, Bench Warrant documents, and Additional Documents were not scanned on the receiving page a window will populate when the user first enters the File Detail page and will require scanning of all provided documents, allowing the user to continue.
Select Capture to attach the scanned documents or click None if no documents were provided. Click Add to add these to the File Actions section of the File Details page and continue.
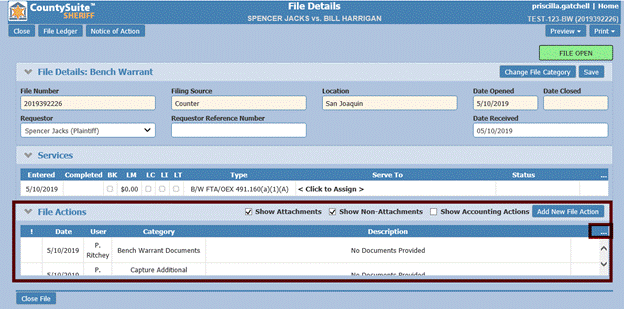
The File Actions are located at the bottom of the File Details page. This section will show all documents captured in the system, all document generated from the system, and comments can be added using the Add New File Action button.
Note: the three-dot ellipsis will open up the File Actions box to scroll and view all actions more easily.
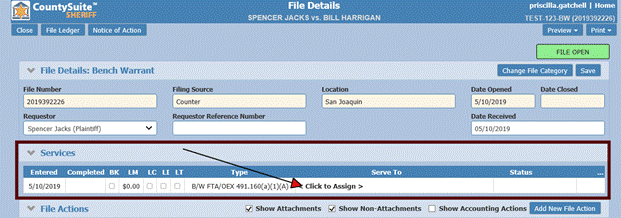
From the File Details page, click on the line within the service grid. Before any service information has been entered the line will always show “Click to Assign”.
The best way to enter information on the Service page is to work from left to right, top to bottom.
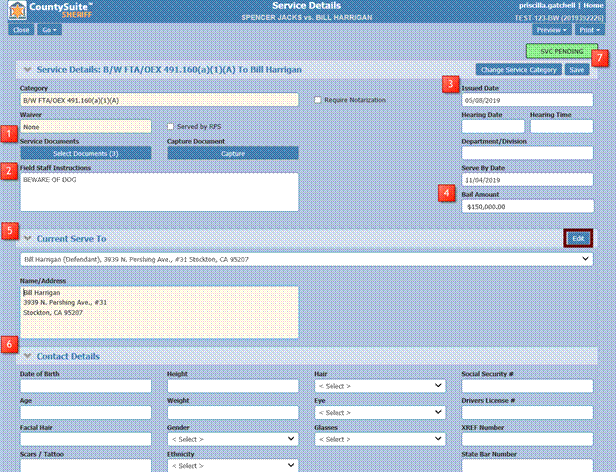
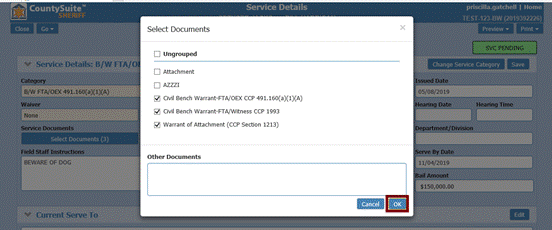
- Use the “Select Documents” button to select the documents associated with this service or type any that are not listed in the “Other Documents” section. You may use the | (pipe) character to enter multiple Other Documents (i.e. Exhibit|Attachments). Anything selected here will show on the back of the Trip Ticket. You may use the “Capture” button to scan and capture (attach) documents that were not added during receiving and replace any that need to be updated from the original scanning.
- Enter any notes that should show on the Trip Ticket for the deputy.
- Enter the date the paperwork was issued by the Court.
- Enter a Bail Amount (if applicable).
- Select the Serve To from the drop-down. If the contact to be served has not yet been entered click the Edit button to go to the Contacts page and add the party.
- Once the Serve To name is selected a Contact Details section will appear to add a detailed physical description (if provided).
- The service will show as status “SVC PENDING” until the page is saved.
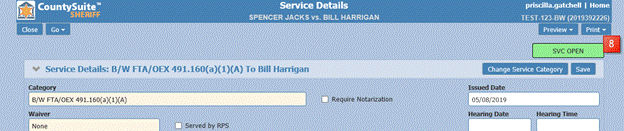
- After the page is saved, the status will change to “SVC OPEN” and the Trip Ticket can be printed from the Preview or Print drop-down.
Print Trip Ticket & Bench Warrant Courtesy Letter
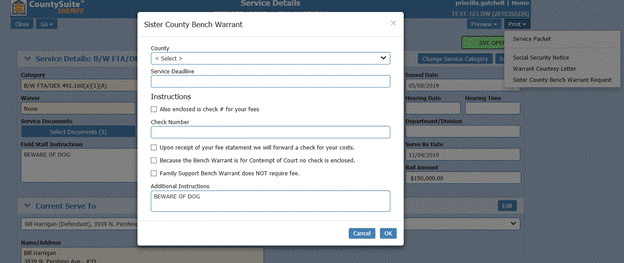
To print the Trip Ticket and Warrant Courtesy Letter click the Print drop-down on the Service Details page.

Use the Receiving page to enter the information the same way a regular Bench Warrant would be received.
On the Case Details click the Add New Participants button to enter the Contact Details page.
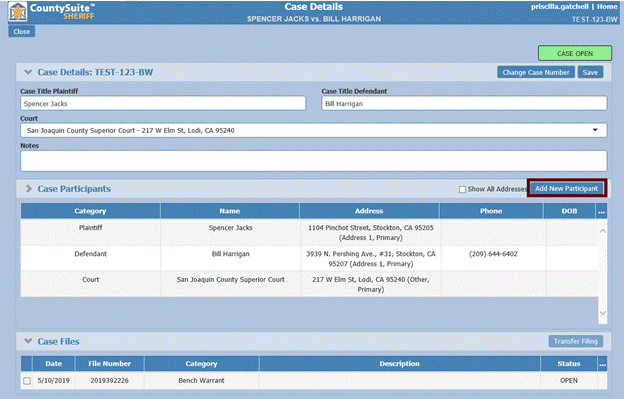
Once on the Contact Details page a “Foreign Sheriff” contact needs to be created in order for the system to know this service is a Sister Bench Warrant type.
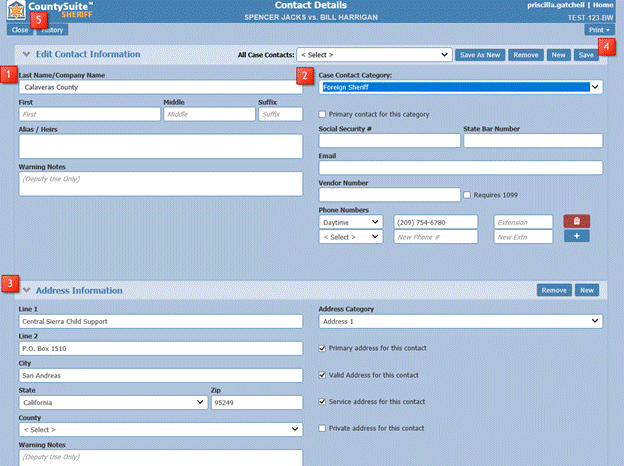
- Enter the County Name in the Last Name / Company Name field.
- Select the Case Contact Category of “Foreign Sheriff”
- As long as this contact type exists, the Service Details page will show a Sister County Bench Warrant Request Letter option in the Print drop-down.
- Add an address in the Address Information section.
- Make sure the Address is marked as valid.
- Click the Save button.
- Click close to return to the Case Details page.
Once the Foreign Sheriff contact has been added click in the File under Case Files to go to the File Details page.
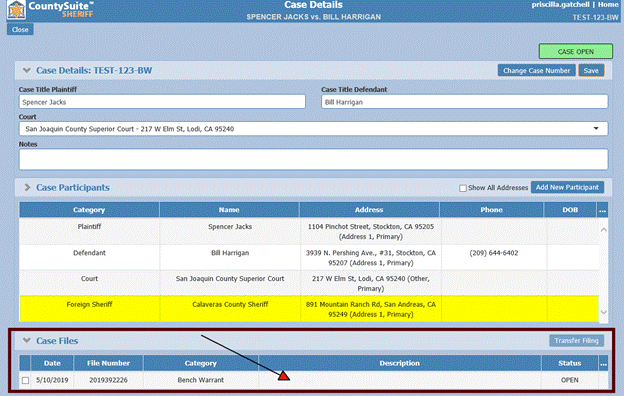
Once on the File Details page, click the line within the service grid. Before any service information has been entered the line will always show “Click to Assign”.
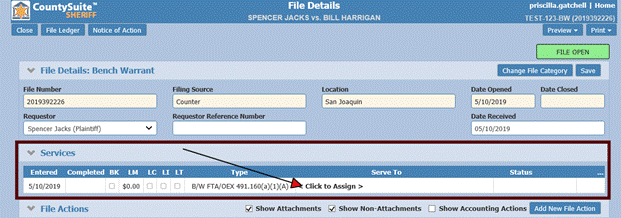
Follow the same Service Details steps listed on pages 5 & 6.
If the Foreign Sheriff contact was not added back on the Case Details page, the user can click the Edit button within the Current Serve To section to go to the Contact Details page and follow the instructions in the previous section of this document.
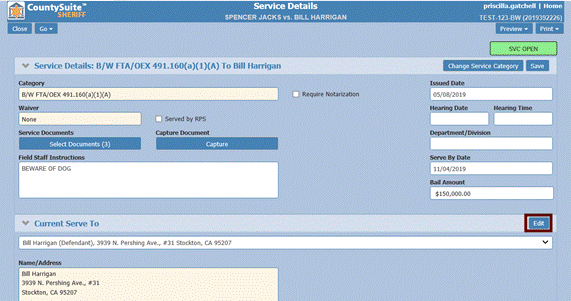
Once the Service Details page is saved the Print drop-down in the top right-hand corner will show a “Sister County Bench Warrant Request” letter.
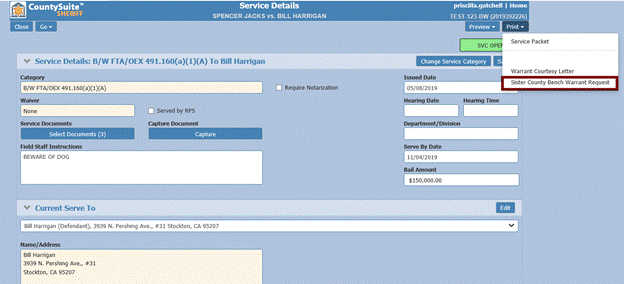
Once selected, a pop-up will require the necessary information for this letter to be generated. Click OK.