Click to Download the PDF File

“How To”
User Guide:
Accounts Page
CountySuite Sheriff Accounts Page
The Accounts Page can be accessed from the Home Screen by selecting the Accounts button.

Users will have access to the following buttons/pages from the Accounts page based on permissions:

Based on a configuration setting, there are 2 default displays when the user first accesses the Accounts page.
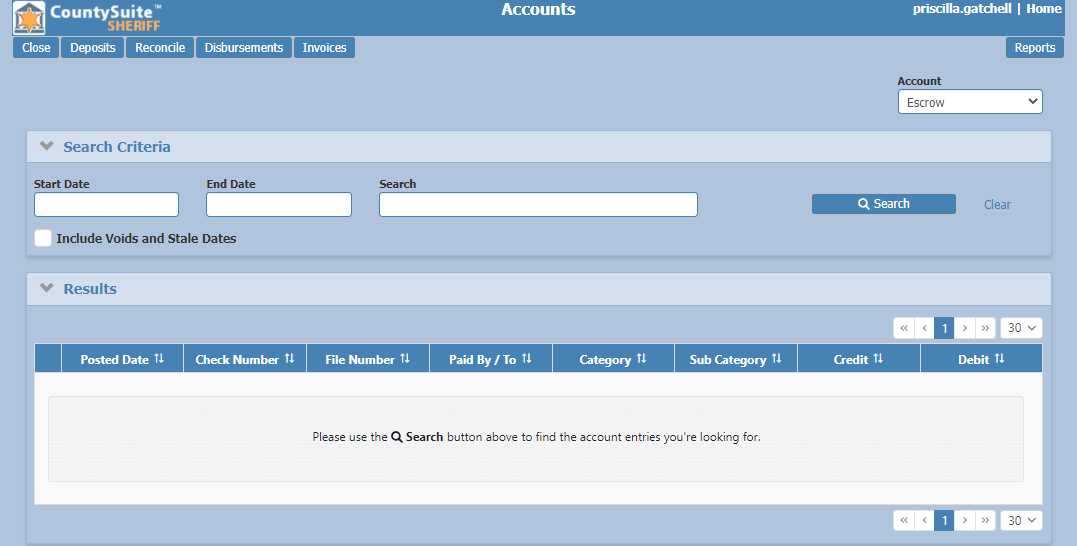
The first option displays the Results grid and will not load any information until the user clicks the Search button.
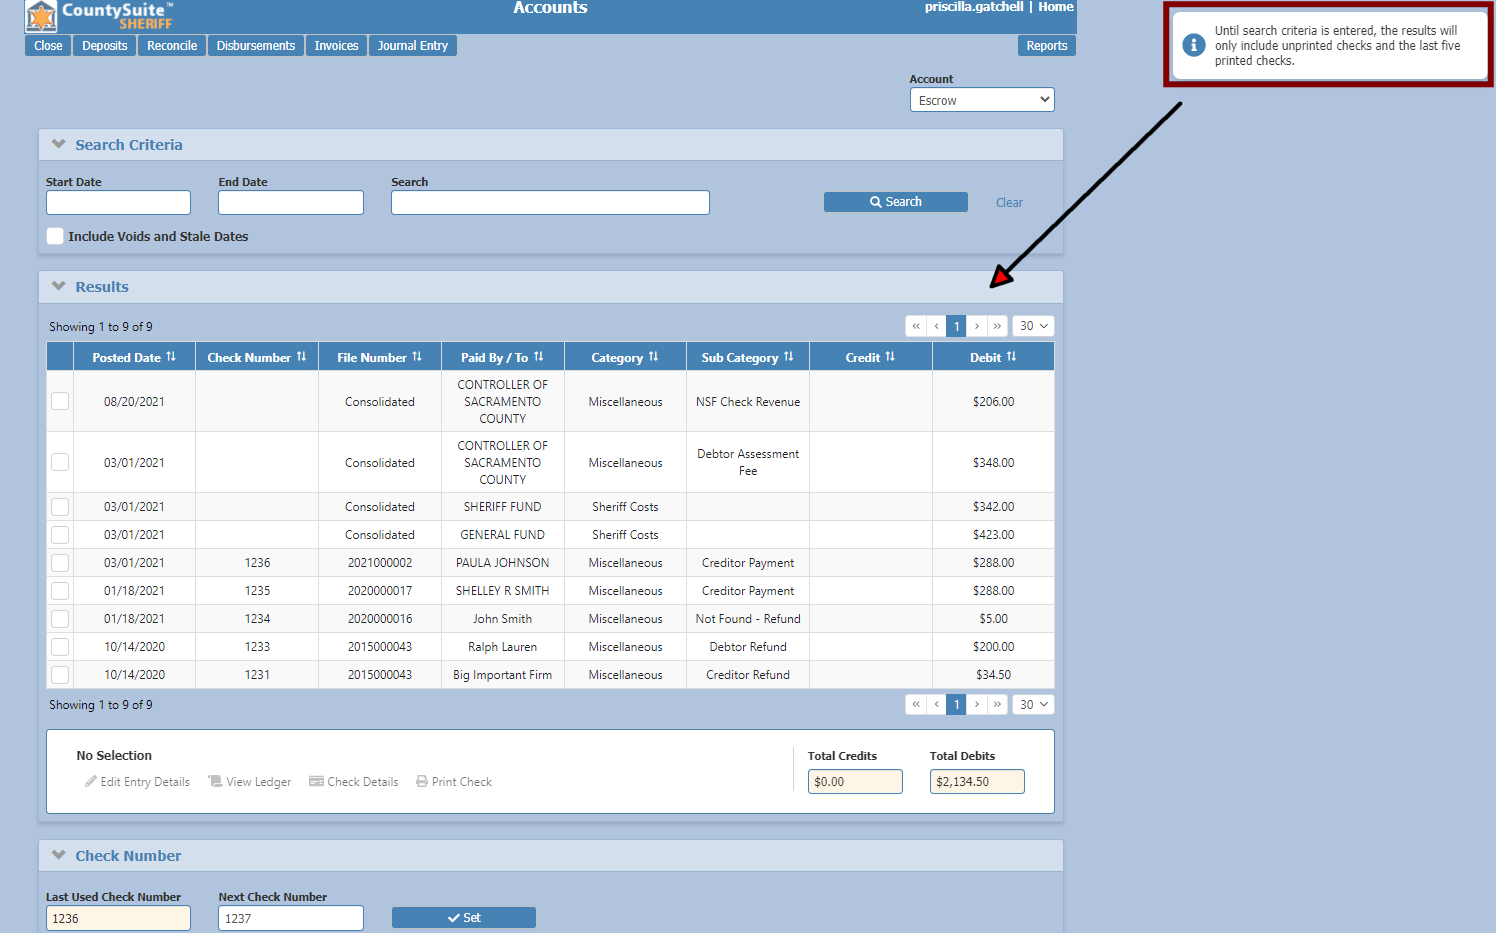
The second configuration option is to default to only show unprinted checks and the last 5 printed checks.
Counties with more than one location can select the applicable location from the drop-down list to guide their search. The page will default to the user’s default location when they first access the page.
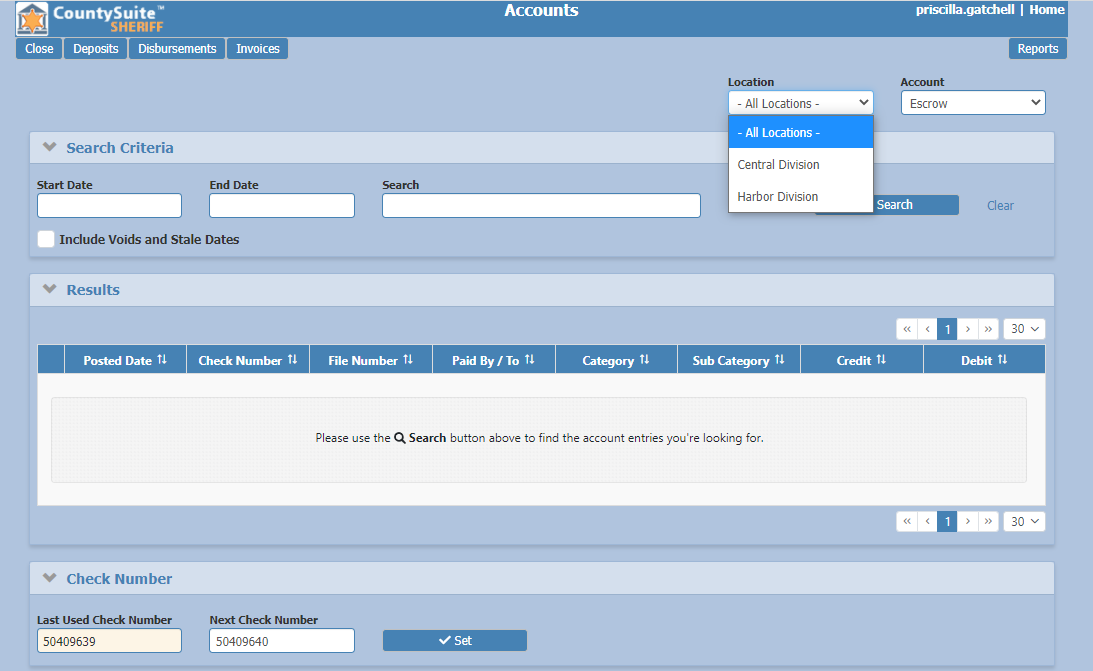
Search Criteria
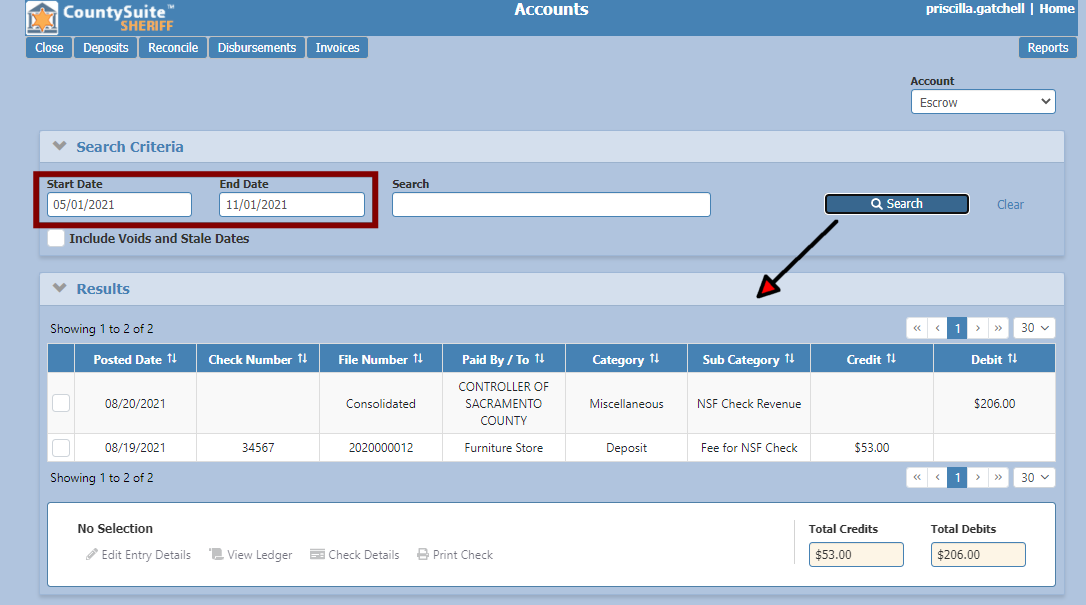
The user can search by date range on the Accounts page. Entering a date range will display all checks (received deposits, printed checks or checks queued for printing) that match the date range.
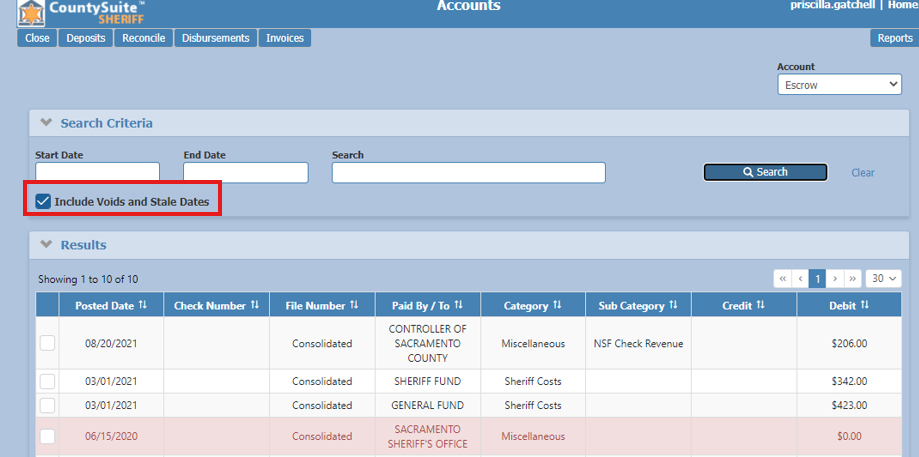
Voided or Stale Dated Checks will also appear in the search results if the check box for “Include Voids and Stale Dates” is marked.
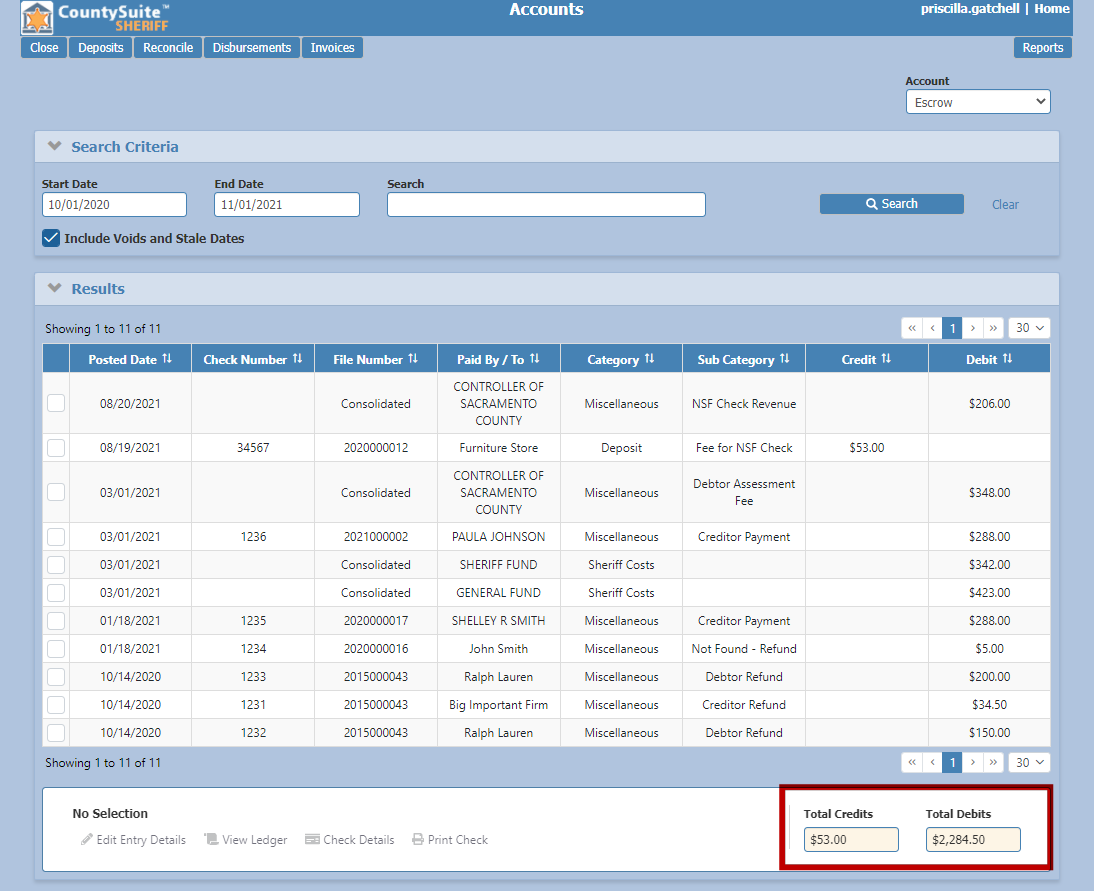
The Accounts page can be used to view all money entered (deposits) and money issued out (via printing checks) for any date range. A total of Credits and Debits will show at the bottom of the Results grid.
The user can also use the Search bar to find any check (printed or queued for printing) based on the following criteria:
- Check Number
- Case Number
- Paid By / To Name
- Category
- Sub-Category
- Amount (Credit or Debit)
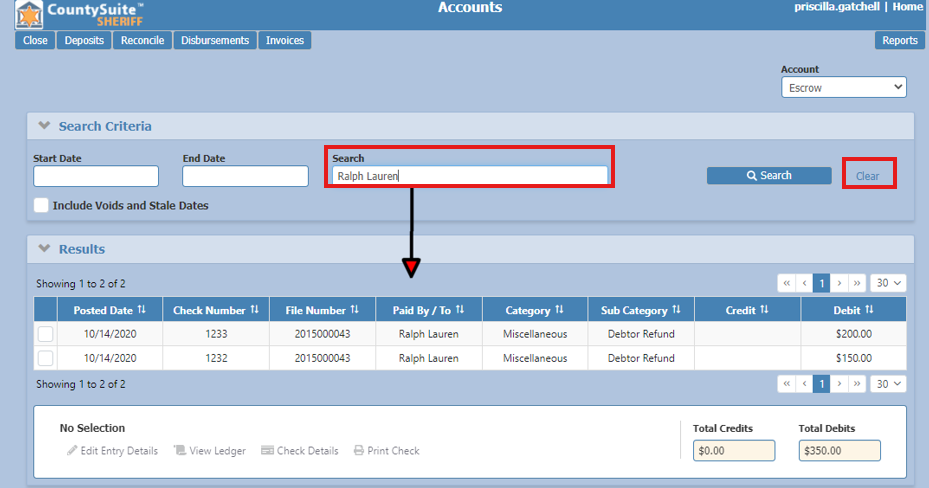
The user can use the Clear button at any time to clear their search results and start over.
Edit Entry Details
The user can Edit Entry Details when a specific line item is selected or by double clicking on the row.
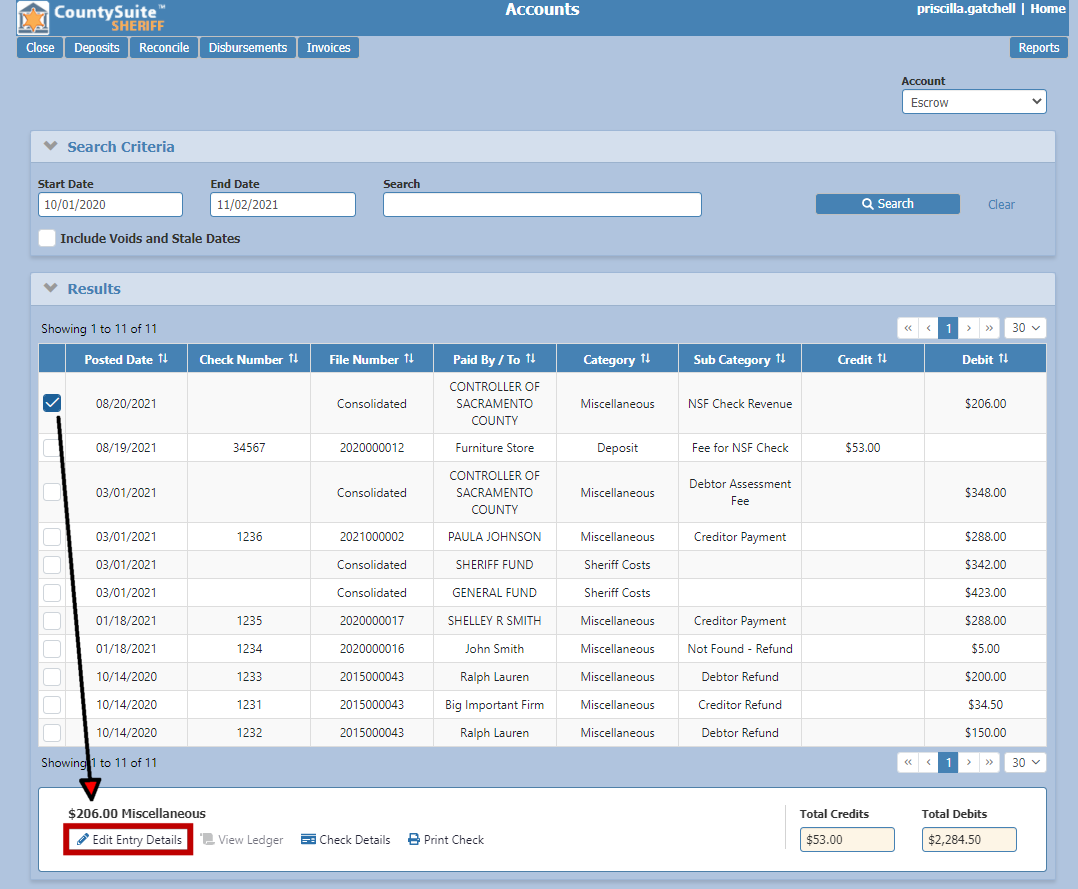
Selecting the Edit Entry Details link will open a pop-up window containing additional information on the line item and allow the user to make edits.
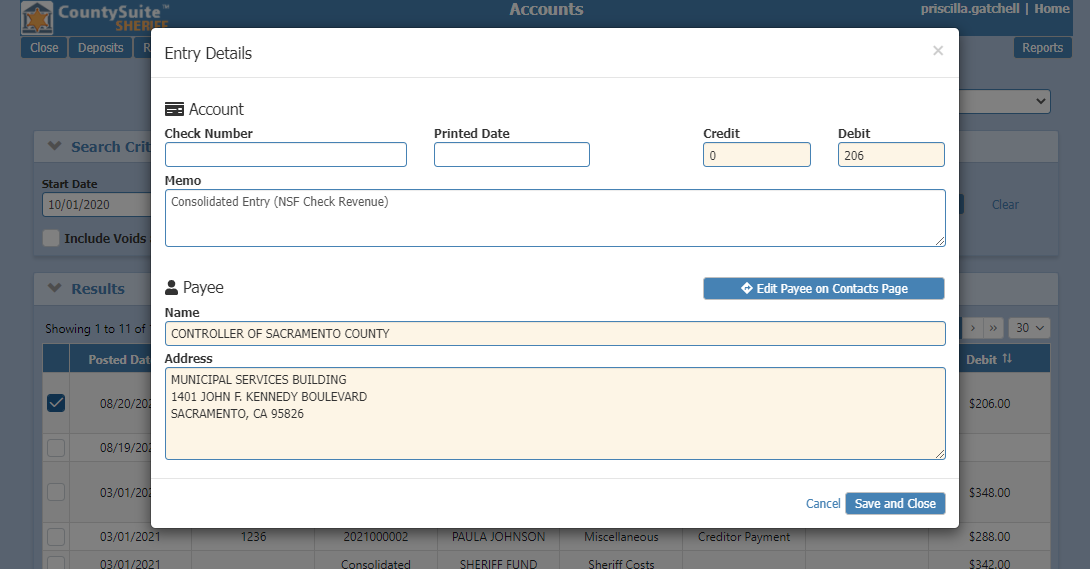
From this window the user can do the following for a check that is not yet printed:
- Manually add a check number (usually used for entering a wire transfer or journal entry # for checks not printed from the system).
- Manually add a check printed date.
- Add/Edit the memo line.
- Access the Contacts Page to add, edit or change a payee’s name and/or address.
The user can leave the edit window at any time by clicking Cancel or save their changes by clicking Save and Close.
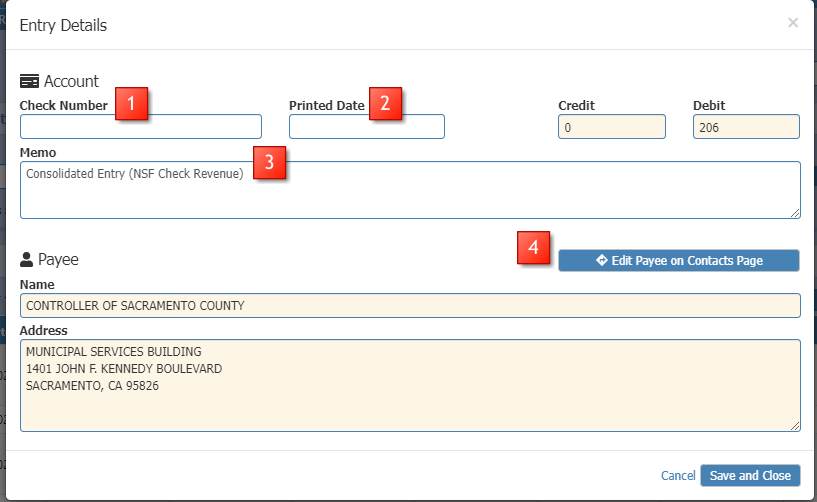
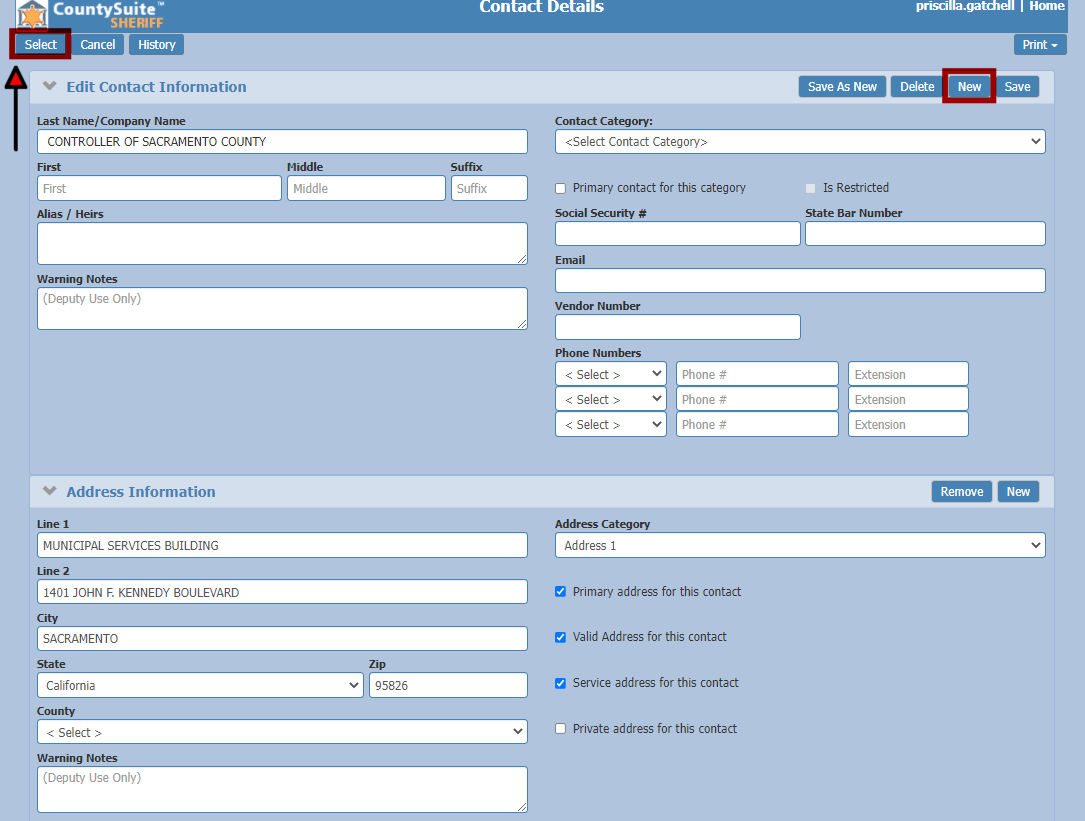
When the user clicks the Edit Payee on Contacts Page button, they are taken to the Contact Details page with the Payee’s contact record displayed.
The user can make changes to the existing contact or use the New button to add a new contact to be selected as the payee for the check selected.
When all changes are complete, the user can click the Select button to return to the Accounts Page.
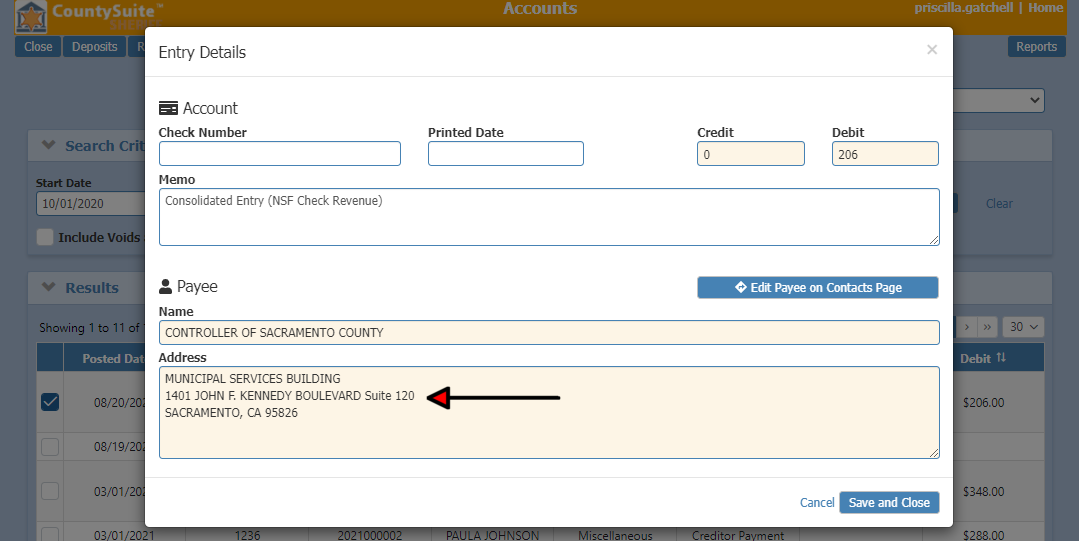
In this example the address was updated to include Suite 120.
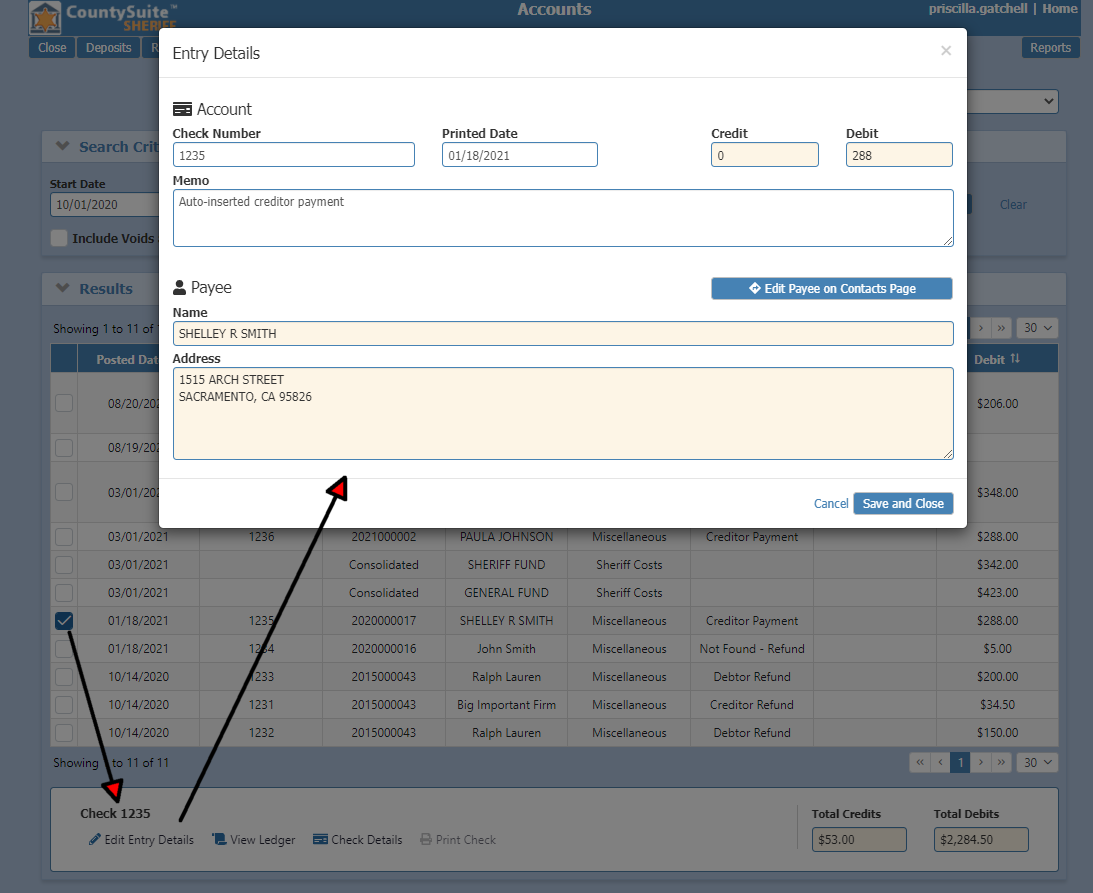
The user has the same options for editing a printed check:
- Edit an existing check number.
- Edit the check printed date.
- Add/Edit the memo line.
- Access the Contacts Page to add, edit or change a payee name and/or address.
Check Printing
Users can print individual checks from the Accounts Page. The Disbursements page is the best option for batch printing multiple checks.
The Print Check option will be available once a line item is selected that does not already have a check number associated with it.
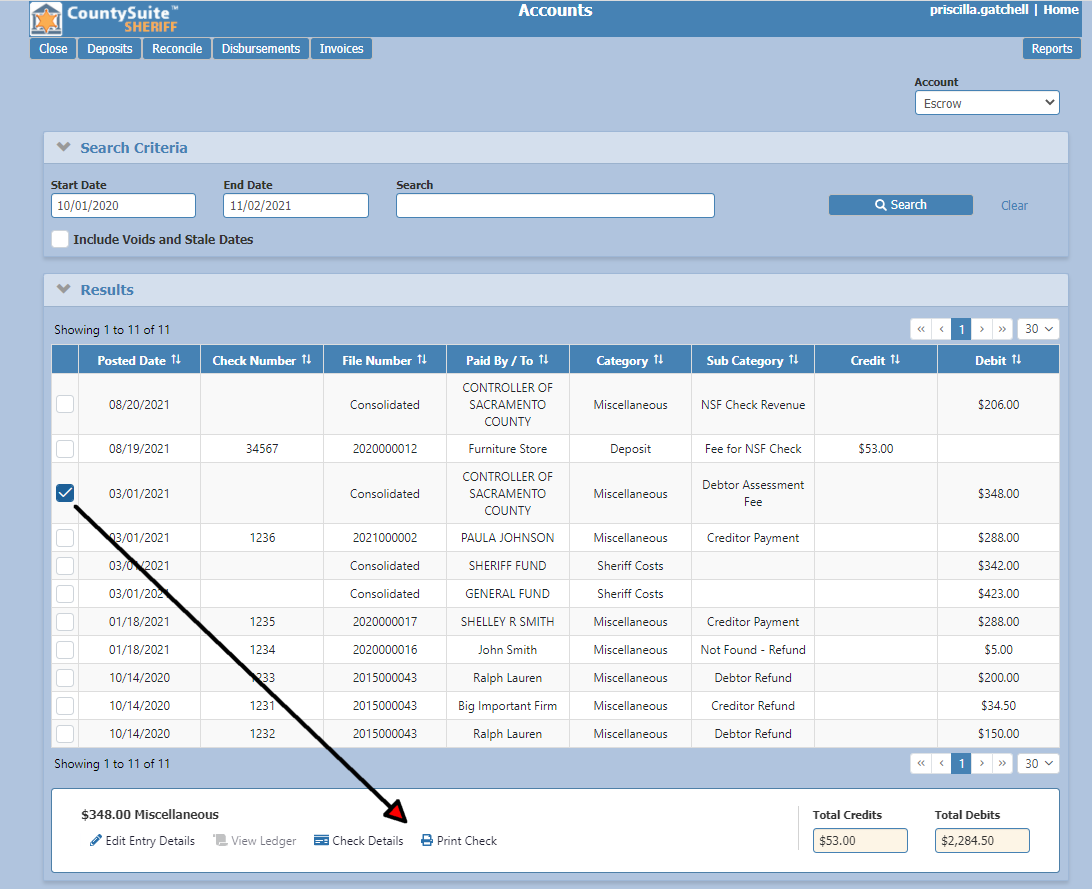
The next check number is always visible, so the user knows what check to pull from the safe for printing.
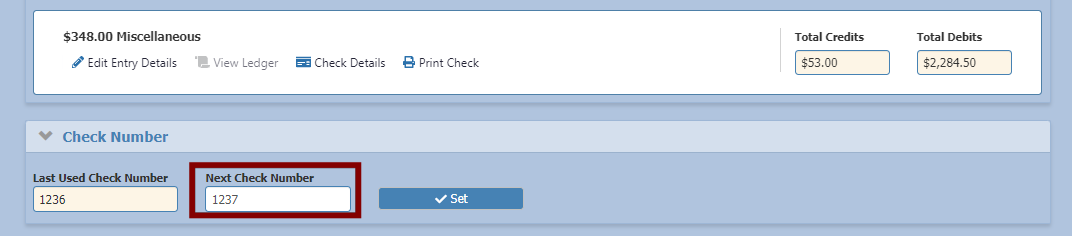
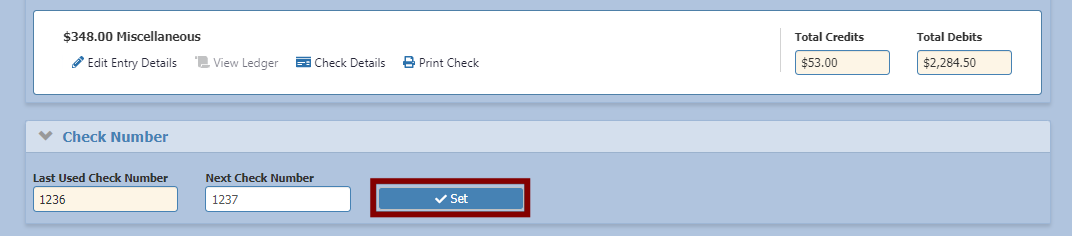
If the check number needs to be changed, users with the necessary permissions can change the check number and click the Set button to save the changes.
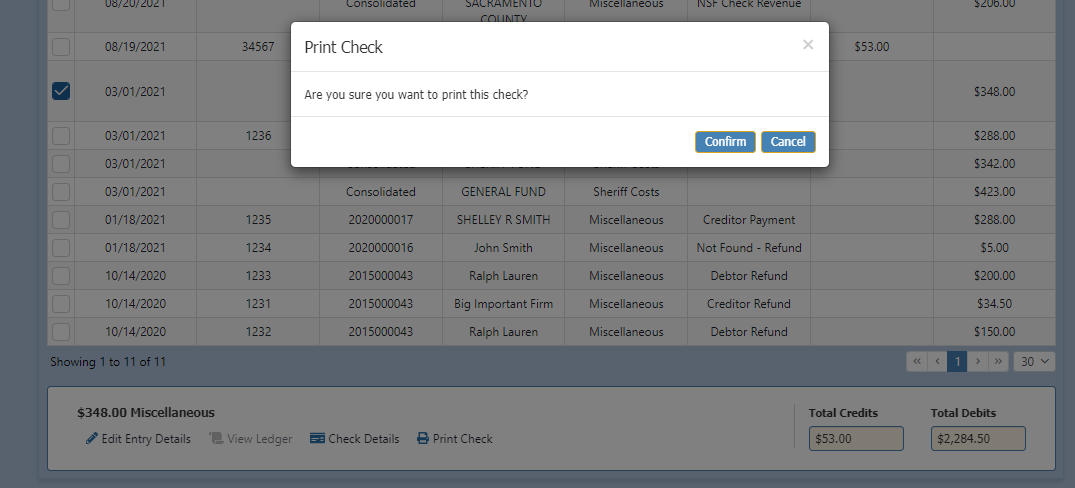
When the user selects the Print Check option, a warning will pop-up to ensure the user is ready to print the check and did not select this option by mistake.
The check PDF will populate as a separate tab when the user clicks the Confirm button.

In addition, when the user selects Confirm, the check number will be inserted and the next check number will be advanced automatically.
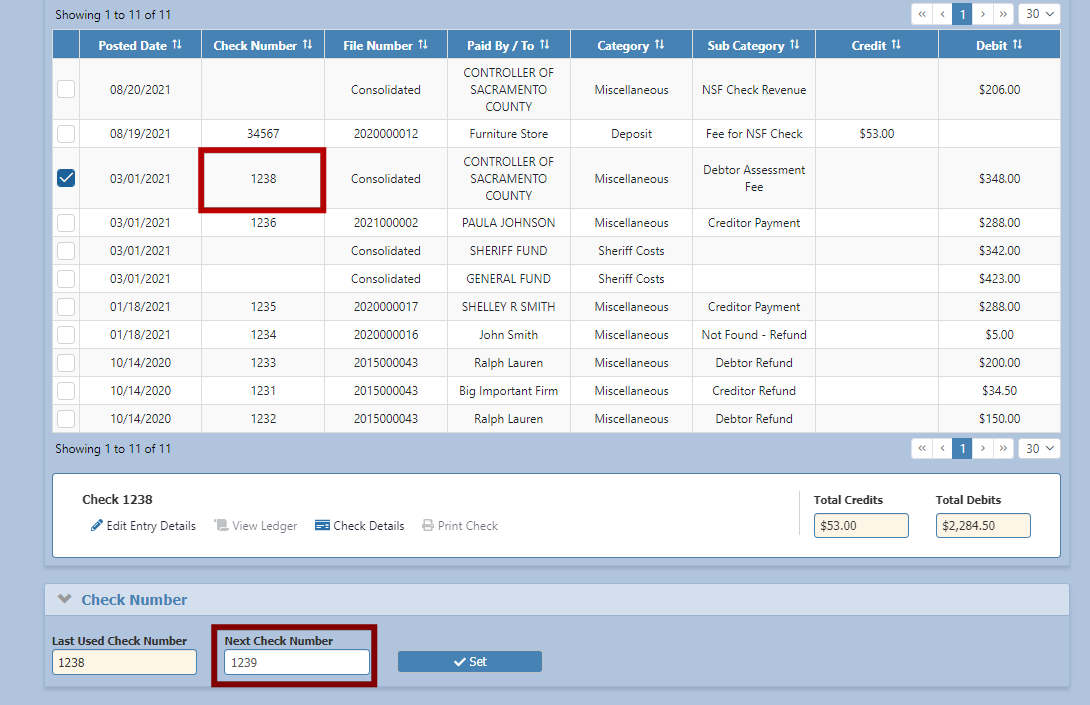
Once the check is printed, the Print Check option is no longer available.

Check Details
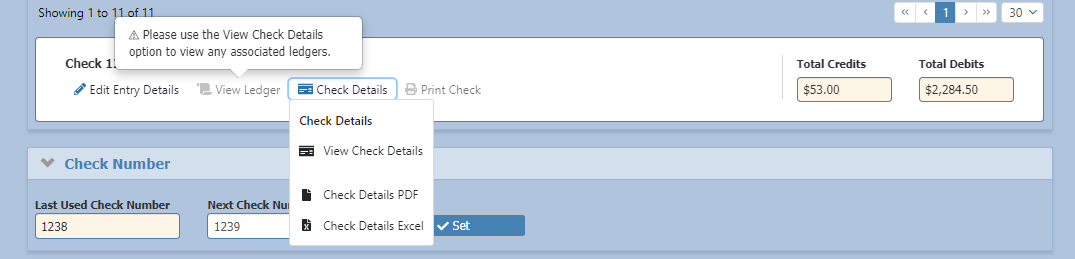
The Check Details option for any printed check allows the user to view check details as a PDF report, Excel document, or on the application page. Check Details are especially helpful for consolidated checks in order to see all the cases/files and money that made up the check amount that was printed.

Check Details Report Options:
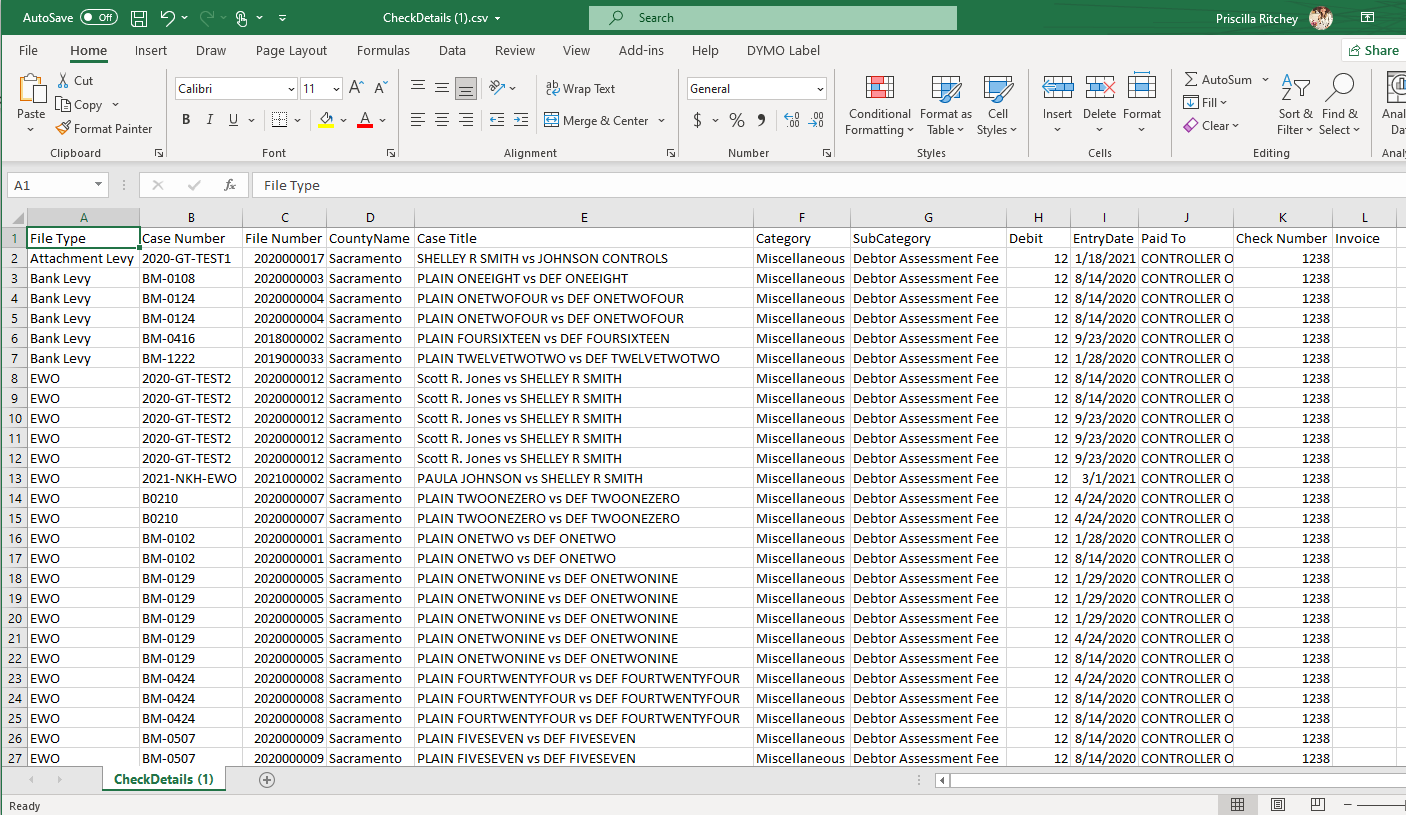
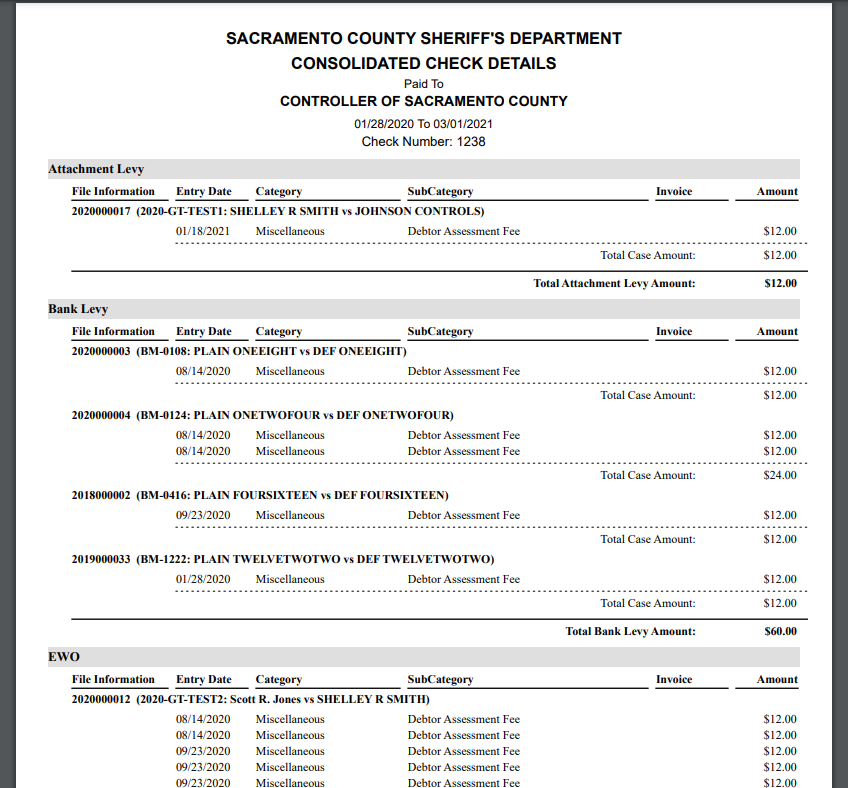
If the user has a consolidated check selected, the View Ledger option will not be available, and the Check Details page should be used to access the ledger for any file included in the consolidated check.
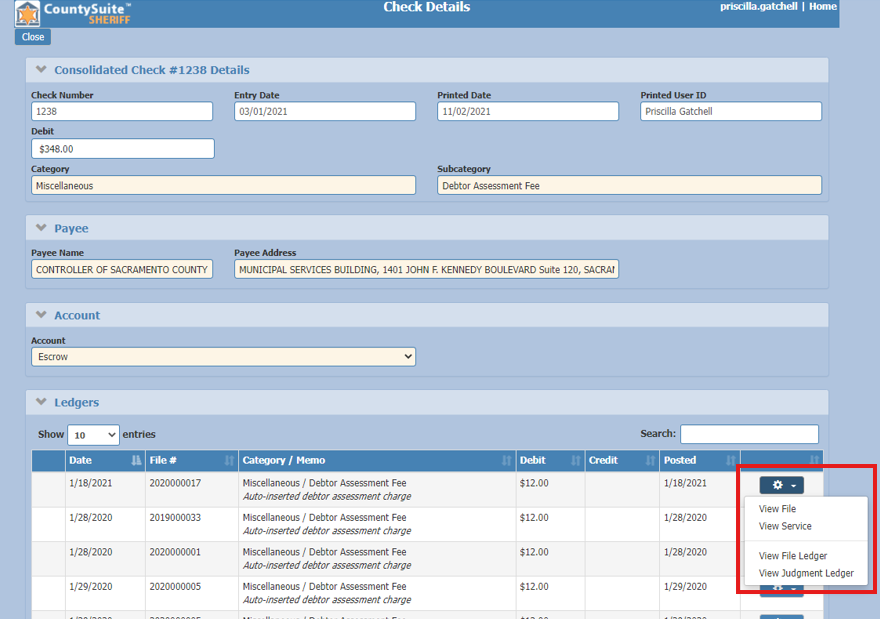
From the Check Details page the user can view all check, payee, and ledger details for the check selected. In the Ledgers section of the page, click the gear icon to the right of the line to go to the File Details, Service Details, or Ledger pages for the record.
Any voided entry will show the following icon and message when you hover over the entry.

Insert Void
The Insert Void button is available at the bottom of the Accounts Page.
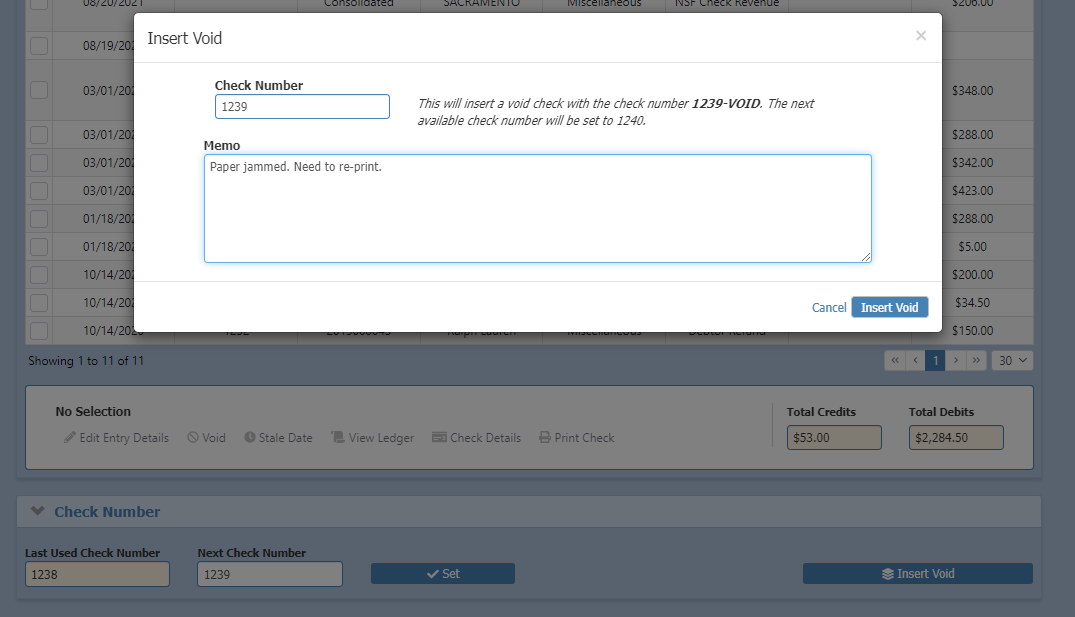
This feature can be used to change and track check numbers without printing a check. This can be useful when a check accidentally jams in the printer or checks are used for purposes outside of the Sheriff Civil Department.

By using the Insert Void button, the user can track what check number(s) were used and give a reason in the memo field.
The Insert Void pop-up window will default to use the next check number, but the user can change this check number if a range of check numbers are being used.
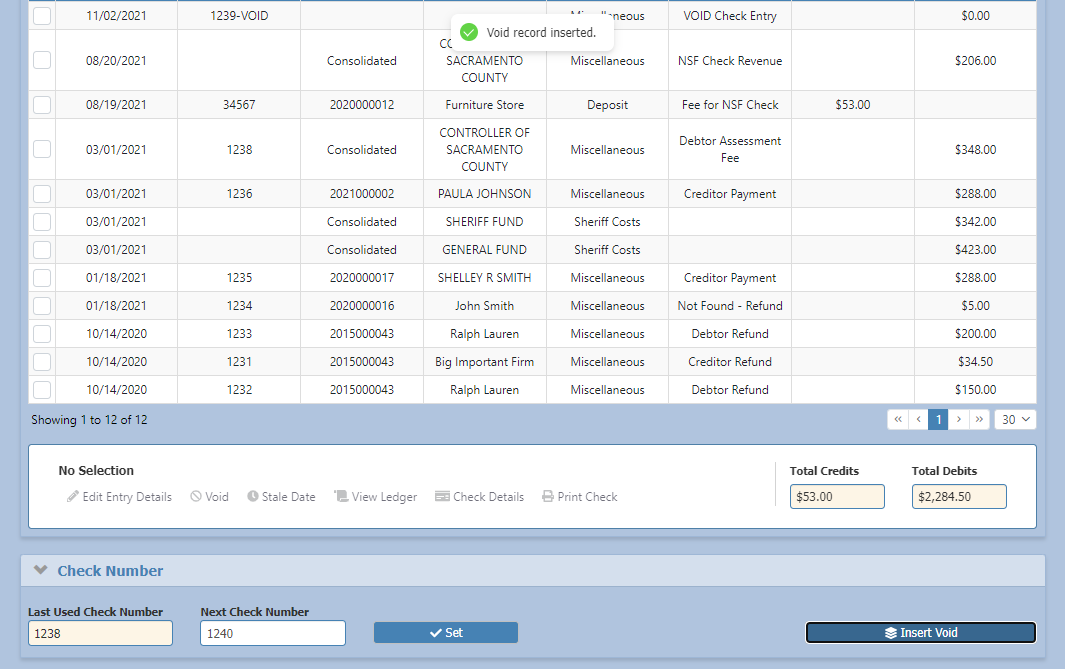
When the user clicks the Insert Void button, the next check number will automatically change and the user will receive a status message on the screen.
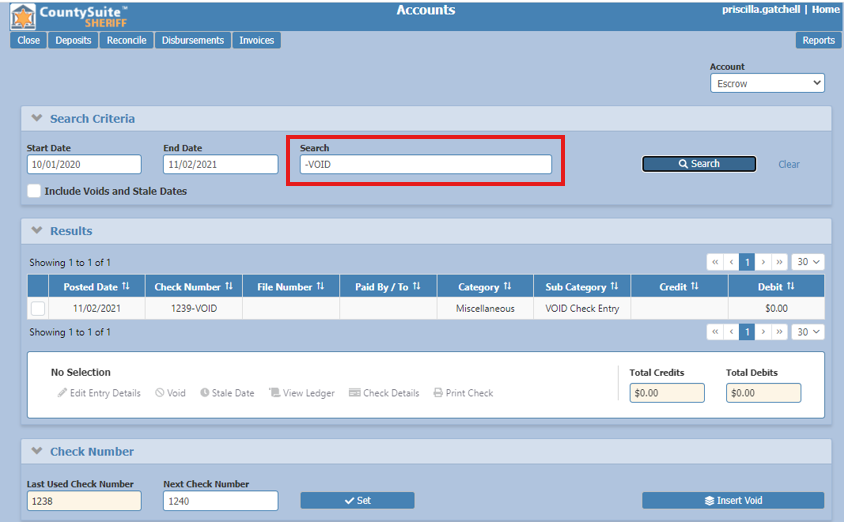
The user can search for an inserted void record using the Search bar by entering “-VOID” as the criteria.
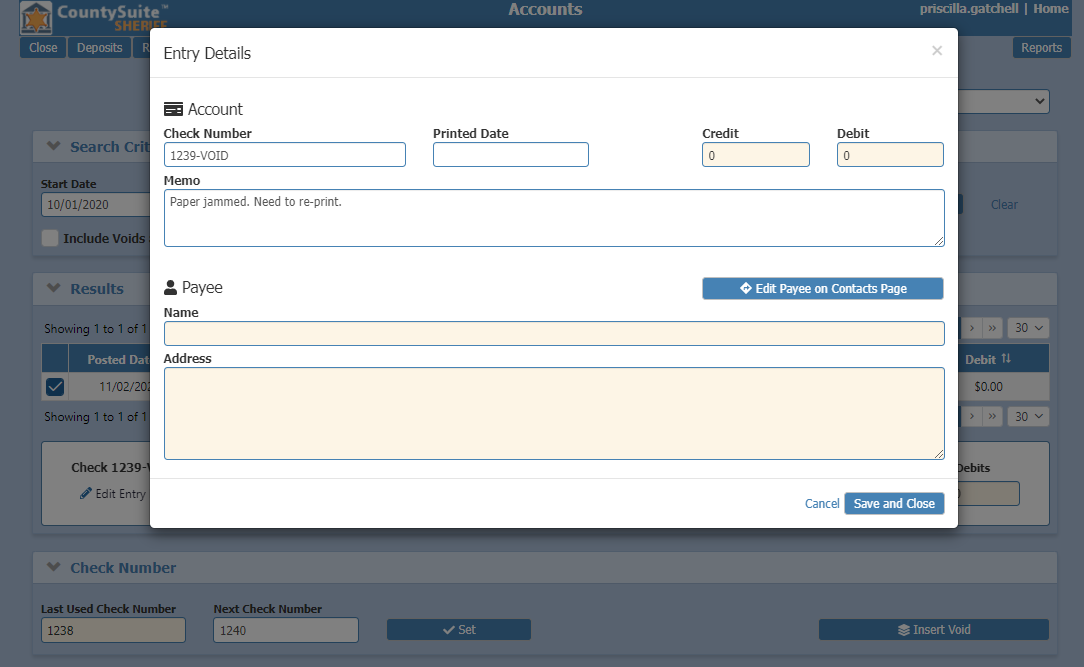
When the row is selected, the user can click the Edit Entry Details option to view and/or change the reason in the memo line.
Void
With the correct permissions, a user can void any check on the Accounts page, regardless of whether it has been printed.
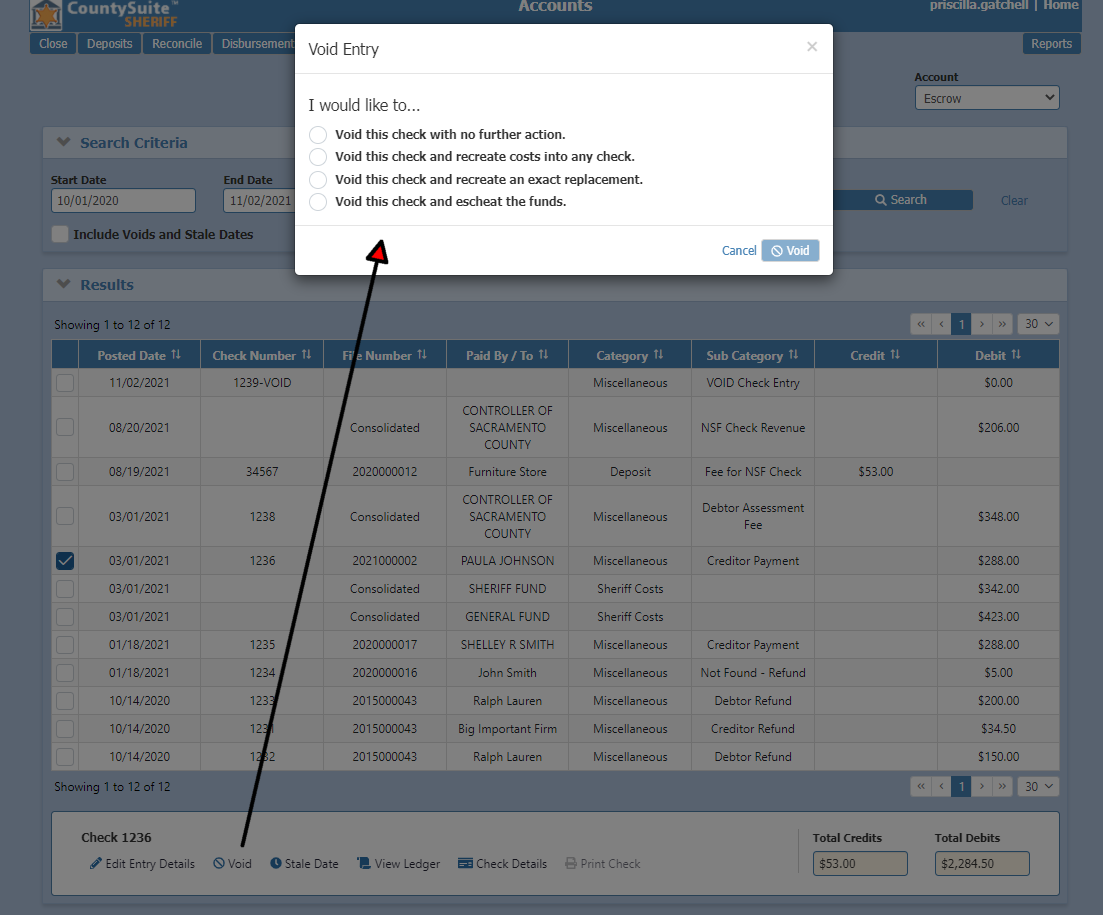
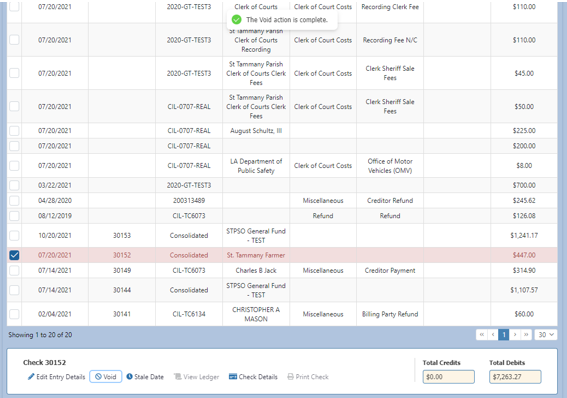
When the Void button is clicked, a success message will appear on the screen and the entry will show in red to indicate the item has been voided.
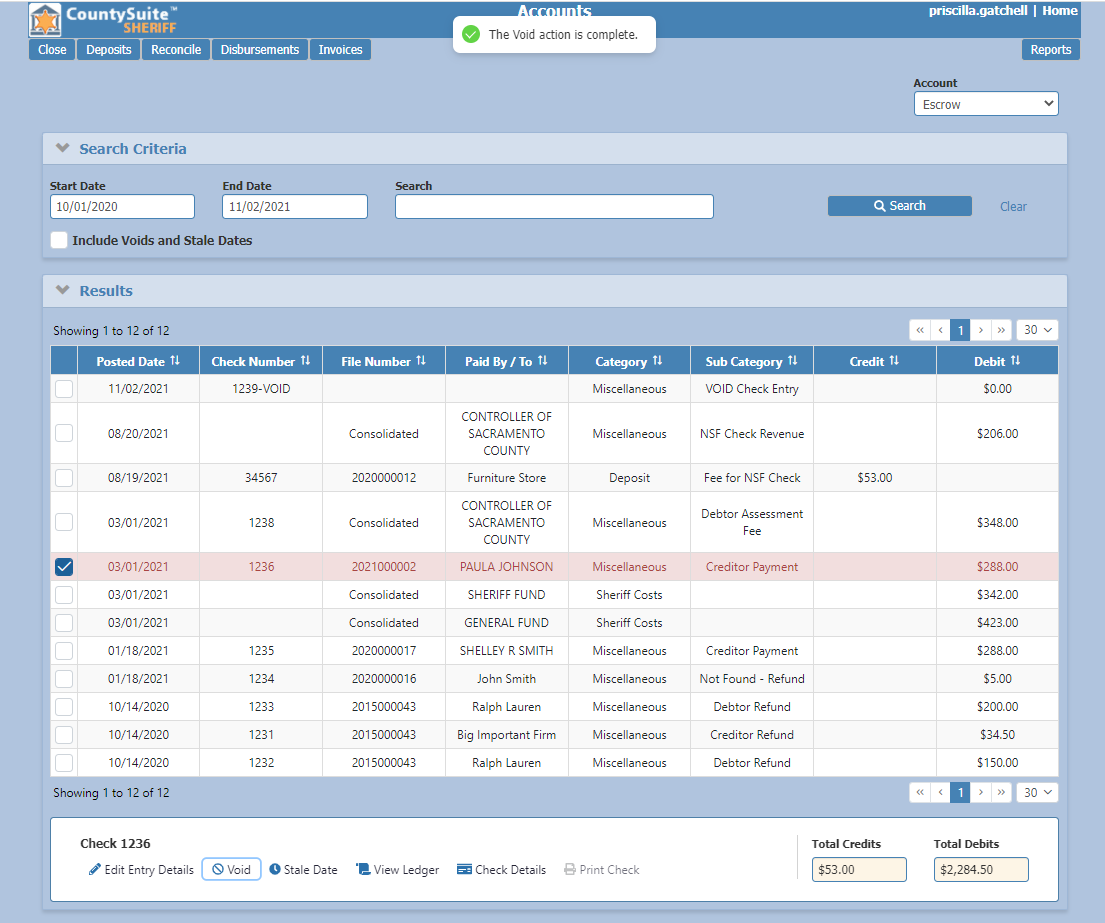
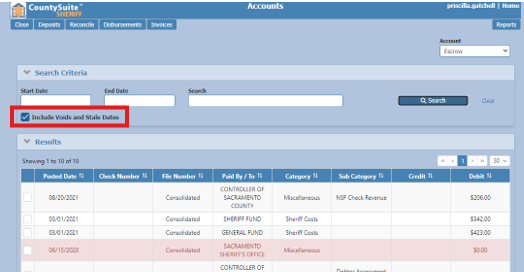
The user can select the “Include all Voids and Stale Dates” option on the Accounts page at any time to view all voided records that match their search criteria.
Voiding Consolidated Checks
Money entries can be configured to consolidate into a single check based on Category, Sub-Category or Payee. The best place to void a consolidated check is from the Accounts page because the check will show as one line entry and be easy to find. Voiding the check will automatically update all the file ledgers for the money amounts that made up that consolidated check entry that was voided.
In the below example there is a consolidated check for St. Tammany Farmer for $447.00.
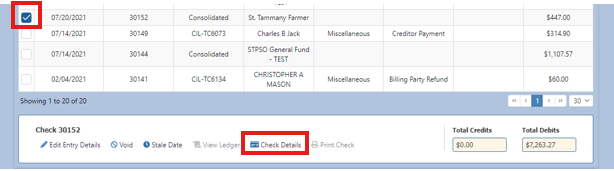
Select the line item and click Check Details to view the entries that make up the consolidated check. In this example, the check is made up of entries from two different files.
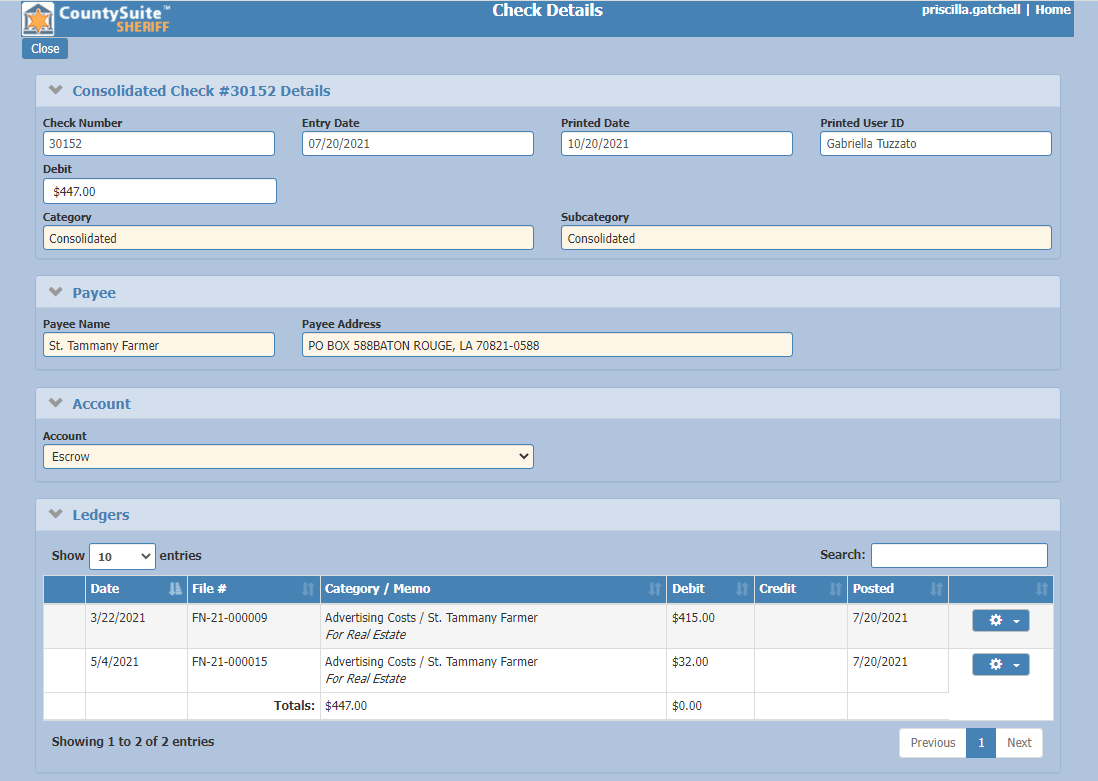
When the entry is voided, both files will be affected automatically.
Return to the Accounts page to select the Consolidated check line item and click Void.
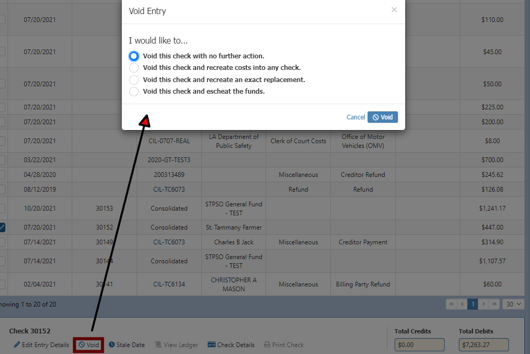
When the Void button is clicked, a success message will appear on the screen and the entry will show in red to indicate the item has been voided.
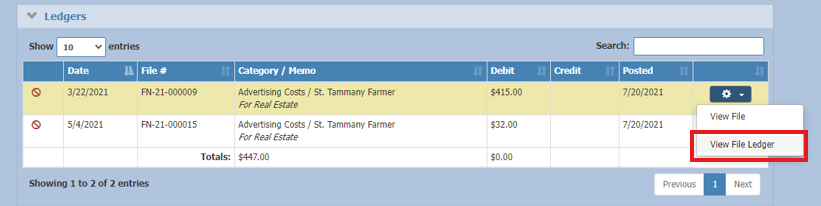
The easiest way to access the file ledgers affected by this void is to use the Check Details page by clicking the link at the bottom of the accounts page. Then select View File Ledger for each entry within the consolidated check.
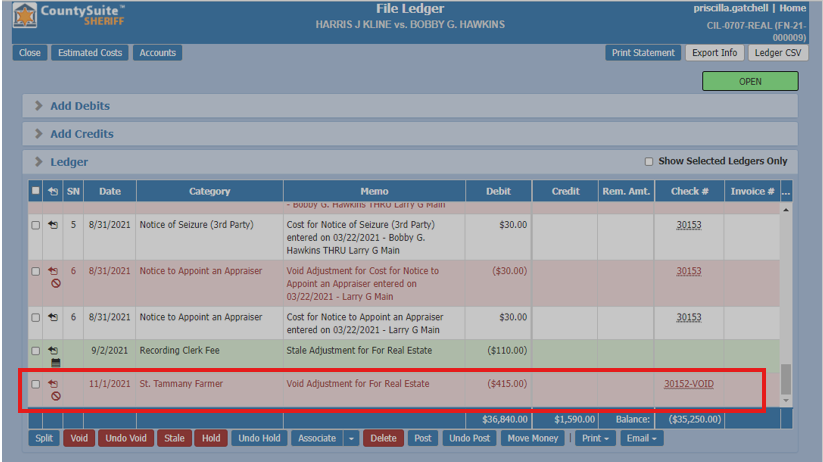
Voiding Consolidated Revenue Checks
Revenue is usually configured to consolidate into a weekly, monthly or quarterly check. It is very important to understand the void process when voiding a consolidated revenue check. If the whole check has been printed in error to the wrong payee, then the best place to void the consolidated check is from the Accounts page using the process outlined in the previous section.
However, if only certain entries were consolidated into a printed revenue check in error then the best approach is to void those specific entries at the File Ledger level. This will insert a negative amount into the current revenue check to account for the money that was printed in error in the previous month.
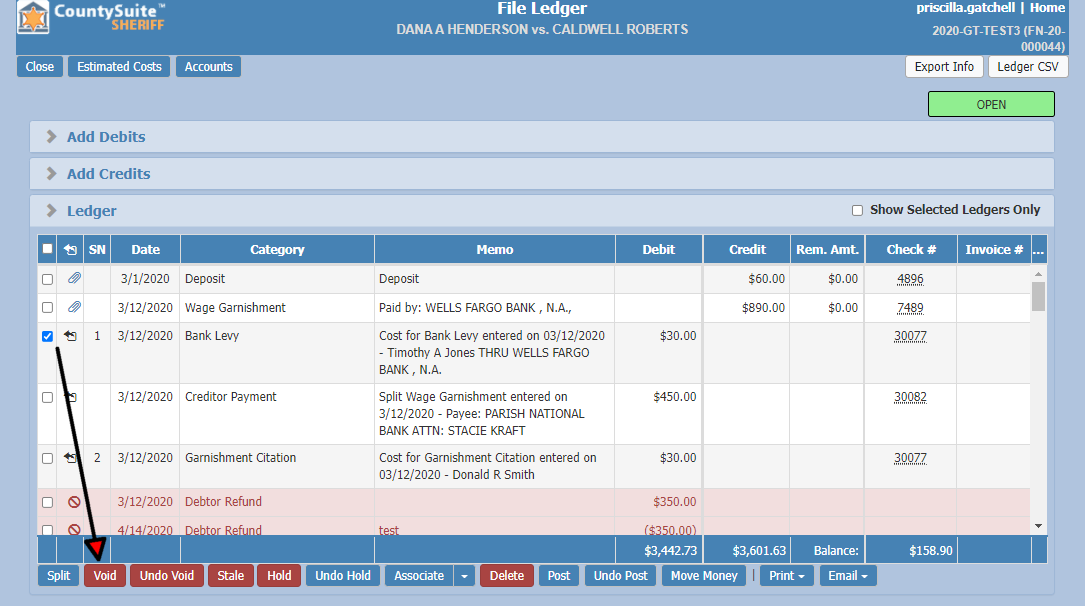
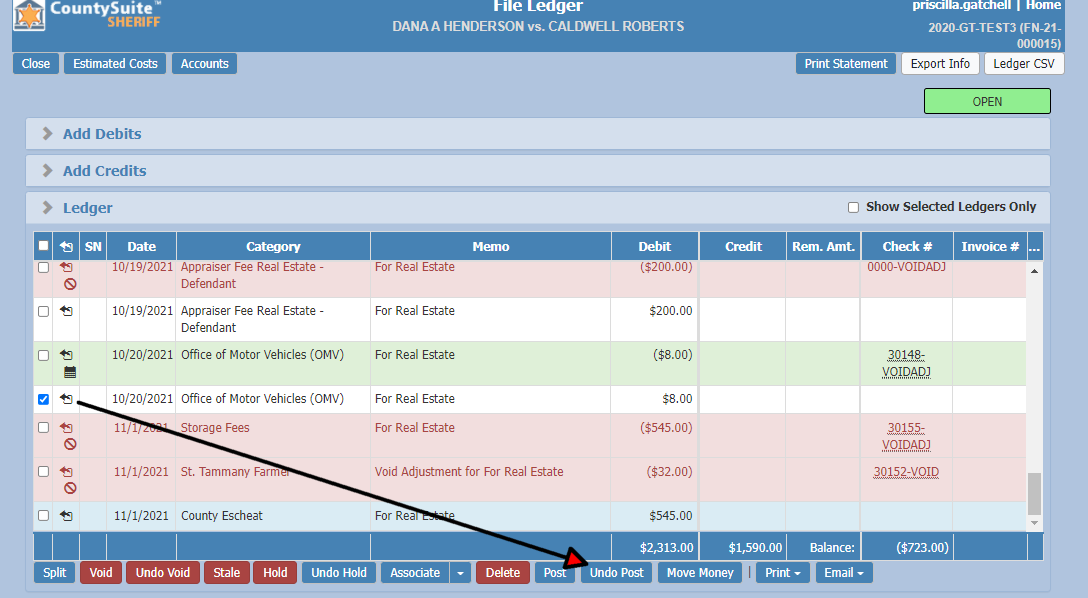
If entries were consolidated into a revenue check and discovered BEFORE the check is printed the best approach is to find those specific entries on the file ledger and use the undo post button.
Stale Date
The same functionality exists for stale dating checks. The Stale Date button is available to any user with the correct permissions. Users can stale date any check on the Accounts page, regardless of whether or not it has been printed. (NOTE: The user may also Stale Date checks from the File Ledger. See the Stale Date How-To Document for instructions on that method.)
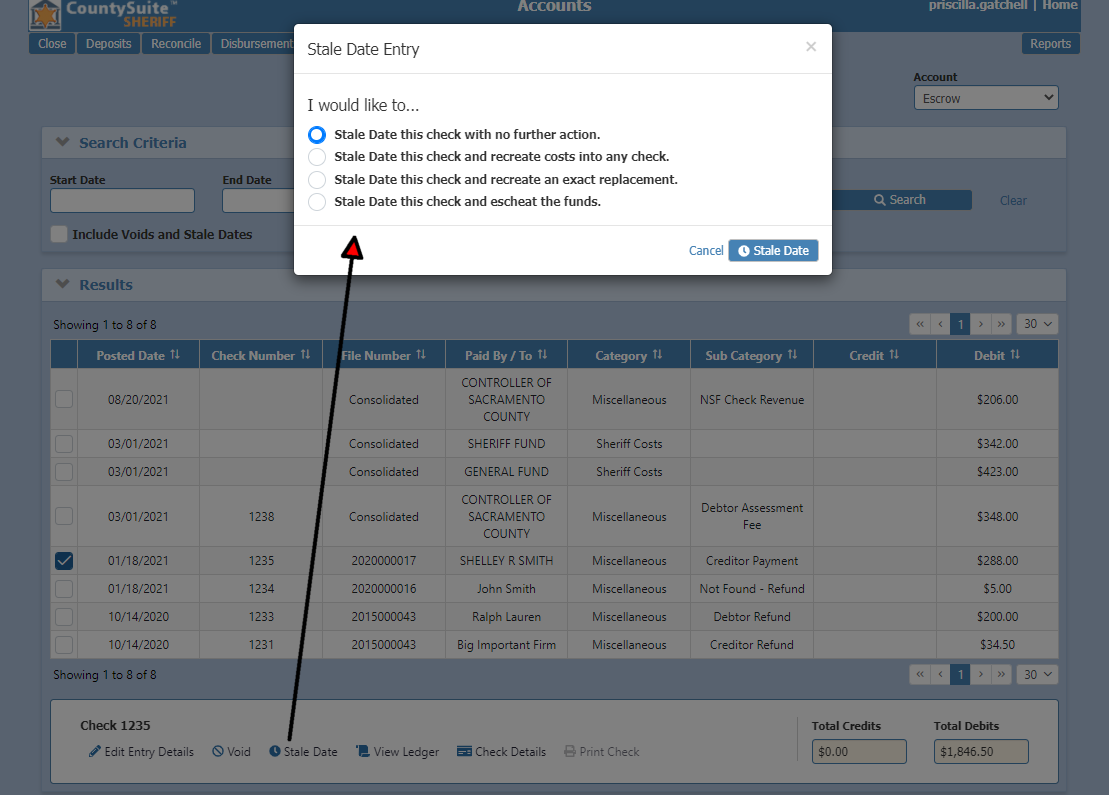
Stale Dating checks is only applicable to checks that have been printed. The Stale Date button will not be available for credits and unprinted checks.
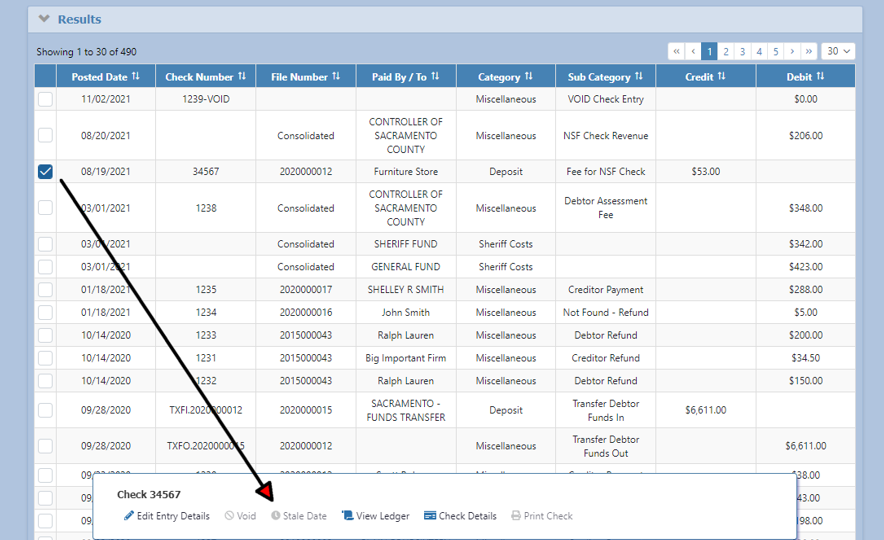
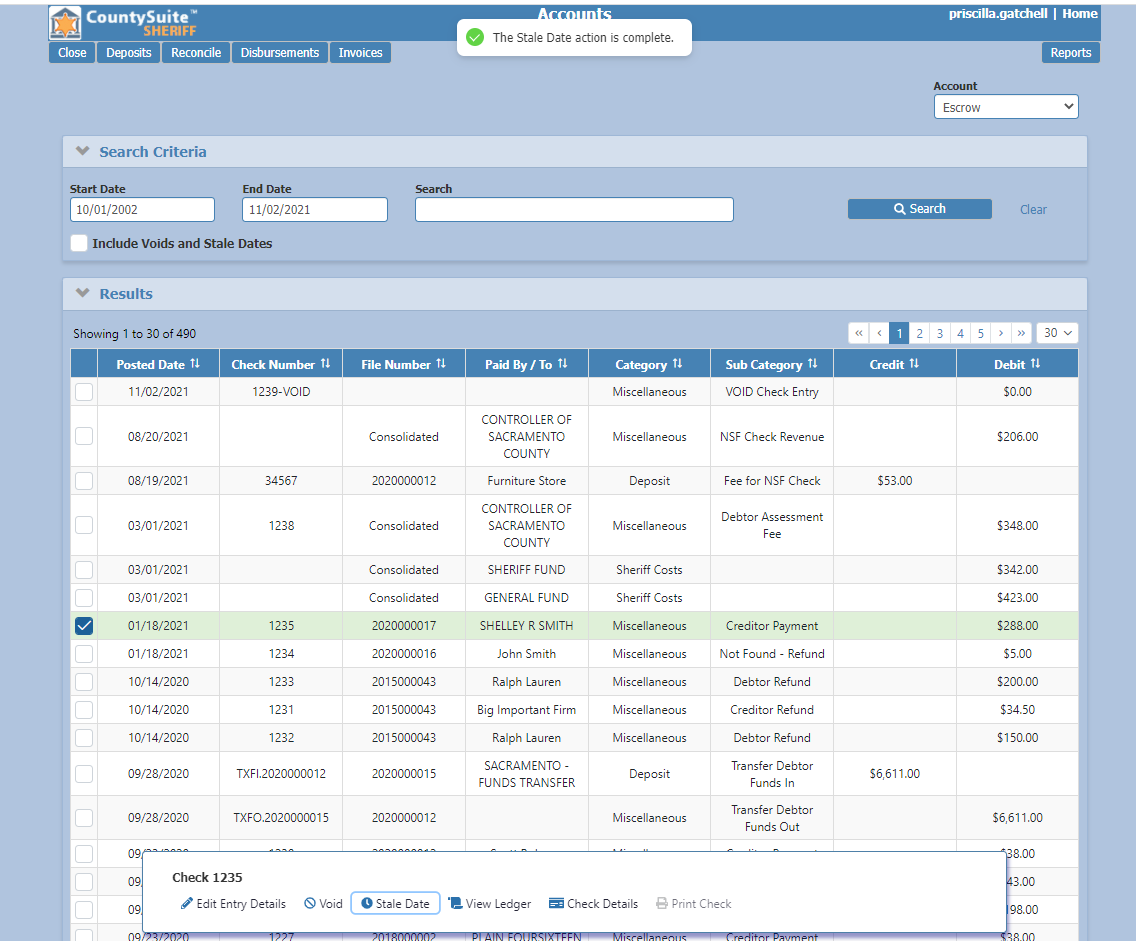
When an entry is stale dated, the user will receive a success message and the row will turn green to indicate the entry has been stale dated.