Click to Download the PDF File

“How To”
User Guide:
Disbursements
Access the Disbursements Page
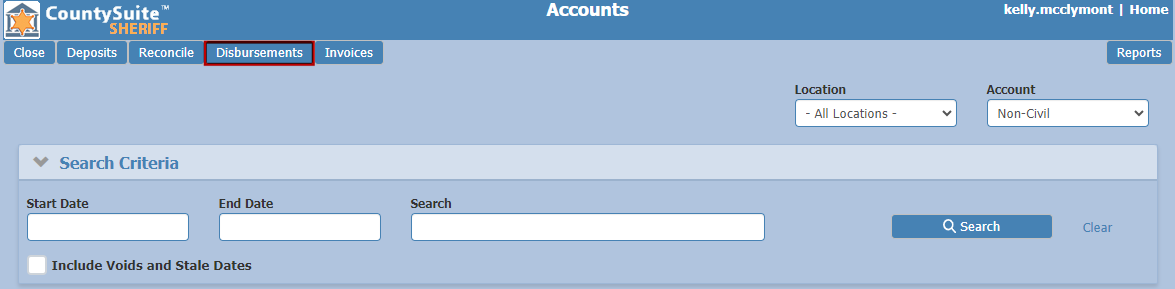
From the Home page, click the Accounts button (this is a permission-based page that is visible to users with accounting permissions).

From the Accounts page click the Disbursements button.
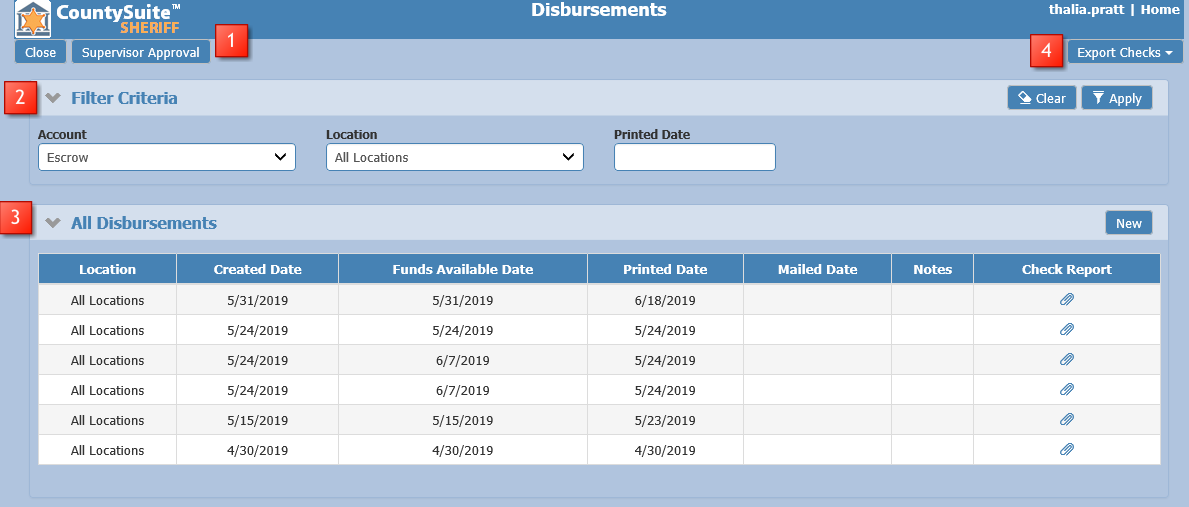
- Supervisor Approval – allows supervisors/managers to review all large checks that have been received in the Sheriff Office (this button is permission based).
- Filter Criteria – allows users to search for an existing check run by a specific location (if there is more than one office) or by printed date.
- All Disbursements – allows users to see all of the checks that were generated and if there is check run currently in progress.
- Export Checks – allows users to export a specific check run to a CSV file.
Create a Check Run
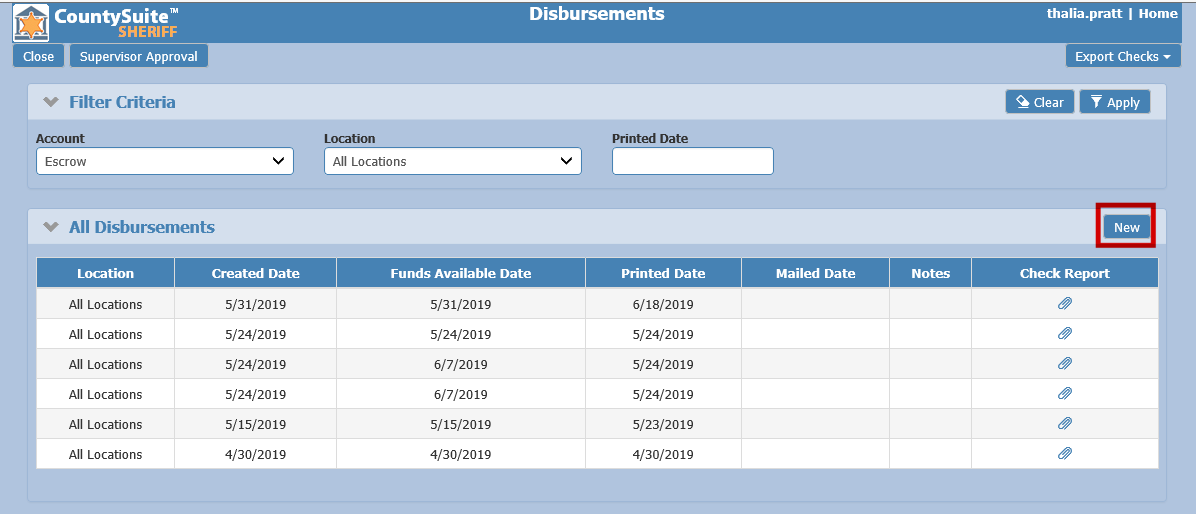
From the Disbursement Page, click the New button. Note: the New button will not be available if there is already a check run in progress.
A pop-up window will appear that allows the user to select the Funds Available Date, Account (should always be Escrow), and Location (if this office has more than one location). Click OK.
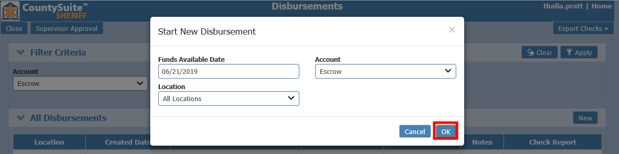
After clicking OK, the user will be directed to the Disbursement Details page.
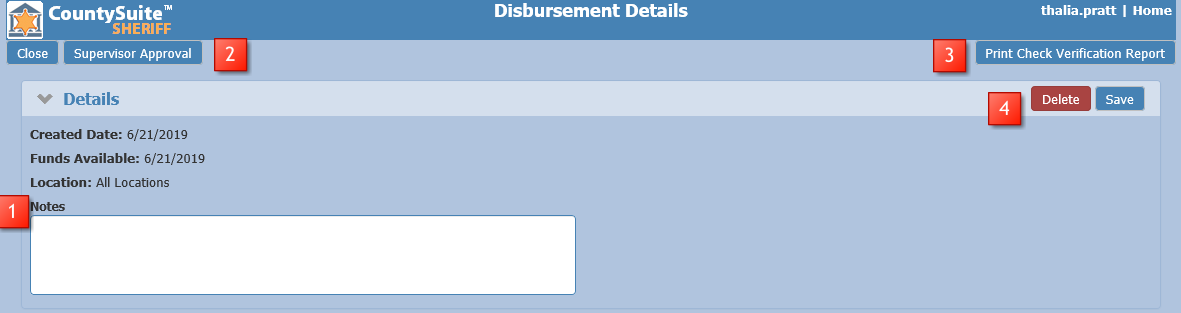
- Enter any Notes that should be communicated internally – optional.
- Supervisor Approval allows the supervisor/manager to review and approve any large checks that pulled into the current check run (this button is permission based).
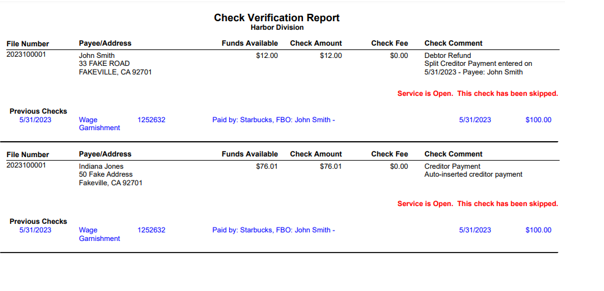
- Check Verification Report allows the user to print a report to verify all checks after they are created and have been displayed in the Pending Checks section.
- Users with the appropriate permissions have the ability to Delete and Save the check run.
- In the Pending Receivables section, click Load Pending Deposits to display all deposits that are available based on the Funds Available Date that was selected.

- By selecting the Show Blocked Receivables box, the user will be provided with a list of deposits that are not able to pull into a check run for various reasons.
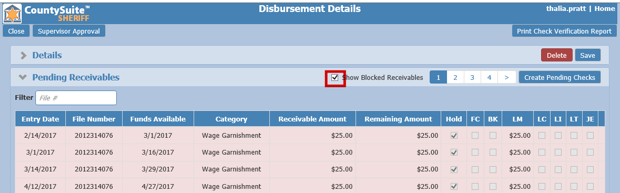
- To determine the specific reason a deposit is blocked from pulling into the Pending Checks section, hover over the columns where there is a checkmark.
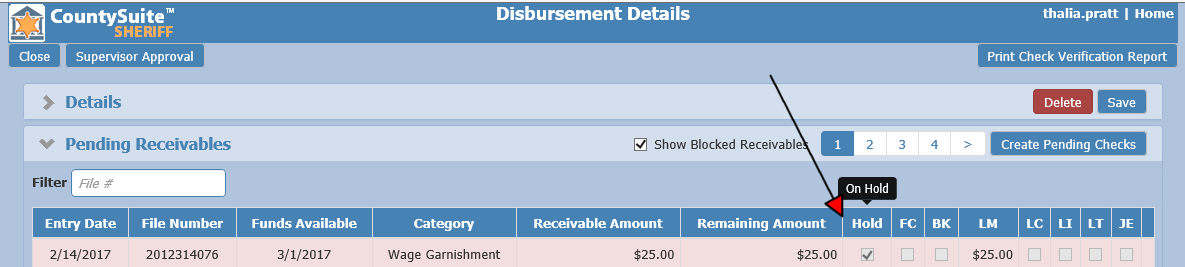
- The Filter field allows the user to search for a specific file # in the list of checks, by typing either the full file # or the shortened version (for example, 19-64 instead of 2019390764).
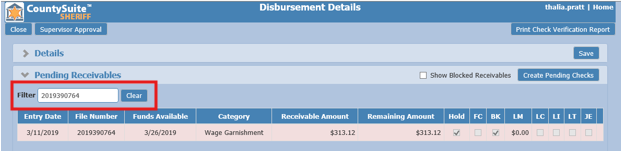
- By selecting the Show Blocked Receivables box, the user will be provided with a list of deposits that are not able to pull into a check run for various reasons.
- Click Create Pending Checks to start the check printing process.
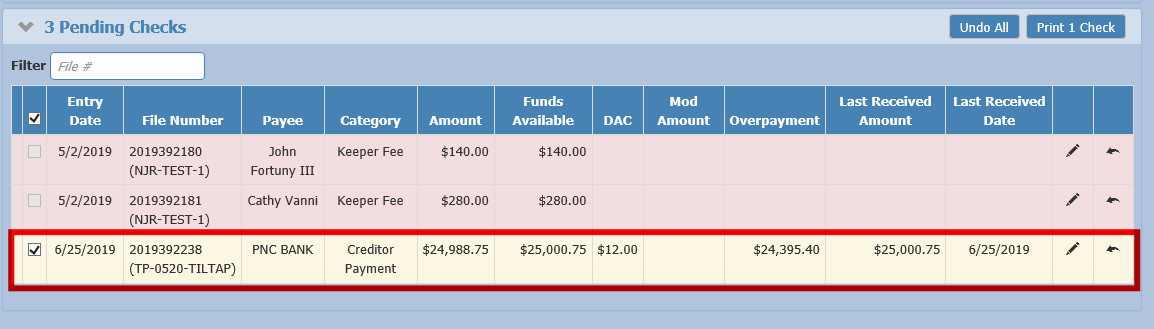
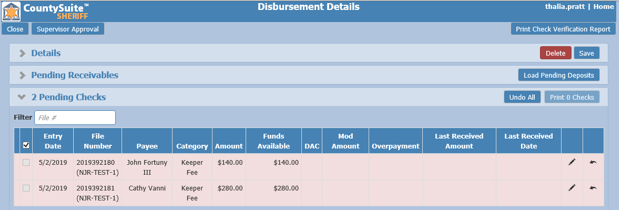
- A list of all available checks will show in the Pending Checks grid and the total number of checks will show in the header.
- The Print Checks button shows the user the number of checks that have been verified and are ready to be printed.
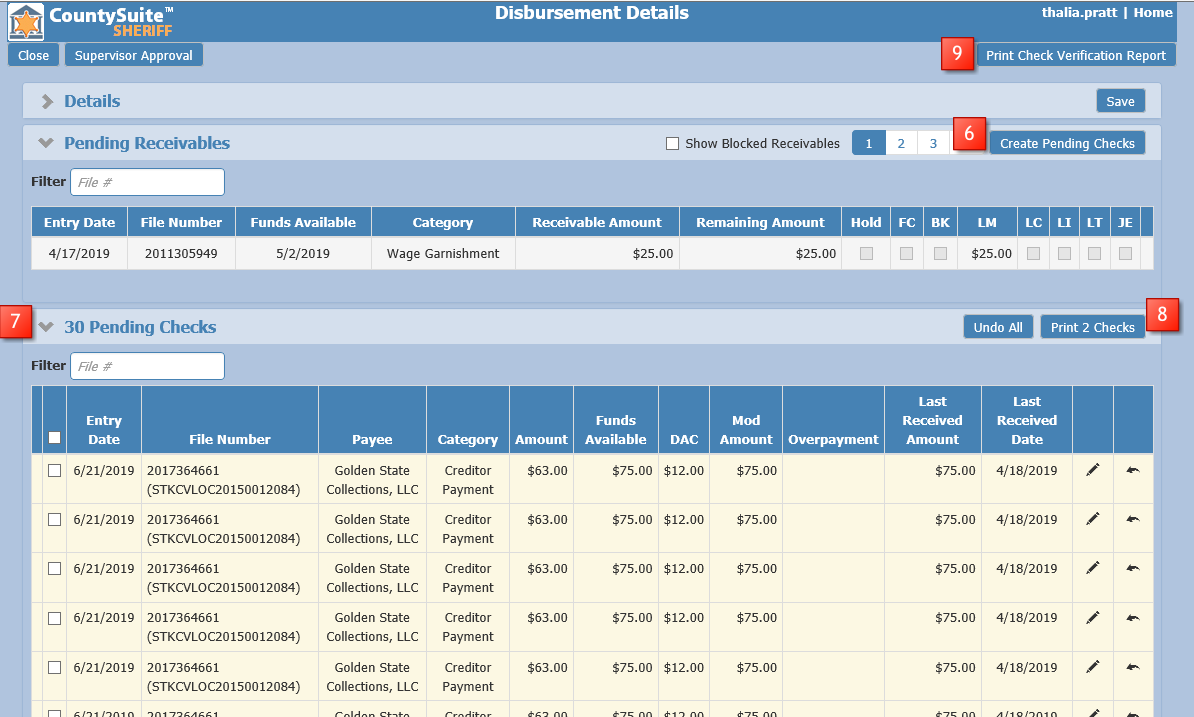
- Click Print Check Verification Report. This report will assist the user with verifying all deposits that are being displayed and provide alerts regarding what should be checked.
Remove Checks from a Check Run
The user has three options to remove a check.
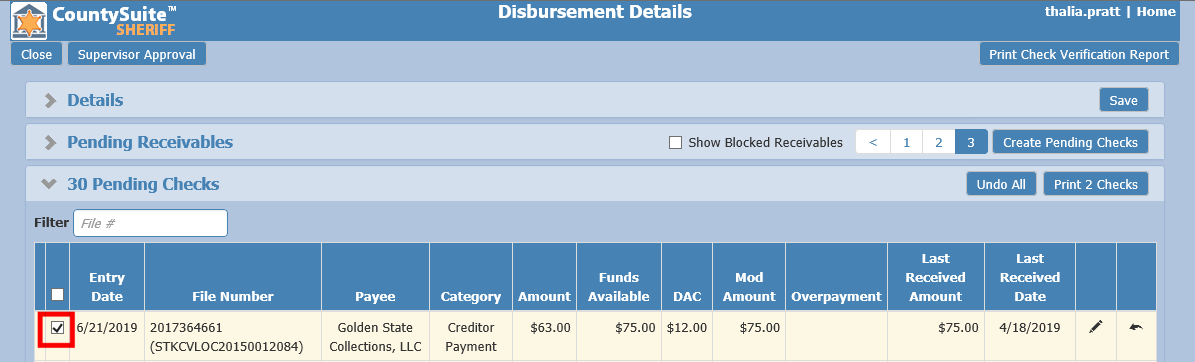
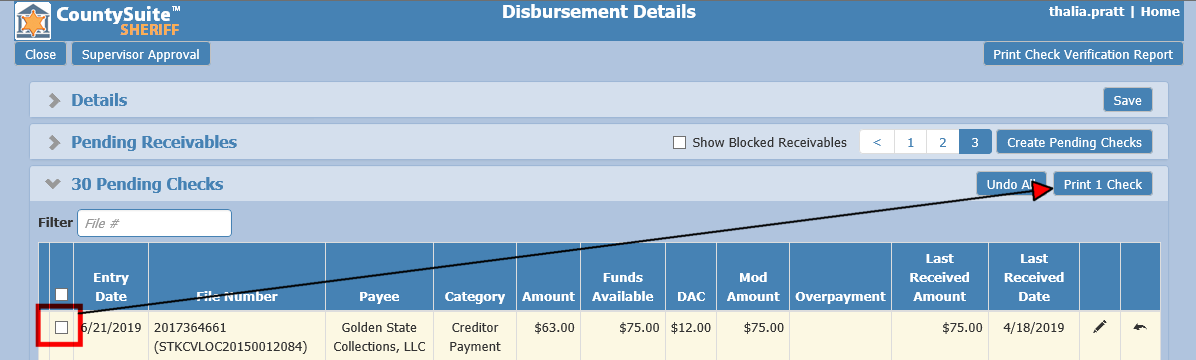
- Uncheck the box next to the entry. This will update the Print Check count.
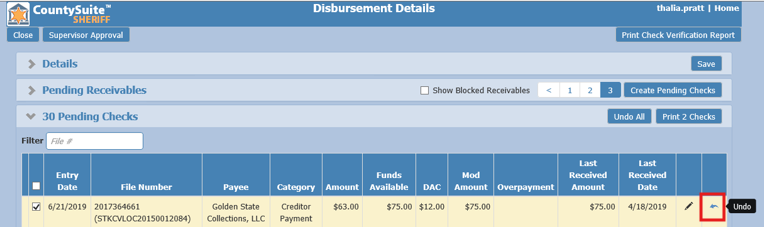
- Click the undo arrow on the far right-hand side to completely remove the entry from the Pending Checks grid and move it back up to Pending Receivables.
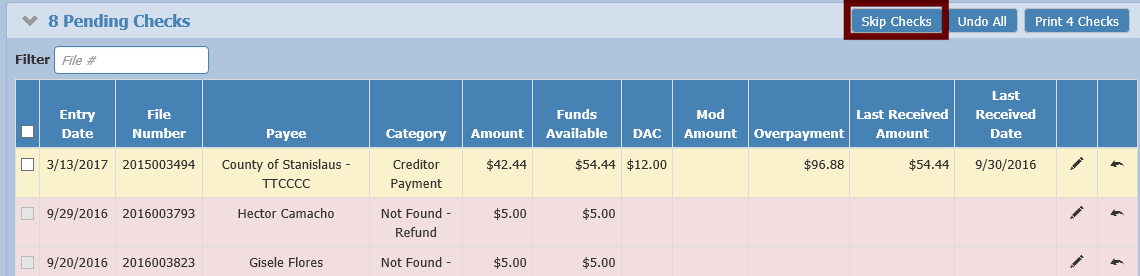
- Use the Skip Checks button to enter a specific file number or a range of file numbers to skip.
- A pop-up will allow the user to enter a To and From file number range of checks to skip.
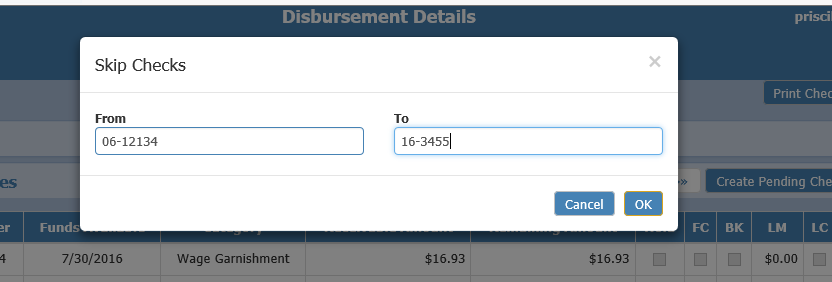
- If only the From field is filled in, that file # and any files after it will be skipped.
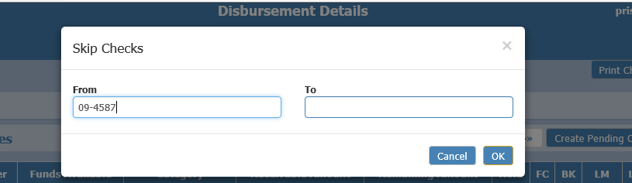
- Any file can be added back into the check run by checking the box located to the left of the line item.
- A pop-up will allow the user to enter a To and From file number range of checks to skip.
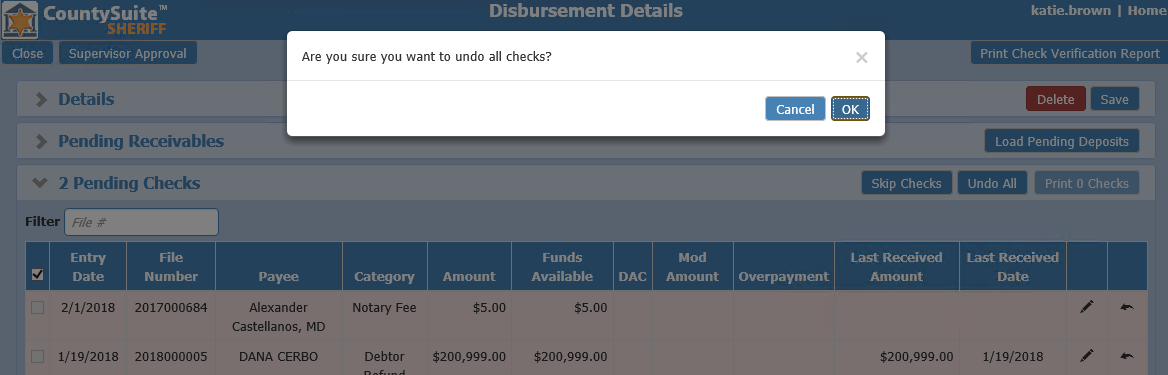
- If there is an issue with the whole check run, the Undo All button will return all Pending Checks to Pending Receivables status in the grid above. A warning will always appear to verify the user wants to undo all checks.
Status of Checks
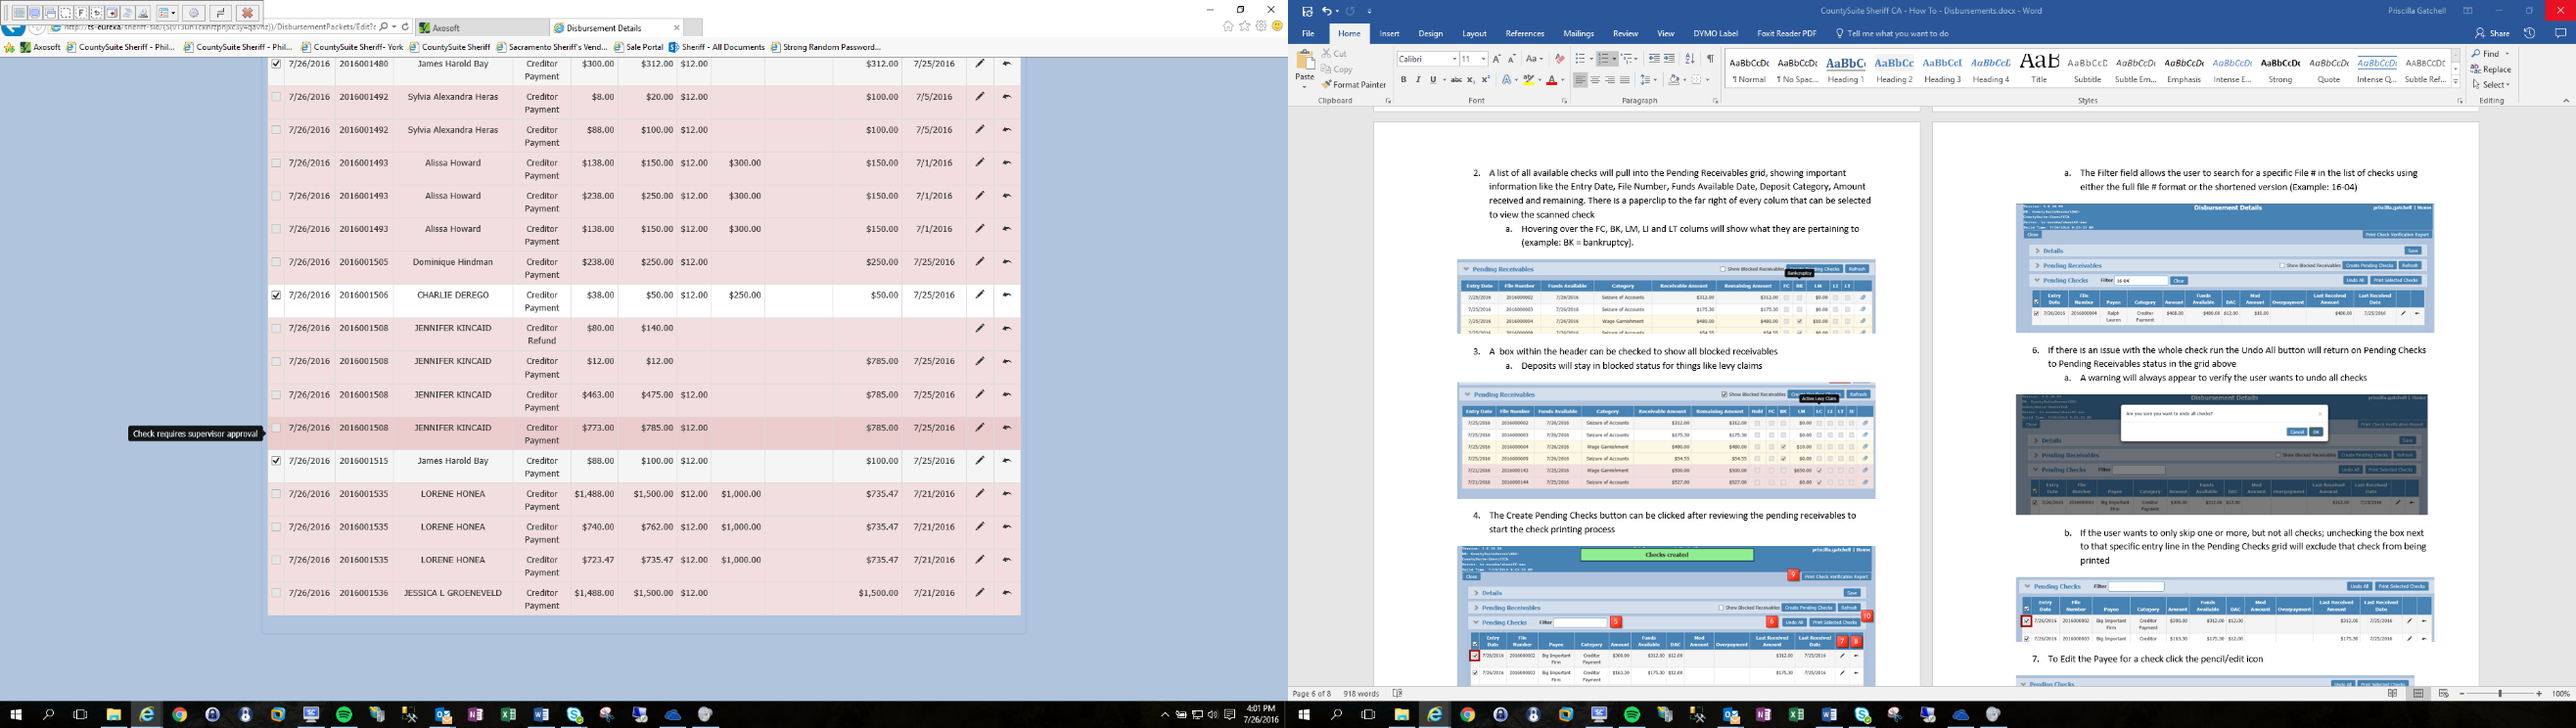
Some entry lines may show highlighted in different colors which means they will not be a part of the check run. Hovering over the check box will show the reason the check will not be printed. Some issues will put the check on hold until the issue is resolved, while others are simply warnings allowing the user to determine if they want to select the check to be printed.
Holds that require action in order to include the check in the check run:
- Missing Vendor Number – this applies to only specific counties that use this feature. To remove this type of hold on the check, click the Edit button on the line and then click the Edit Payee button. Add the vendor # in the Vendor field on the Contact Details page and save. Return to the Disbursements page. The check will then be available to print.
- Payee Address is Invalid – this indicates that either an address does not exist for this contact or the address has not been marked in the system as a valid address. Click the Edit button and then click the Edit Payee button. Review the Payee to determine what address information is missing.
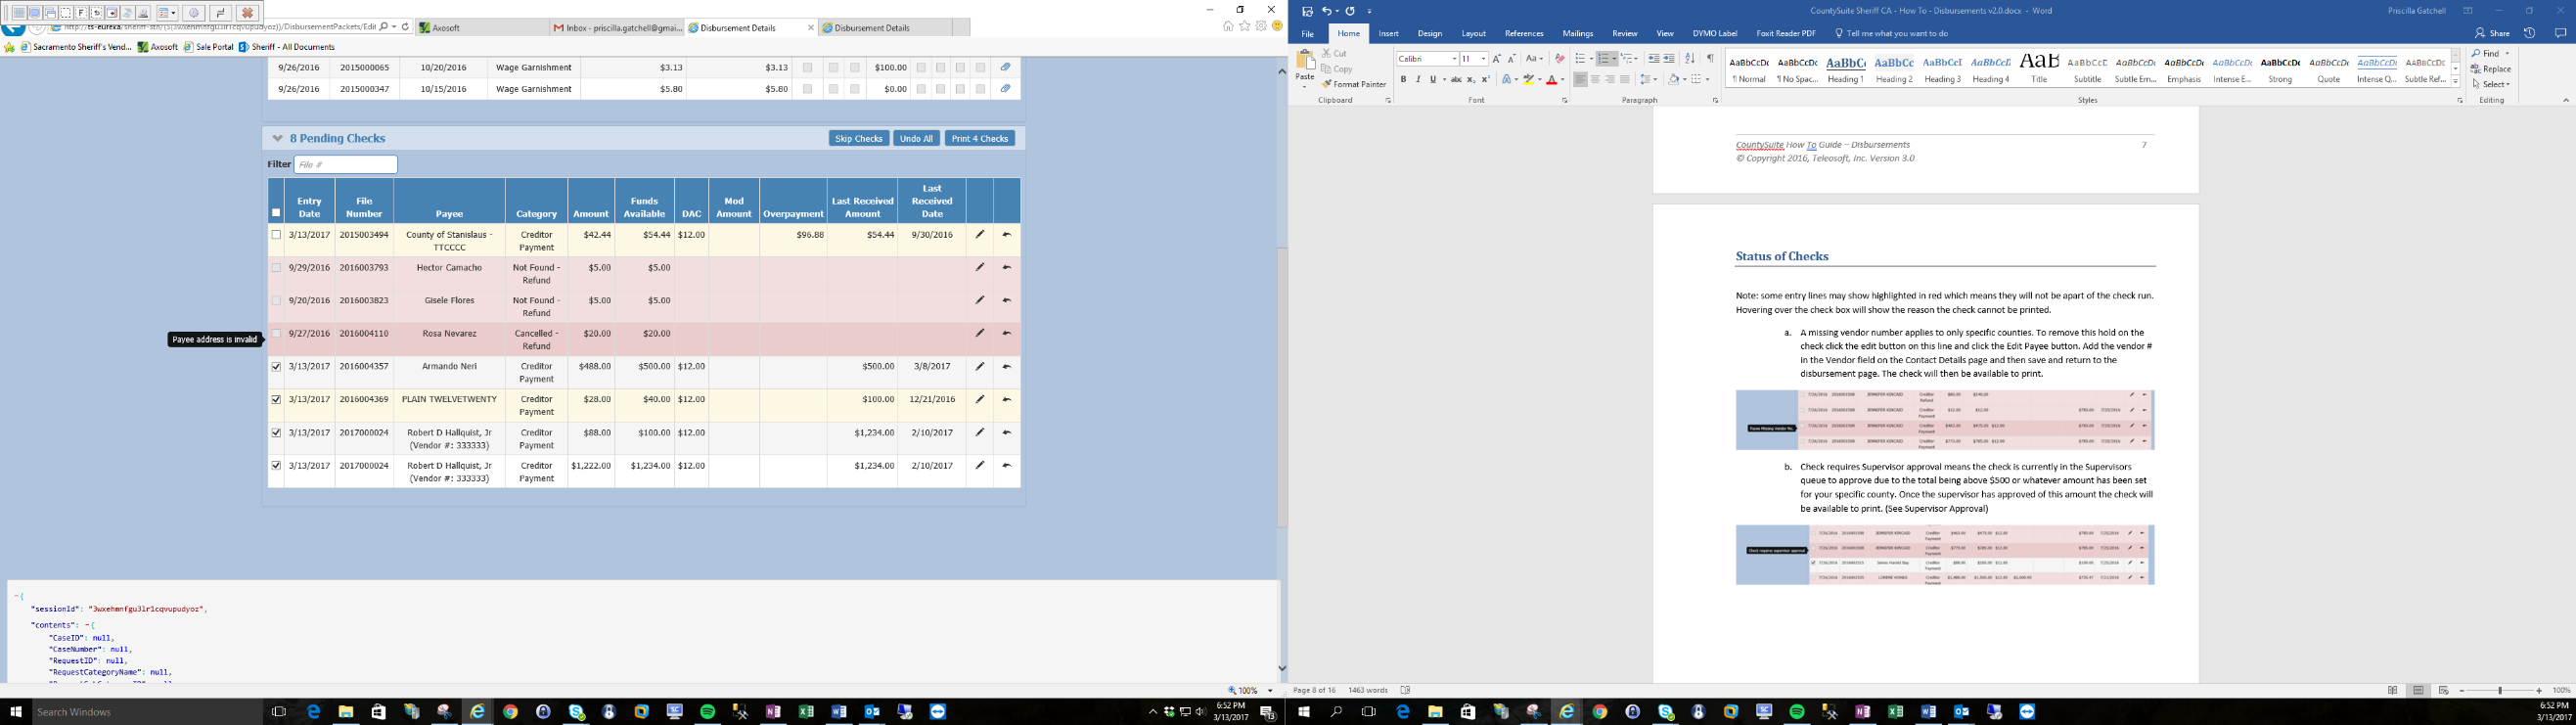
- Check Requires Supervisor Approval – this indicates that the check is currently in the Supervisor’s queue to approve due to the total being above threshold set for your county. Once the Supervisor has approved this amount, the check will be available to print.
Holds that are a warning only:
- Overpayment – this indicates that the amount of this check might possibly overpay the Judgment.
- Negative Balance – this indicates that the Ledger associated with this check has a negative amount of money showing as available for Disbursement.

Edit a Check
To edit a check, click the pencil icon.

The Check Options window is used to make changes to the money currently available for the specific file selected.
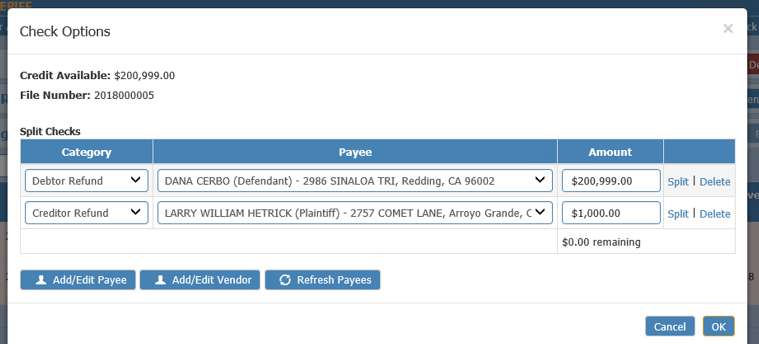
- Split or Delete Checks - clicking Split creates another line. The user can change the category (Debtor Refund, Creditor Refund, Garnishee Refund, etc), payee and amount as long as it does not exceed the total credit available for this file. The system will calculate what amount is remaining based on the amounts you enter on each line.
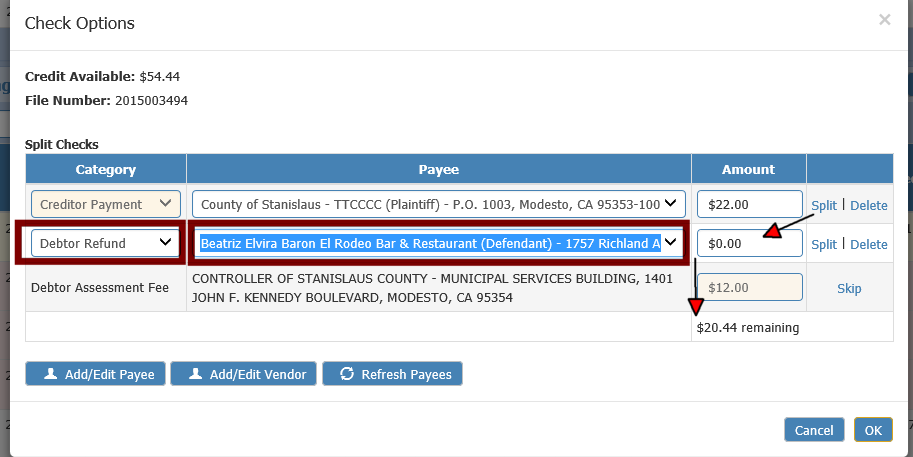
- Skip Debtor Assessment Fee – each Debtor Assessment Fee has a Skip button to the right side to allow the user to skip the charge for a Creditor Payment, if needed.
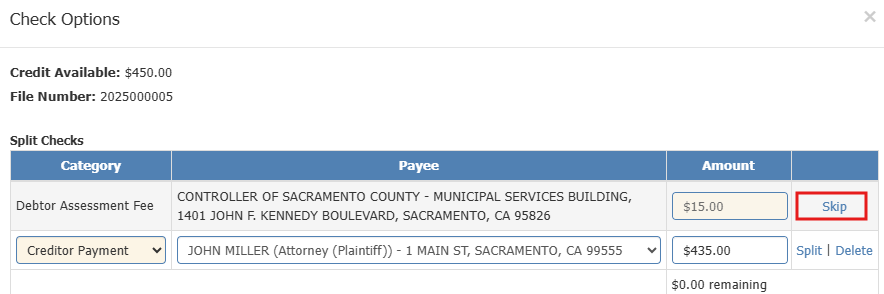
- There is also an Un-Skip button once the Skip button has been selected.

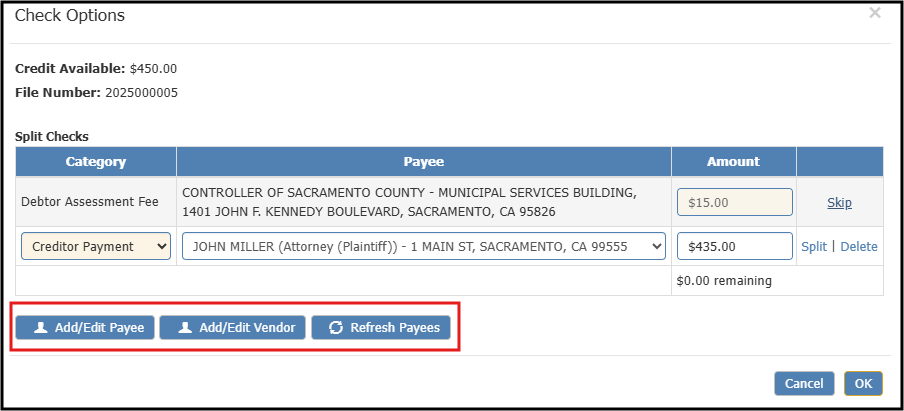
- Add/Edit Payee or Vendor – if a contact does not exist in the Payee drop-down for the check that is being cut, or if the name or address is incorrect, click the Add/Edit Payee or Add/Edit Vendor buttons. This takes the user to the Contact Details page for that specific file and any new contacts or updates to a contact can be made. After the updates have been made, click the Refresh Payees button to see the changes in the Check Options pop-up window.
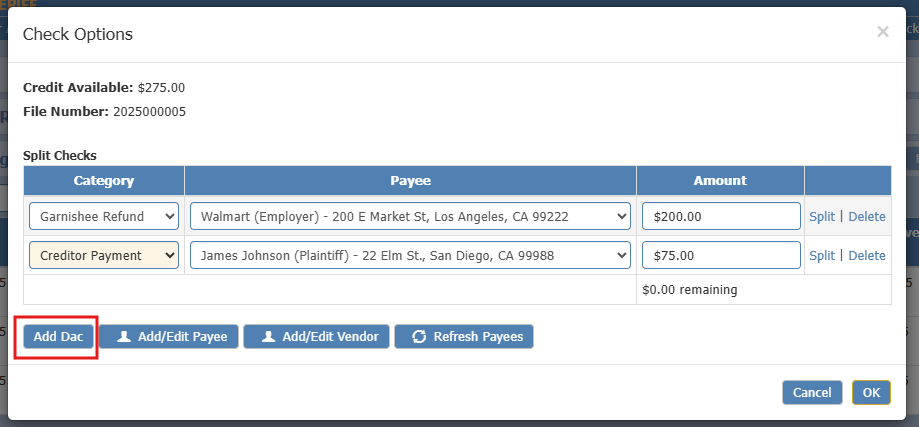
- If a check was split from a credit, the DAC must be manually added using the Add Dac button. This button is available on checks that do not already have a DAC associated with them.
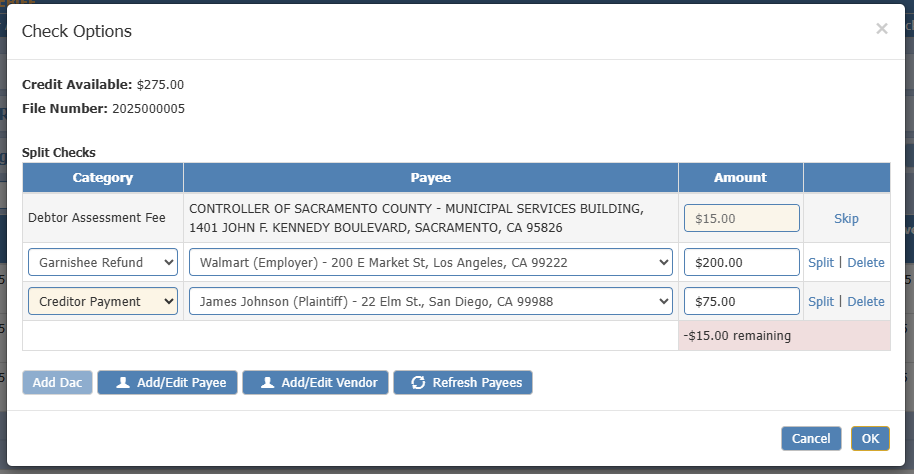
- The Check Options window will show a red field indicating -$15.00 remaining.
- The user should deduct the $15.00 from the check total and click OK.
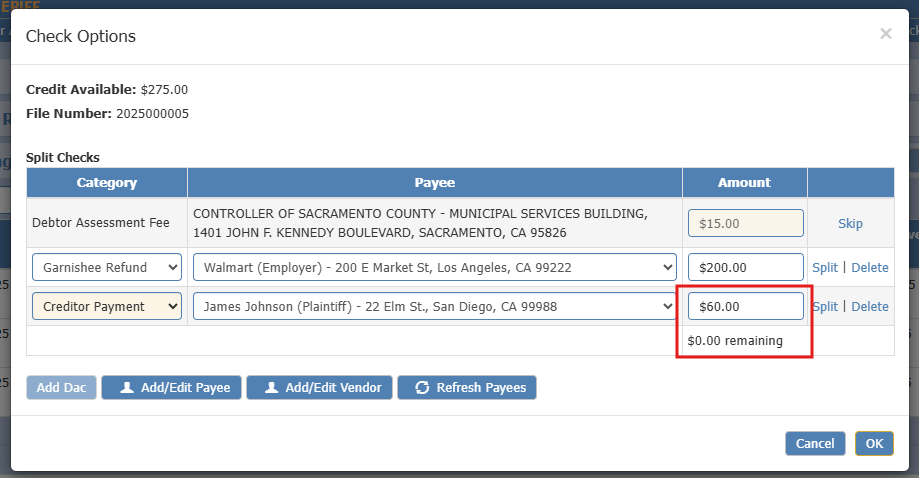
- The Check Options window will show a red field indicating -$15.00 remaining.
Print Checks
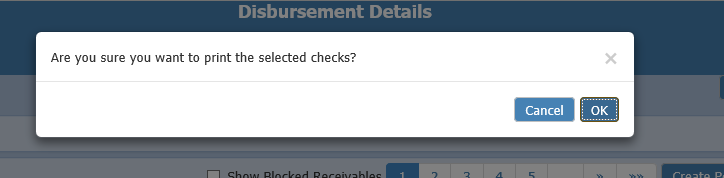
Once all checks have been verified, click the Print Checks button. Note: a warning will pop-up to confirm you meant to start printing checks.
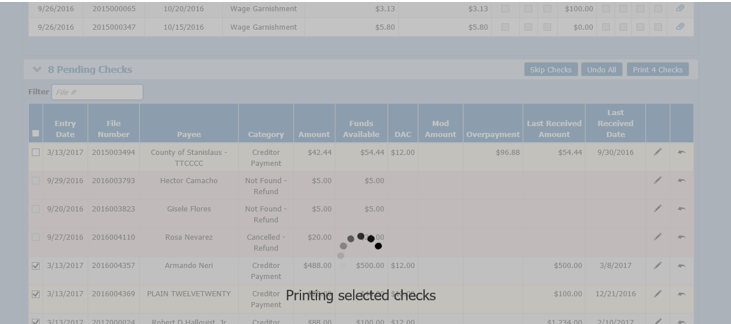
The system begins generating the selected checks and will display a status message until complete.
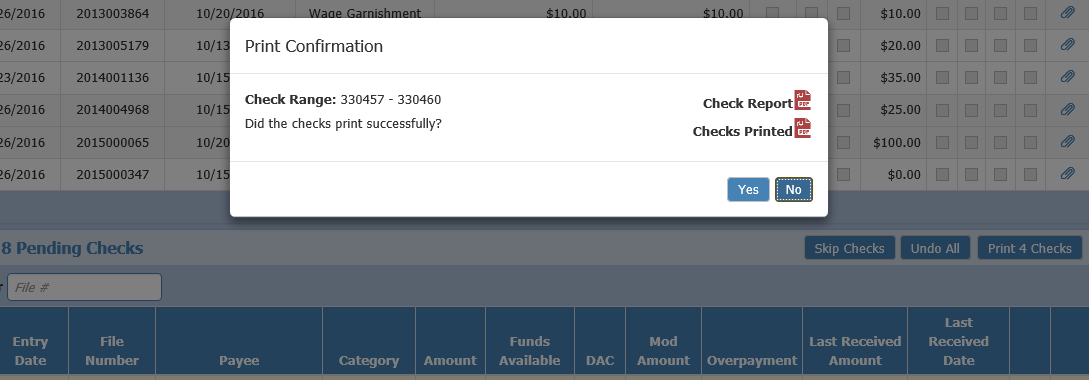
Two tabs will be opened. One tab is the PDF of the checks and the other tab is the list of “Checks Printed.” If a tab is accidentally closed before printing, go back to the Disbursement Details tab and re-print the reports using the Check Report and/or Checks Printed links on the Print Confirmation pop-up window. This pop-up will also show the user what check # range is needed in order to print the checks.
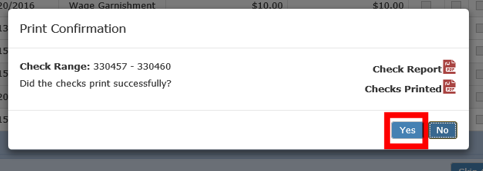
If the check run is successful, click Yes. If not, click No and the user will be returned to the Pending Checks grid.
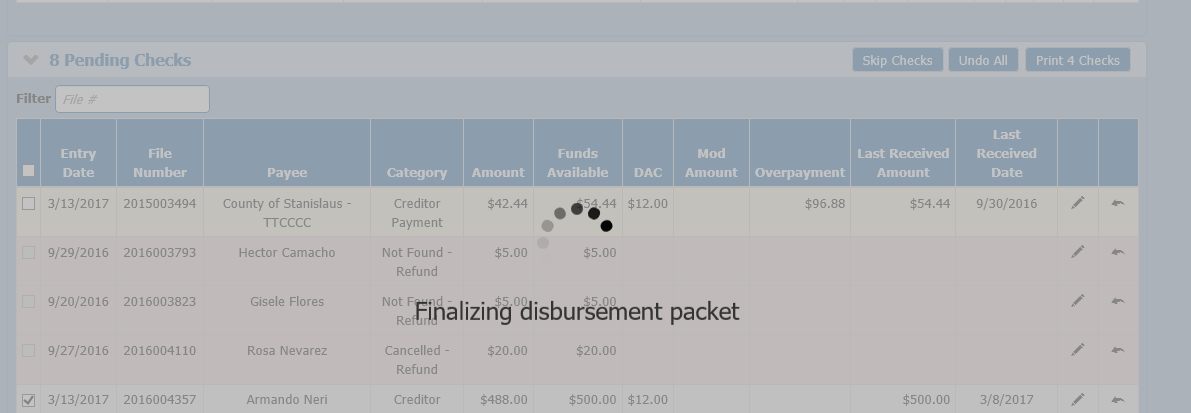
After clicking yes, another status message will indicate that the check run is being finalized.
The user will then be returned to the Disbursement Details page.
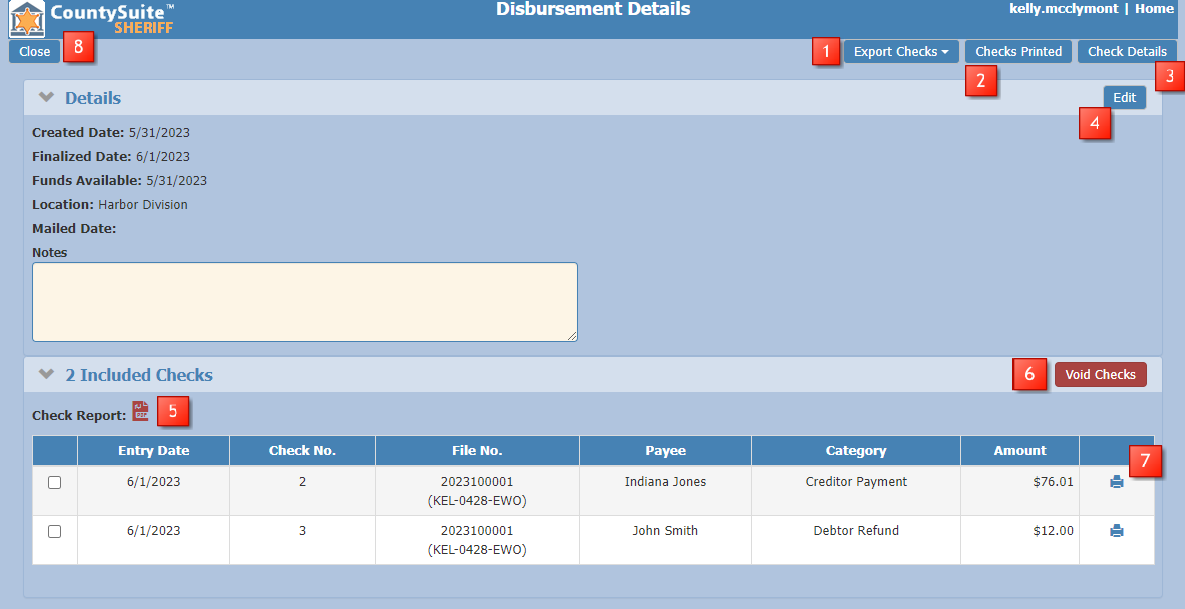
- Export Checks allows a CSV file to generate for Positive Pay. (If setup)
- The report of all checks in the check run can be generated by clicking the Checks Printed button.
- The Check Details report can be generated by clicking the Check Details button.
- The Edit button allows the user to modify the notes and mailed date.
- The Check Report PDF button will allow the user to view the checks again.
- The Void Checks button allows the user to void an individual entry in the check run.
- The Check Details report can be generated for individual checks by clicking the printer icon.
- Click the Close button to return to the main Disbursements page.
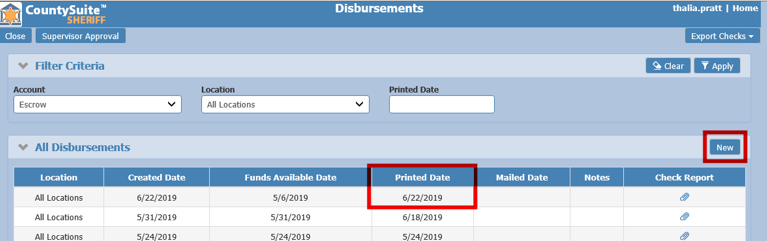
On the main Disbursements page, the latest check run will appear with a Printed Date instead of the ‘In Progress’ status. The New button will appear ready for the next check run to be created.
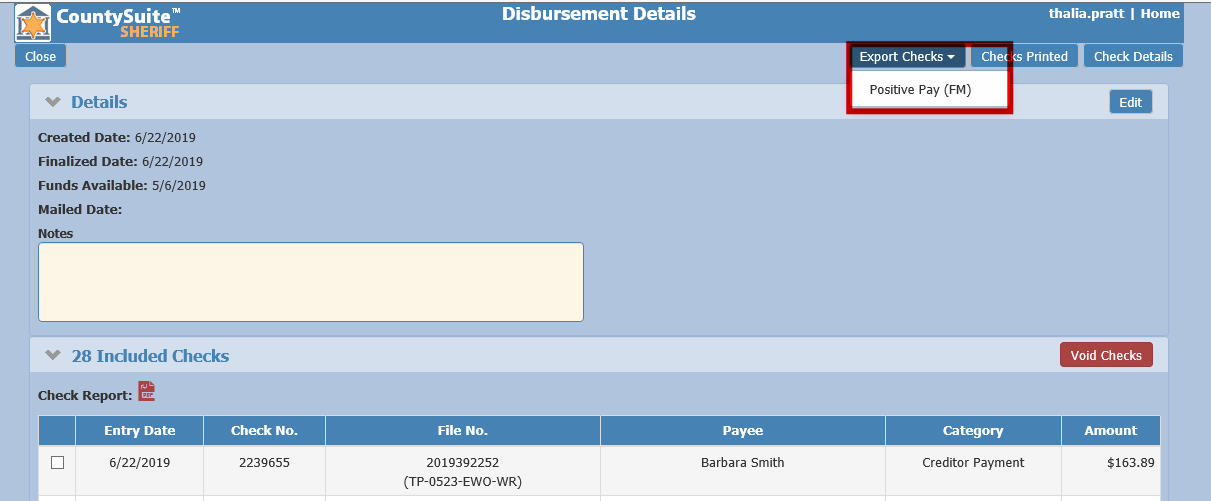
Export Checks – Positive Pay
From the Disbursement Details page, select the Export Check dropdown and click Positive Pay.
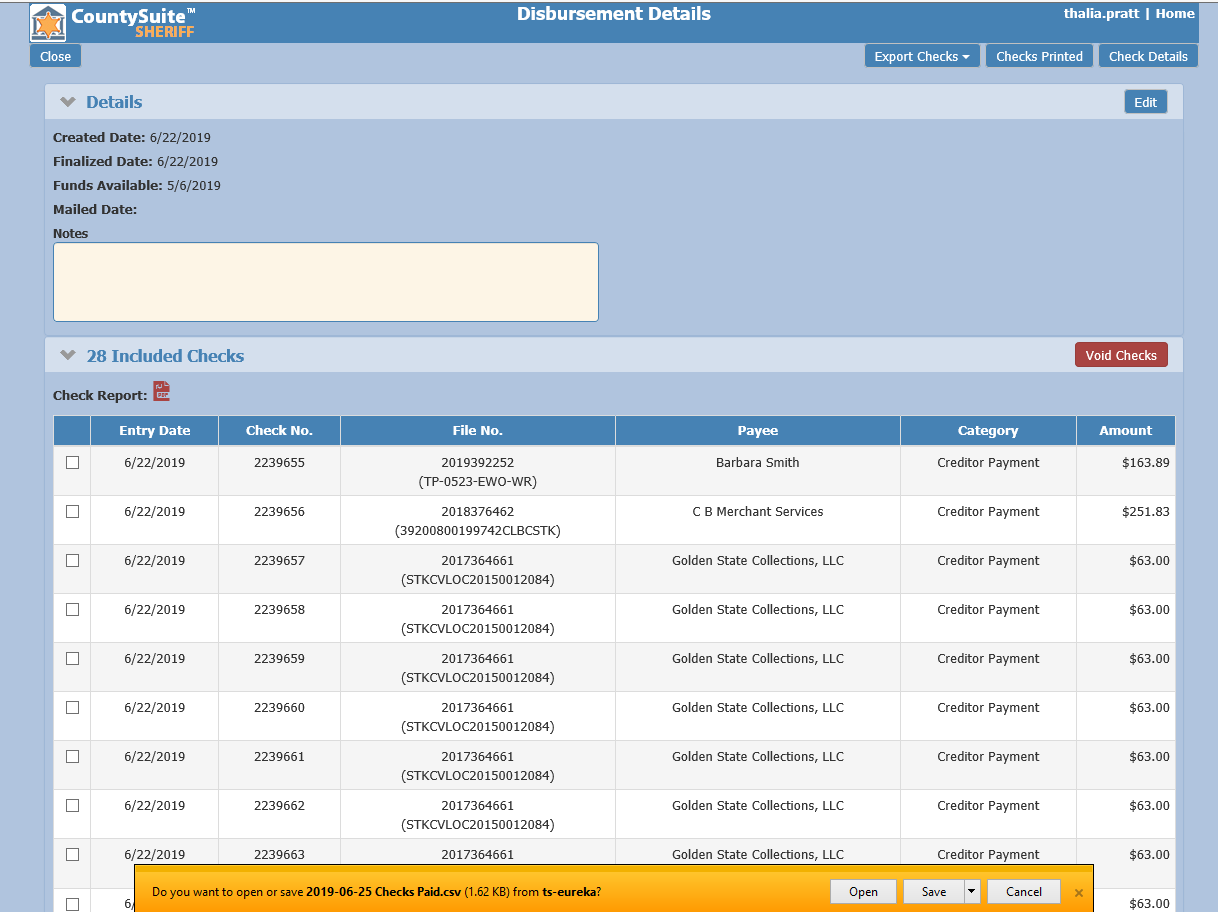
A CSV file will pop-up at the bottom of the window. The user has the option of saving or opening the file.
Send Check Request to Auditors
This process is used to generate a check file that can be sent to Auditors for printing. The process has been automated for certain counties.
Once the Print Checks button is clicked, a separate tab will open with the Check Request Report PDF.
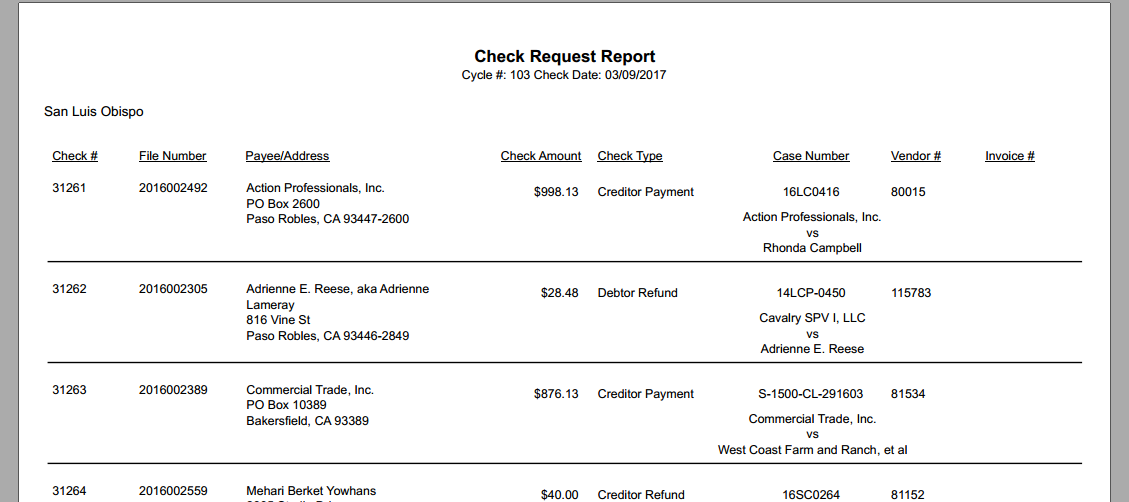
Back on the main Disbursement page, a Print Confirmation box will pop-up.
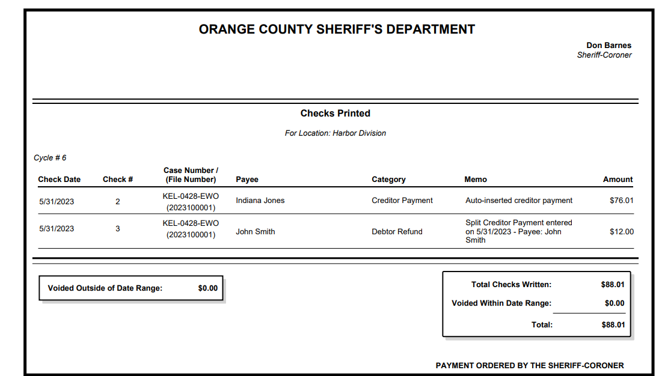
From here the user can click the Checks Printed PDF icon to generate the Checks Printed list.
To finalize the check run click the Yes button.
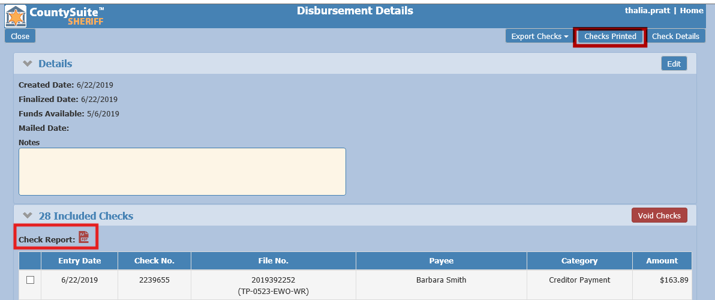
On the Disbursement Details page the Check Request Report can be re-printed by clicking the Check Report PDF icon. Click the Checks Printed button in the top right hand corner to re-print the Checks Printed list.
Delete a Check Run In Progress
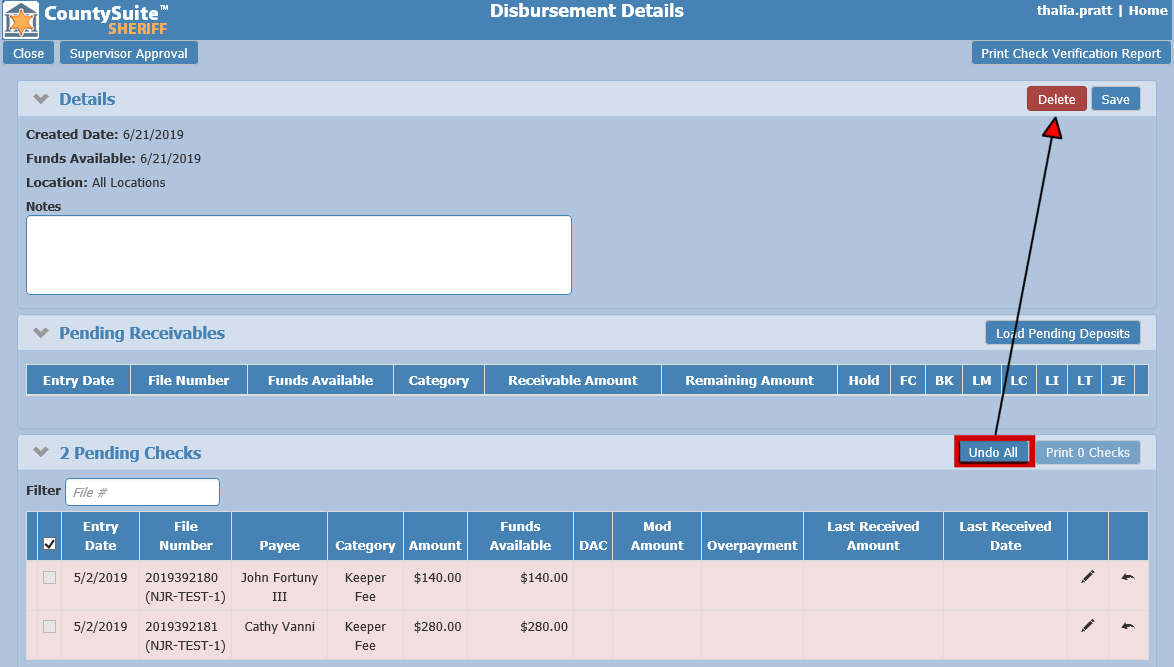
A delete button will show as long as nothing exists in the Pending Checks grid. This allows the user to completely delete a check run if it was begun in error. Only users with certain permissions will be able to see and use the delete button.
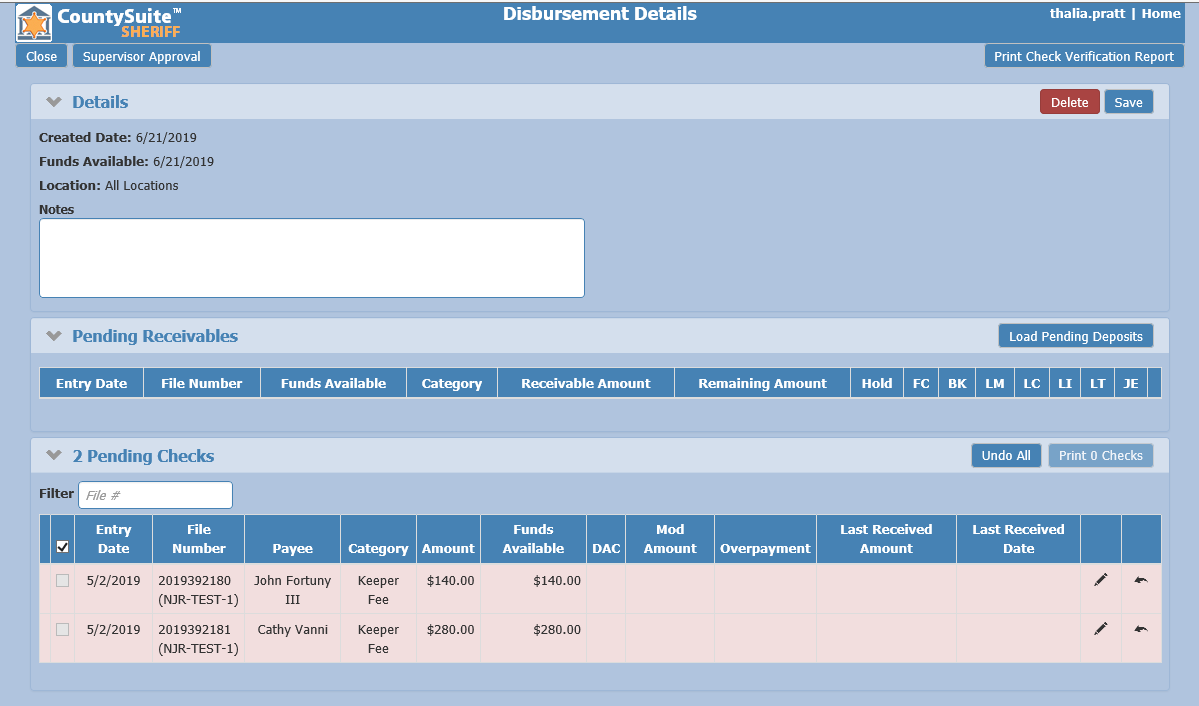
If checks are already in the Pending Checks grid, use the Undo All button to move them to the Pending Receivables grid. Then the Delete button will be available, allowing the user to delete the check run.
Supervisor Approvals
During a check run, if a check amount is above the approval limit, the entry line will show in purple on the Disbursement Details page. The user will not be able to select the check to print.
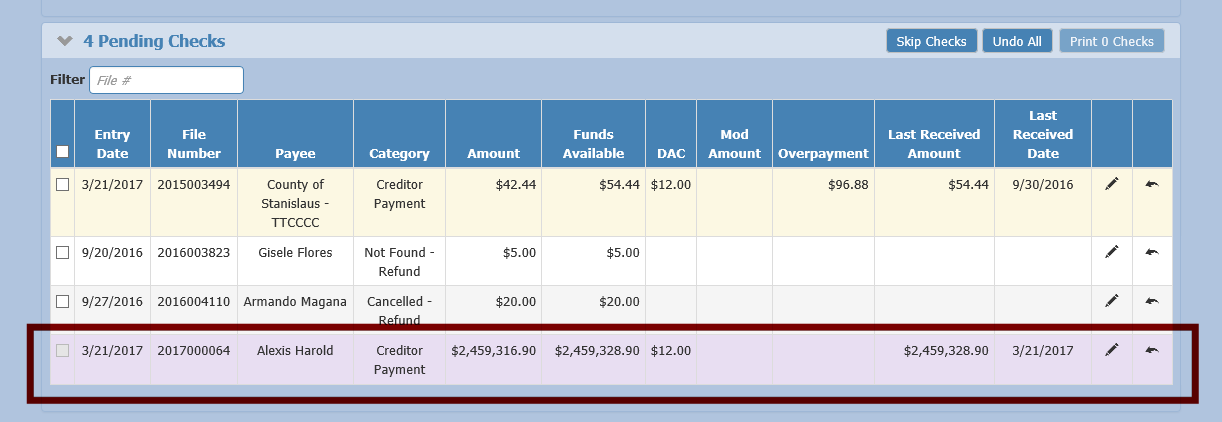
The file(s) will show on the Supervisor Approval page for users with Supervisor Approval permissions to view and approve checks.
- From the Home page, click the Accounts button.

- Click the Disbursements button.
- Click the Supervisor Approval button.

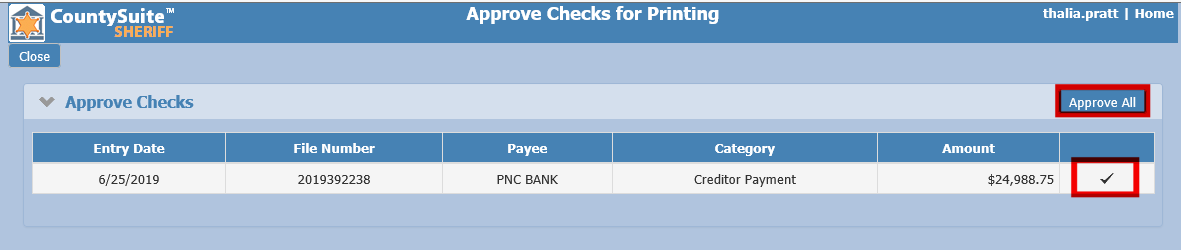
- There are two options to approve checks.
- The list of files above the approval limit will show and can be approved individually by clicking the check mark to the far right of the entry line.
- All checks can be approved at once by clicking the Approve All button.
Once approved, the check will show as available on the Disbursement Details page where it can be selected and included in the check run.