
Click here to download the PDF

“How To”
User Guide:
Receiving
Overview: County Suite Sheriff Home Page
This is the Home Page of the application. The user can always return to this screen by selecting the Home button in the upper right corner of any screen while in the CountySuite Sheriff Application.
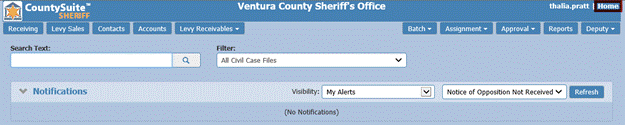
From this page, users can access the various sections of the Sheriff Application using the buttons located near the top of the screen. These buttons are controlled by user permissions and may not be available to all users.
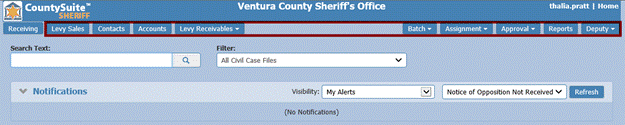
Users can search for existing cases using the Search Text field. Searches can be performed by entering a Case Number or File Number (full or partial). Users may also search by the last name (full or partial) of case participants or by Business Name (full or partial). Additionally, there is an option to search by the address (full or partial) of case participants or Eviction/Sheriff Sale addresses using the filter dropdown. The Contact Name filter also allows users to search by Social Security Number.
The wildcard for searching is %. For example, use “2025%” to find all case numbers beginning with 2025.
Hyphens and/or letters can be omitted as well as shortening the number entry when searching case numbers. For example, use “25-338” to search for the case number 2025-10000338-AB-YZ.
Notifications will appear under the Notifications section when applicable (if this setting is turned on for your county). The user can filter by notification type by using the dropdown.

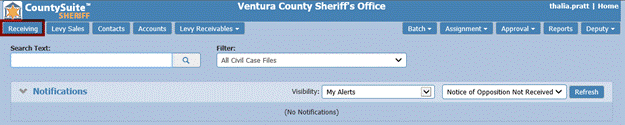
From the home page, click the Receiving button in the top left corner of the screen.
The Receiving Page is where all new Cases, Files, and Services are created in the system. The New File button at the top of the page resets the form, allowing you to start over at any time. The Check APR and Return Instructions buttons are explained in detail in the section at the end of this document. The Close button will always take the user to the previous screen they were just on. 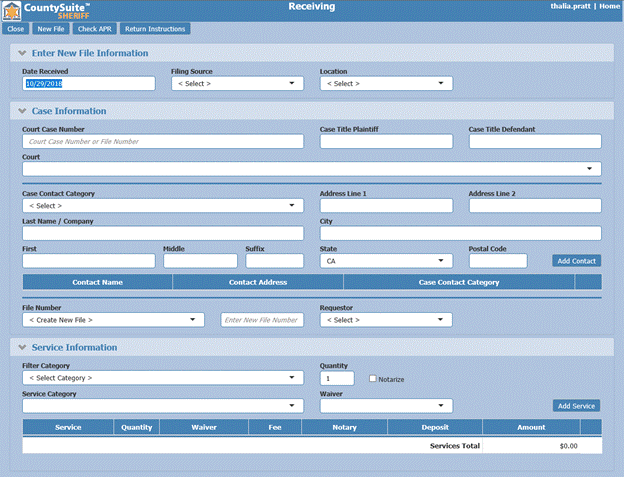
When moving from one field to the next, use the Tab key on your keyboard or click into the next field with your mouse. Remember, if you are receiving at the front counter, you may enter only the bare minimum information. The remaining details can be entered during the entry stage of the process.
- Enter New File Information:
- The Date Received refers to the date stamped on the Instructions. You can back-date. To enter the date, you may use the calendar or type in the date. The application can automatically fill in the current year after the forward slash ‘/’. For example, enter 7/26/ and hit Tab on your keyboard.
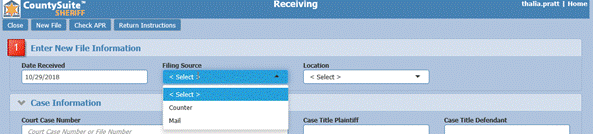
- The Filing Source indicates the method by which the document was received.
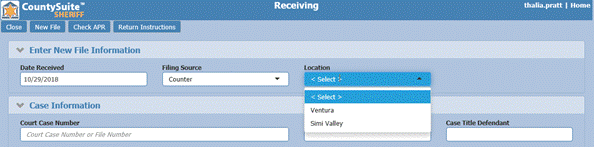
- The Location is the ‘serving’ branch if the county has more than one branch. Select the appropriate branch from the Location drop-down menu.
- Case Information:
 Enter the Court Case Number. If there is no case number on the documents, enter the appropriate number according to your office’s policy. If matching results are found, select the existing case. When you select an existing case number, the corresponding case participants and other pertinent information will populate on the page. If you select an existing case, skip Steps B and C below. If you do not select any of the matching results, the application will create a duplicate case number. Identical case numbers may be assigned by different court locations.
- Enter the case caption in the Case Title Plaintiff and Case Title Defendant fields.
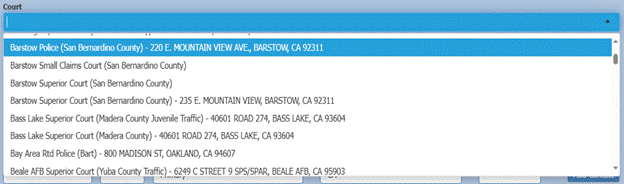
- From the Court drop-down menu, select the court where the documents were filed, either by scrolling through the list or by typing the street address of the courthouse. After you select the court, the court location will be added to the Contact grid. NOTE: This field may not display if your county configuration is set to capture the Court name after the initial Receiving process is completed.
- Add the Requestor. From the Case Contact Category drop-down menu, select the appropriate category. Typically, you would add the requestor of the service; either the Plaintiff, or the Attorney if there is an attorney representing the Plaintiff. If you are at the front counter, you may enter bare minimum information.
- File Information:
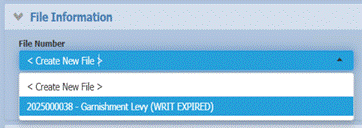
- If you are adding a service to an existing file—such as in the case of a re-levy on a money judgment—select the active File Number from the File Number drop-down menu. If the writ on file has expired, the drop-down will display “(WRIT EXPIRED)” next to the corresponding file. When you select the ‘Create New File’ option, the application will create a new file under the same case. Select the appropriate option.
- Select the appropriate File Category from the drop-down menu.
- The Requestor drop-down will show the Requestor (either Plaintiff or Attorney) you added in the previous section.
- Enter the number of pages in the Copies field if the office is charging copy fees. The application will add the appropriate total to the amount due.
- Service Information:
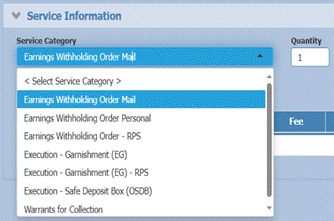
- Select the appropriate Service Category from the drop-down menu.
- Quantity (see image above) refers to the number of processes you need to add for the same Service Category selected in the previous step. Depending on the county’s configuration, this field may only be used for specific service categories.
- If a notary is required on the Proof of Service and the requestor has submitted the applicable payment, check the Notarize box. The appropriate notary fee will be automatically added to the total amount due.
- Depending on the county’s configuration, the Services button is used to capture separately the Instructions and Court Documents. Click the Services button if documents are to be scanned into the system.
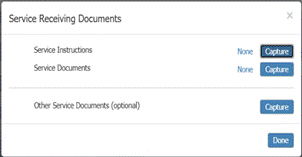
- Click Capture next to the applicable documents in the Service Receiving Documents window. Click None if the document is not available.
- Service of Process (non-restraining order service):
 An RPS Number option can be turned on per service type as well.
- Enter Payment Information.
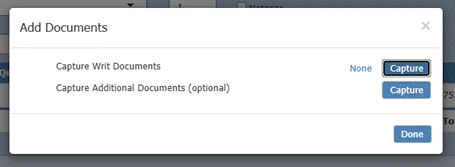
 Once the payment information is added, the Filing Documents button will appear to scan in documents such as the Writ. This is a setting that can be configured based on a county’s preference. Click Capture to scan the document or click None if you do not need to scan the document. Click Done when completed.
- A Generate File Label box will appear if configured for the county.
- A Generate Receipt box will appear and can be set-up to be checked by default, depending on the county’s preference. The receipt will populate in a separate tab after clicking the Add or Add/Goto button.
- The Add or Add/Goto button is used to complete the receiving process. The Add button saves all the information and then resets the screen for receiving a new Case. The Add/Goto button saves all the information and takes the user to the next screen to continue adding information on that specific case.
- To continue entering information, reference the How-To Document for the specific service type being entered.



-
- If the requestor is a frequent-flier attorney/plaintiff, the contact may already exist in the system. Make sure that you are selecting the exact match of the name and address. If you select an existing contact, the contact will be added to the Contacts grid.
- If the contact does not yet exist in the system, you may skip adding the phone number and address. Add the bare minimum contact information and click the Add Contact button to add the contact to the Contacts grid.
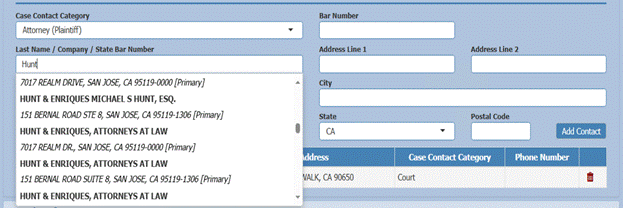
Note: If you are receiving at your workstation (not at the counter), you may add all case participants from the Receiving page. However, certain information may not be editable on that page and must be added from the Contact Details page (e.g., employer relationship, Social Security number, etc.).
To delete a contact entry from the Contact grid, click the trash can icon.
 |
Note: There is a configurability option with respect to how a file is created. A county may select the option to have the application assign the next available file number automatically, or the office may assign the next available file number manually.


From the Waiver drop-down menu, select the appropriate waiver type, if applicable. The available waiver options will depend on the selected Service Category. For example, if your service category is Restraining Order, the waiver list will include "Waiver – Bill Courts." This waiver type is not available for garnishment levies. Each county may have slightly different waiver category options.
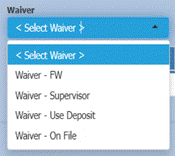
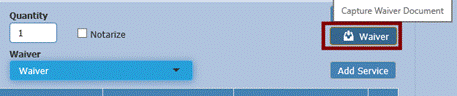
If you select a waiver type that corresponds to Form FW-003 and depending on configuration, the application will require the form to be scanned (captured) into the system. Click the Waiver button to capture the Waiver document.

How the scanning is configured affects how the county’s service packet is generated.
-
- Service Instructions: SER-100 and SER-100A, if applicable
- Service Documents: Court documents (e.g., COP, etc.)
- Restraining Order
- Service Instructions: SER-100 and SER-100A, if applicable
- Service Documents: Court documents (including exhibits and attachments)
- Once service information has been added, click Add Service.
 |
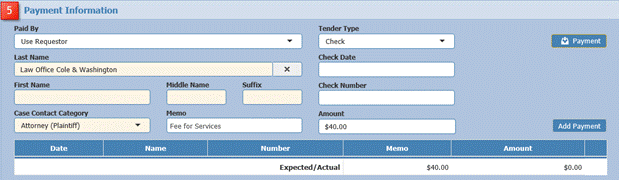
- The Paid By field will automatically select the Requestor on the case (entered in the Case Information section above). However, any contact on the case can be selected from the drop-down, or a new contact can be entered by selecting “Add New Contact” from the drop-down.
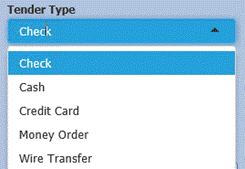
- Select the deposit type from the Tender Type drop-down.
- Enter the Date of the check/transaction.
- Enter the check/transaction/credit card number.
- Enter the payment Amount.
- Capture payment documents by clicking the Payment button. Once captured, a green check mark will confirm that a document has been captured successfully. This is a setting that can be turned off or on based on the county’s preference.
 Click the Add Payment button to add the information into the grid below.
- To delete an entry line in the grid, click the trash icon.
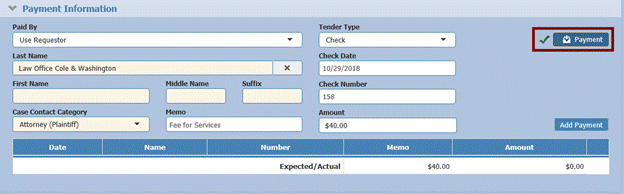

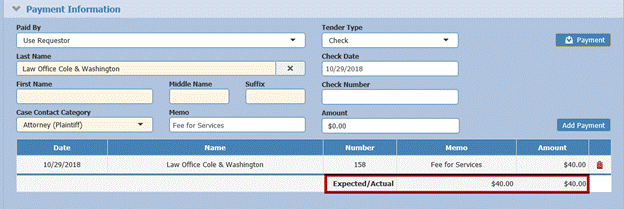
More than one form of payment for a service is supported on the Receiving page. When a payment is entered, an Expected/Actual balance tracks the amount paid vs. total cost of the service(s).
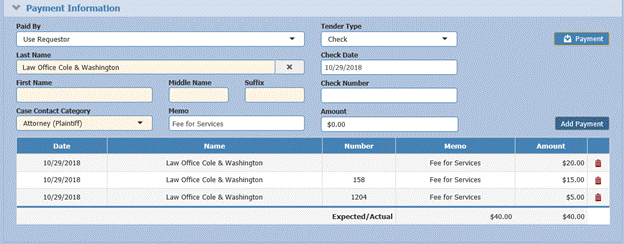
Payments can be entered in a variety of ways; for example, two different check #’s, Check and Cash or Credit Card.
When the user clicks the Add or Add/Goto button, a warning message will populate if the payment amount entered does not match the full cost of the service(s). The user can click “OK” to bypass this warning if necessary.

Adding to an Existing File Number
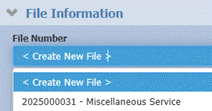
- If an existing Court Case Number is selected on the Receiving page, the File Number field will show a dropdown of options in addition to “Create New File.” If the user would like to add another service to an existing file number, select the number in this dropdown.
- Complete the rest of the receiving page, selecting the new service being added to the existing Court Case and File Number. Add Payment Information and click Add/Goto to continue to complete additional entry.
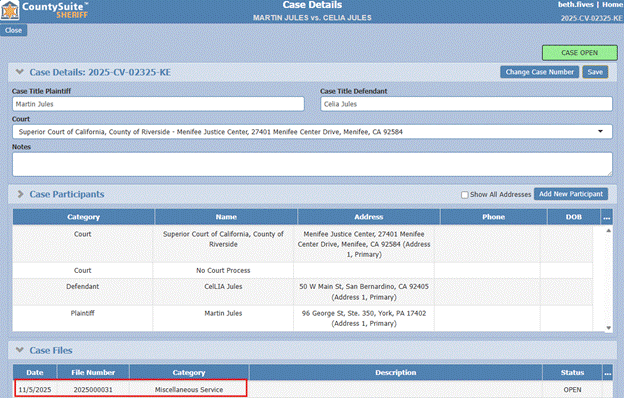
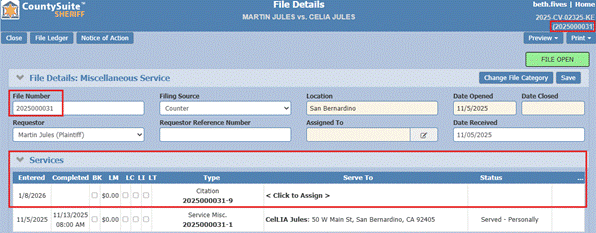
- On the Case Details page, the existing File Number will already show in the Case Files grid. Click on the File entry in this grid to access the File Details page.
- The current File Number will appear under the File Details section and in the top right corner of the page. The newly added service will show in addition to any previously existing services.
The following settings can be configured depending on county preferences.
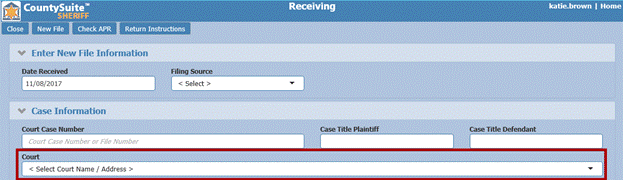
Select Court: An option can be enabled to select a Court on the Receiving screen instead of doing this on the Case Details page. If this setting has been turned on, it will be visible just below the Case Title fields. Some users prefer this option so they can enter the court and all the parties on the receiving page. When they click Add/Goto at the bottom of the Receiving page the system will skip the Case Details page and take the user directly to the File Details page.
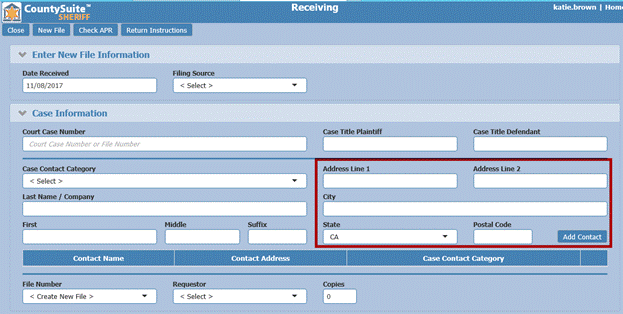
Add Contact Address: An option can be enabled to show an Address field on the Receiving Page. This allows the user to fully enter contact details for the Requestor or other case participants, if they do not exist in the system. When this setting has been turned on, it can be found just to the right of the category/name fields.
Add Filing Documents: An option can be enabled to allow users to capture any documents that were received before clicking the “Add/GoTo or Add” button.
 |

Check APR: At the top of the Receiving page the Check APR button can be used to check if the interest is above 10% even before receiving the file.
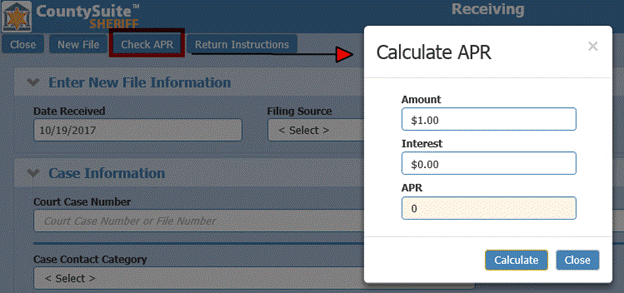
If the documents need to be returned before a Case/File is created, use the Return Instructions button at the top of the Receiving page.

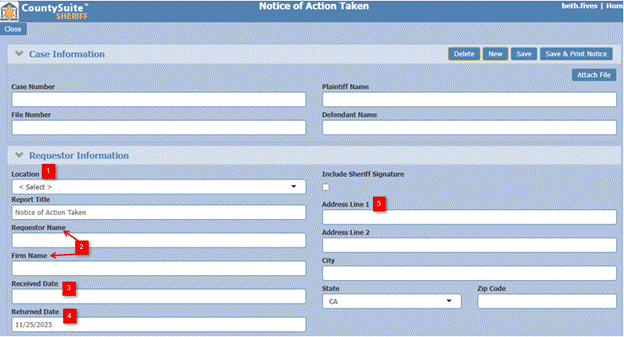
Required fields before saving or printing a notice:
- Location –if there is more than one location, there will be a drop-down list to select the county location.
- Requestor or Firm Name – the Requestor (Plaintiff) or Firm (Attorney-Plaintiff) name.
- Received Date – the date that you have received documents.
- Returned Date – the date that you are returning documents.
- Address – the requestor or firm’s address.
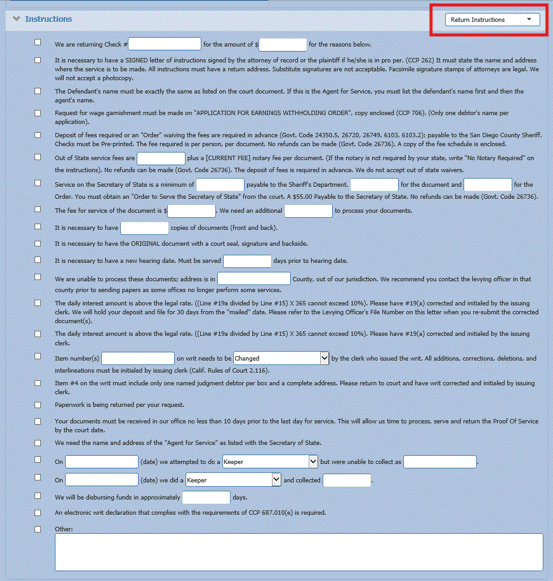
There are two options under the Instructions Section: Return Instructions and Notice Instructions.
- Return Instructions – a list of most frequently used reasons that can be selected and used to generate the notice.
- Notice Instructions – a blank section that allows users to manually type another reason that was not part of the list under Return Instructions.
 |
- Use the Attach File button to upload the documents that were provided by the Requestor so that they can be referenced from within the file. The document will be available for viewing via the File Action that was created after saving the Notice.
- The Save button will generate the Notice as a File Action to be printed later from within the file.
- The Save & Print Notice will generate a PDF of the Notice to be printed out immediately as well as create the File Action.

Once a Notice is saved, it can be found via the Search feature on the Home page. Use the Filter option for “Notices of Action Taken” to find the Notice by entering a Case number:

The Case Details page is where all case contacts are displayed and additional information can be added, such as the Court name. The user can also update/change the Case Title from this page.
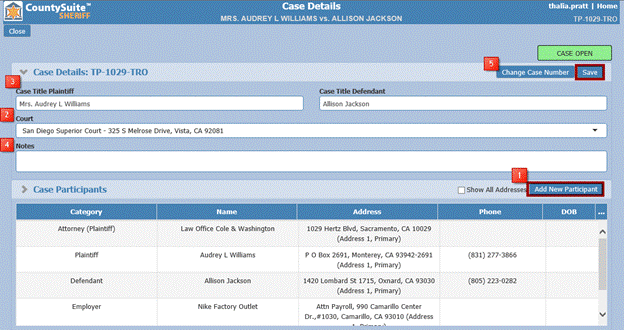
- To add a new contact on the case, click the “Add New Participant” button and add their information on the Contact Details screen. To add additional information for any Case participants, click the entry line for the contact and follow the “Add Contact Details” section of this document.
- Use the Court dropdown to select a court. The list will auto-filter as the user begins to type part of the court name OR court address. Click Save after selecting a court and the Case File grid will become visible.
- The Case Details section allows the user to edit the title for the case if it is different than the Plaintiff(s) and Defendant(s) on the case. Once a change has been made, click Save.
- Notes related to the Case can be entered in the Notes field below the Court selection dropdown. Click Save.
- If the case number was entered incorrectly, edit by using the Change Case Number button. The case number will always be found in the top right corner of any screen. Once generated, the file number will show next to the case number on the file details page.
- The Case Files grid will show the entry date, file #, type of service, and status of the file (open or closed).



 Clicking anywhere on the line within the Case File grid will take the user to the File Details page where file specific information can be added. The File Details are different depending on what type of service is being entered. There are separate how-to documents for the different types of services.
To view or enter remaining details for any Case participant, on the Case Details page select the contact under the Case Participants section by clicking the line.
 |
|
 |
- The easiest way to view the current list of contacts on the file is to click on the All Case Contacts drop-down. If the party you need is not listed, use the New button to add a contact to the file.
- Case Contact Category determines the role of the contact on the case: defendant, plaintiff, etc.
- Add important details provided for the contact, such as the SSN or an email address.
- Add any phone numbers provided for the contact.
- Enter contact’s Address information.
- Enter any Physical Details provided for the contact.
- Use the Employer Relationships section to create a relationship between Debtor and Employer. Select a contact from the drop-down and click the Add button. The relationship automatically saves when the Add button is selected. (This relationship is only required for an EWO service).
- In the Bankruptcies section, a bankruptcy can be added against the contact by clicking the Add button. The user can view all bankruptcies currently associated with the contact by clicking the arrow that opens the Bankruptcies section. See the Bankruptcy How-to document for detailed instructions.
- When all information has been entered, click the Save button.

- If there is more than one address to add for the contact, under the Address Information section, save the contact page before clicking the New button. This will ensure that the first address is saved before proceeding with adding an additional address. Once you have added and selected the address category, select Save so the additional address is saved. There is no limit to the number of addresses that can be saved.
- To set the primary address, move between addresses using the arrows next to the “1 of 2” box, select the “Primary address for this contact” box, and click the Save button.

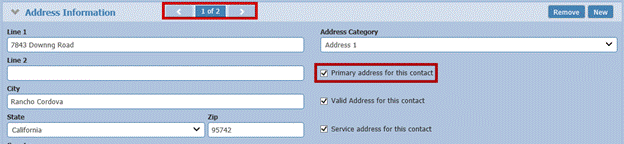
- An address that is no longer valid can be removed as an option for a Service address by deselecting the “Valid Address for this contact” box and saving the changes. This address will no longer show on the Trip Tickets as an alternate address or appear as an address selection when choosing a name/address combination on the Service page. NOTE: It is important to mark the address as invalid instead of deleting it so that there is a history of all addresses.
- The “Service address for this contact” box determines which addresses show on the Trip Ticket.


