
Click here to download the PDF

How To User Guide:
End-of-Day Balancing
The End-of-Day Balancing process is the final stage of verification of the total deposits in a given day. When you Transfer a deposit, you are verifying and finalizing that deposit. This process can be done either at the end of the day or the next morning.
How to get to the Deposits Page
- From the Home page, click on the Accounts button.
- From the Accounts page, click on the Deposits button.
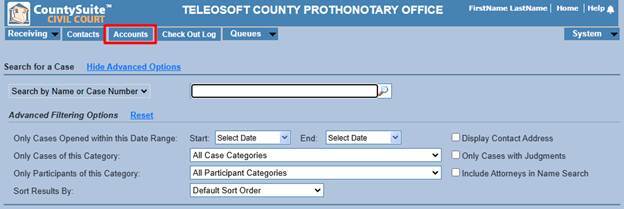

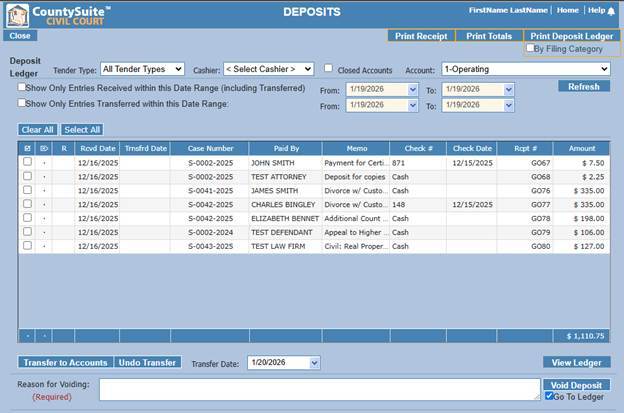
The Deposits page will display all deposits/monies that have been entered into the application (including your Miscellaneous Categories) that have not yet been Transferred to Accounts. The page defaults to display all Tender Types and all Cashiers that have not yet been Transferred to Accounts.
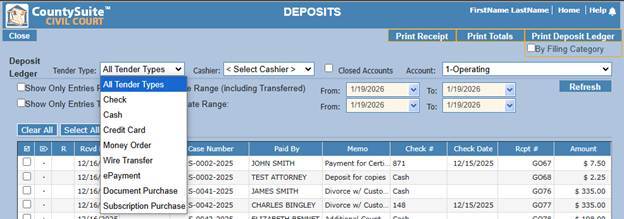
The Tender Type drop-down box allows the user to specify a specific tender type, and the application will list deposits specific to the tender type selected.
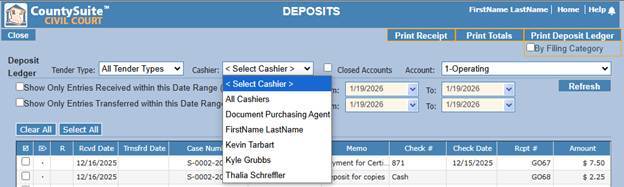
The Cashier drop-down box allows the user to specify a specific Cashier, and the application will list deposits received in by the Cashier selected.
Cashiers in the dropdown are based off of any user that enters in a deposit into the application. A user will not show up in the Cashier dropdown until they have entered a deposit/received a case with a deposit.
The application allows the user to limit the entries shown based on the date on which they were received. Click on the “Show Only Entries Received within this Date Range (including Transferred)” check box. Enter your target date range, and then click on the Refresh button.
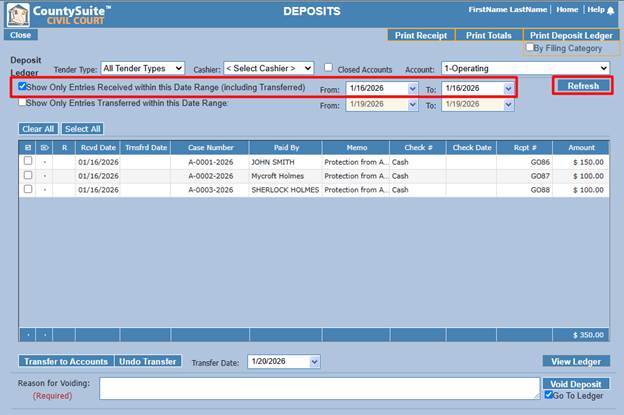
NOTE: The View Ledger button at the bottom-right of the grid allows you to jump to the Case Filing Ledger page for the selected row to look at the details associated with that deposit.
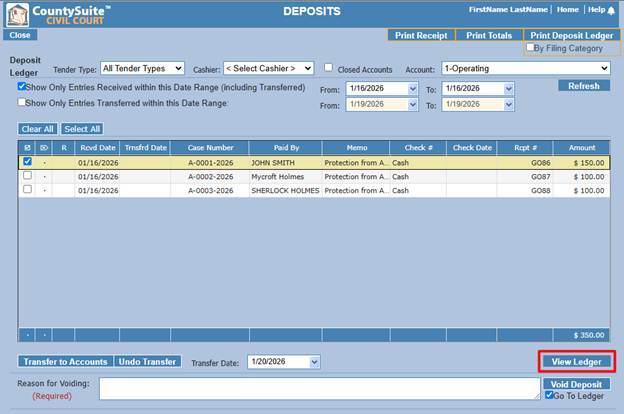
Users can re-print receipts, view if the deposits were distributed, or view their deposit ledger to show money that will be taken to the bank.
Print Totals
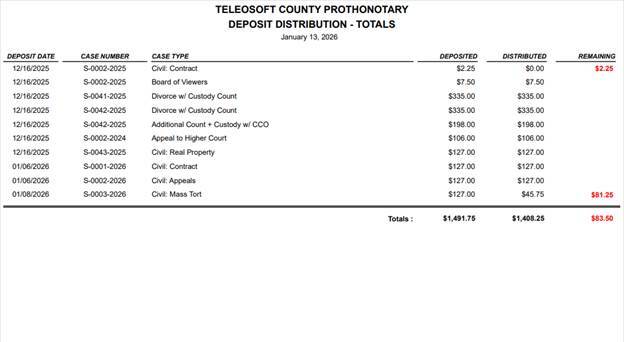
The Deposit Distribution – Totals report shows a complete list of all the deposits that are on the deposits page as well, as their deposited amount, distributed amount, and remaining amount.
- From the Deposits page, click on the Print Totals button in the upper right-hand of the page.
- Write a reason for voiding the deposit.
- Click Void Deposit button.
- A message will appear to confirm that the correct deposit was selected. If the correct deposit was selected, click OK. If not, click cancel.

This report is valuable to make sure that all deposits received for Filings had their money distributed for the total amount received. The only times that an amount should show in the Remaining column would be when receiving a deposit that should remain in escrow (such as a Landlord Tenant payment, or a Wage Garnishment payment).
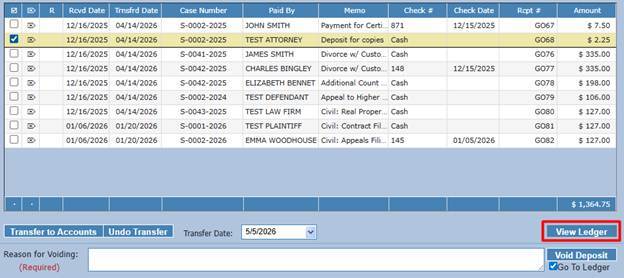
If a deposit has a remaining balance that should be paid out, the user will need to add and transfer cost(s) to accounts on the incorrect case filing ledger. Users can go directly to the case filing ledger with the remaining balance by checking the row with the remaining balance and clicking View Ledger.
Example of Deposit Distribution – Totals report below.
Print Deposit Ledger
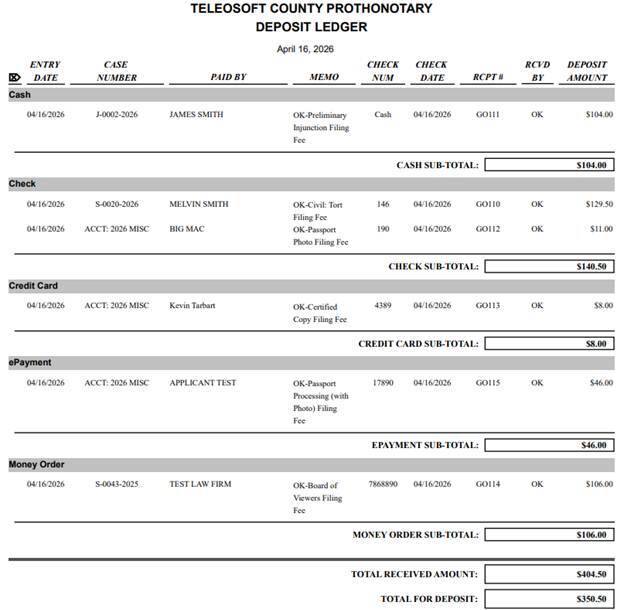
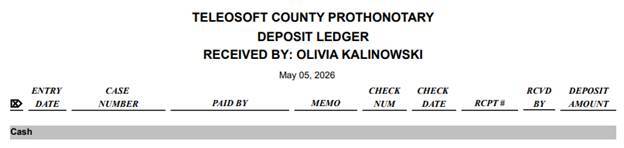
The Deposit Ledger report shows the day’s deposits and groups them by Tender Type.
- From the Deposits page, click on the Print Deposit Ledger button.
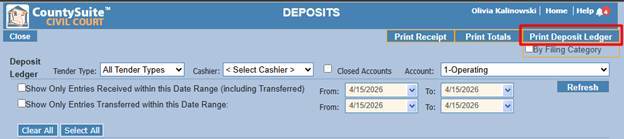
Checking the By Filing Category check box in the upper right-hand corner of the page will group the Deposit Ledger report by filing category instead of tender type.
Note: if the user has filtered by Tender Type or selected a Cashier, the report will also be filtered by those selections. To generate the Deposit Ledger for all tender types, and all cashiers, please make sure those filters are cleared.
Example of the Deposit Ledger grouped by All Tender Types and for All Cashiers below.
The example shows five different deposit categories: Cash, Check, Money Order, Credit Card, and E-Payment. Although the Total Received Amount at the end of this report includes the credit card and e-payment deposits, the Total for Deposit amount excludes them since the money is already in the bank.
Print Receipt
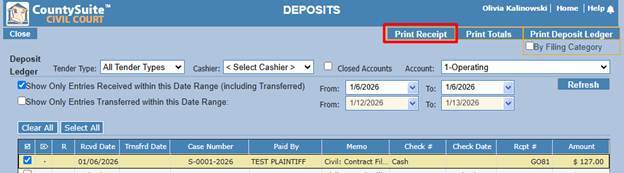
From the Deposits page, you have the option to print an individual deposit receipt. Click on the deposit entry check box, and then click on the Print Receipt button in the upper right-hand of the page.
Balancing by Cashier (or All Cashiers)
In offices where an individual clerk handles their individual End-of-Day balancing, they will need to have permission to access the Deposits page.
The page will default to list all deposits received in by all cashiers. The cashier will select his/her name from the Cashier drop-down box, and the grid will automatically refresh to show only entries received by that cashier.
The cashier will verify his/her physical total deposit matches his/her total in the system.
If you balance by All Cashiers, no cashier filters need to be applied because the Deposits Page defaults to show all deposits received in by all cashier that have not been transferred yet.
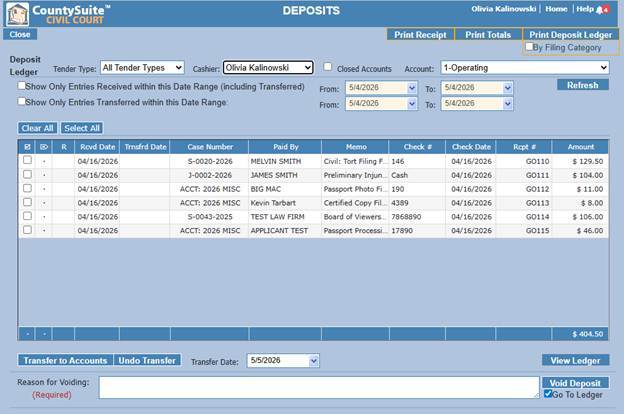
The Deposit Ledger Report will show the filter cashier and say received by: cashier’s name if filter is used.
If a deposit was received incorrectly, the user can delete the deposit from the Deposits page.
- Select the deposit that was entered incorrectly.
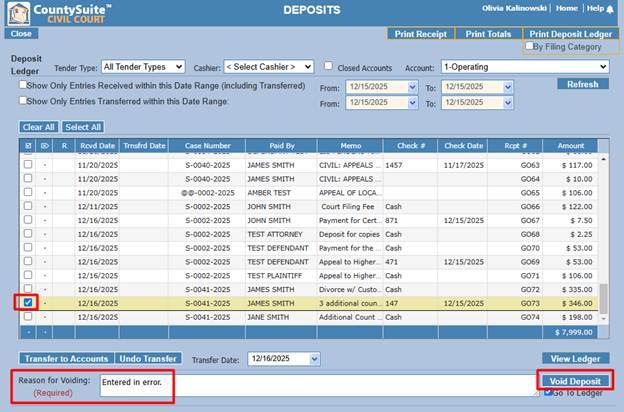
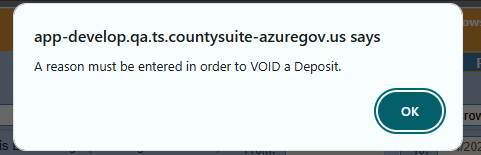
If the user does not write a reason and clicks the Voided Deposit button, an error message will appear informing the user that a reason must be entered in order to void the deposit.
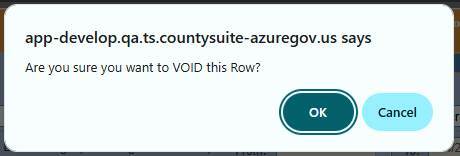
Once a deposit is voided, the application will take the user to the case filing ledger that the deposit was on before it was voided. If the deposit was within the same month and is voided, the application will un-transfer any costs associated with the voided deposit.
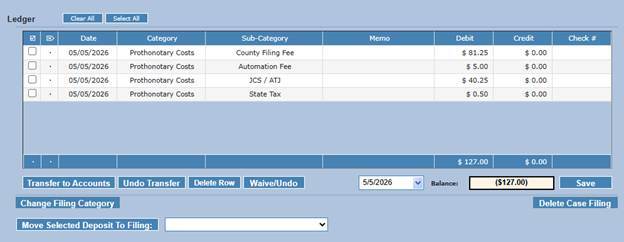
If the user intends to re-enter a deposit with the corrected information, they can enter the corrected deposit information directly on the case filing ledger in the Deposits section. Once the information is added, the user will click Add Deposit.

The added deposit will appear on the case filing ledger. The user needs to click the Save button to finish adding the deposit onto the ledger.
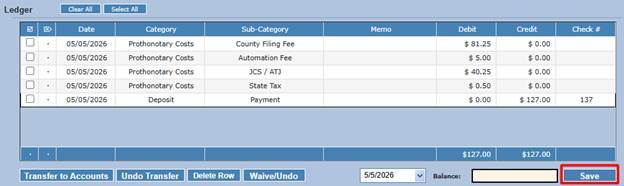
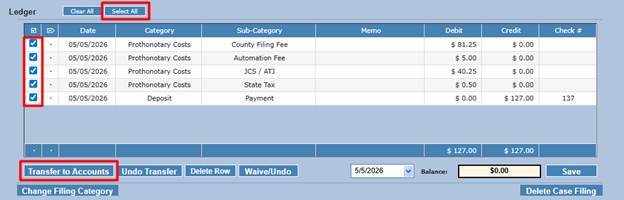
Once the deposit is saved, the user will need to transfer the costs.
Click Select All to select all of the costs.
Then click Transfer to Accounts.
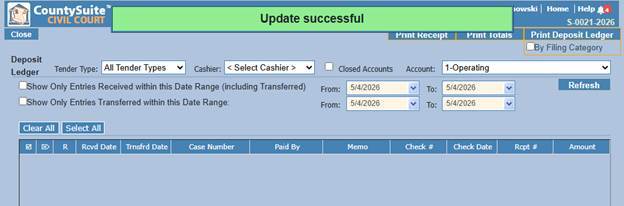
An Update Successful banner will appear at the top of the page.
Transfer icons will appear next to each cost that has been transferred.
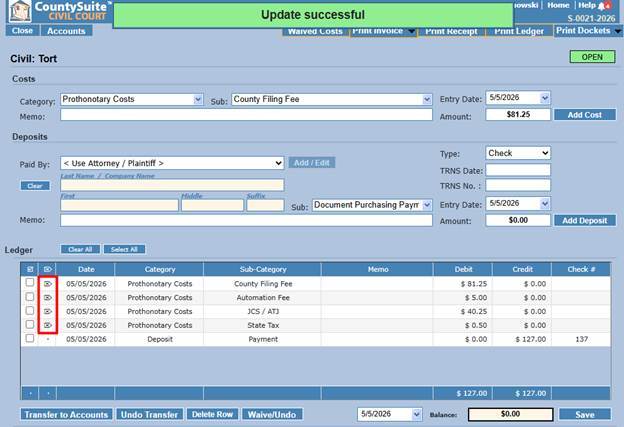
If you click on the Close button in the upper left-hand corner of the page, the application will take you back to the Deposits page.
How to Transfer Deposits to Accounts
After the user has verified that the deposit totals match, click on the Select All button.
The Transfer Date defaults to today’s date. This date may be changed, as necessary, to match the actual bank deposit date. Click on the Transfer to Accounts button to complete the process.
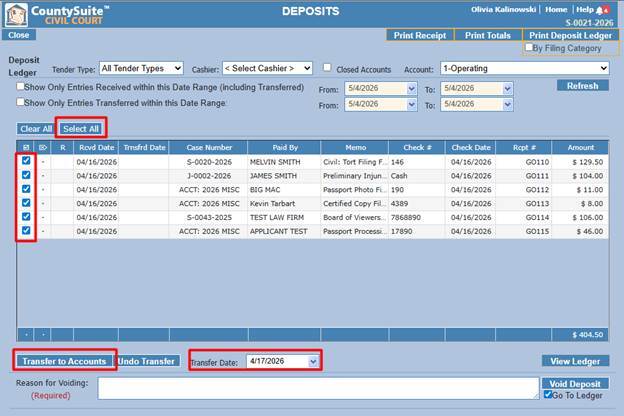
Once the deposits are transferred, they are removed from the Deposits page.
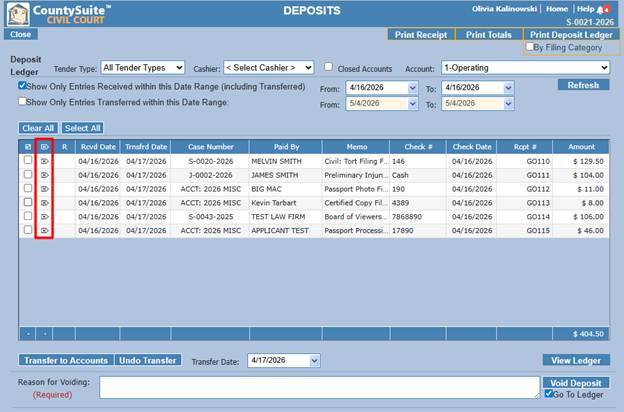
To see the transferred deposits, users can use the filters to “Show Only Entries Received within this Date Range (including Transferred) or “Show Only Entries Transferred within this Date Range”. Each transferred entry now has an arrow with an “x” inside it, right next to the check box. This means that this entry had been transferred.
How to Undo Transfer Deposits
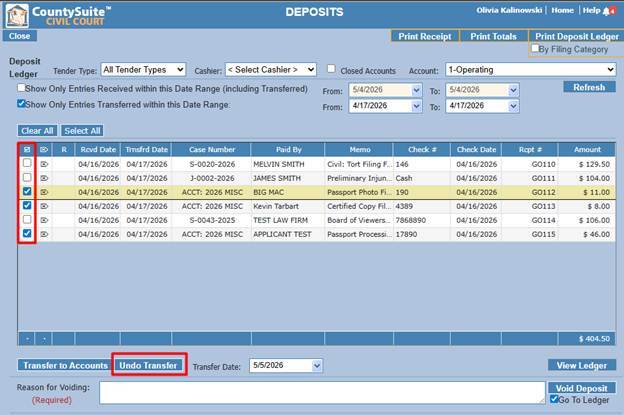
- On the Deposits page, click on the check box “Show Only Entries Transferred within this Date Range”.
- Enter a target date range.
- Click on the Refresh button. This will list all deposits that have been transferred given your target date range.
- Select the entry (or entries) you want to undo.
- Click on the Undo Transfer button.
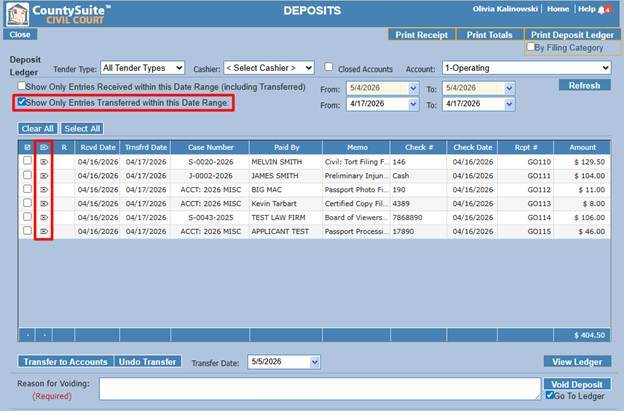
If all of the entries should be un-transferred, click the Select All button to check every entry.
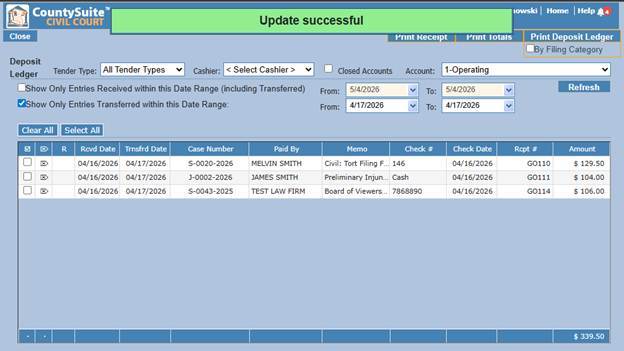
You will get a message that your update has been successful and the un-transferred deposits will be removed from the Deposits page since this view only shows entries that have been transferred on the targeted date.
Unselect the filter and click Refresh to see the deposits that were just un-transferred.
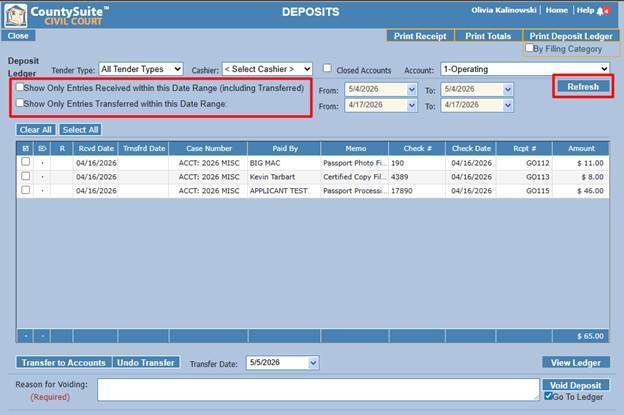
Change the Transfer Date and re-select the deposits to transfer them for the correct date.