No recent searches
Popular Articles

Sorry! nothing found for
Adding a New Call
Created by Kris Wahler, Modified on Fri, 9 May, 2025 at 11:19 AM by Kris Wahler
Adding a New Call
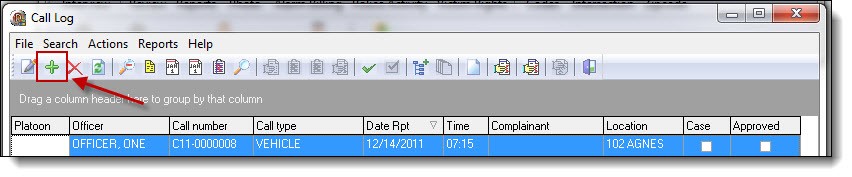
1. To create a new call, click the “Add” button from the Call Log grid.
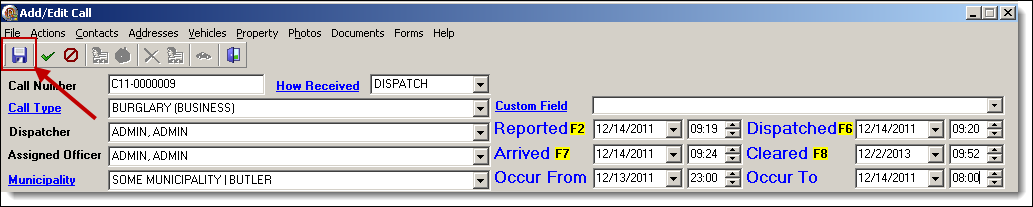
2. The top section of the Add/Edit Call window contains the Call Number, How Received, Call Type, Dispatcher, D/T Reported, D/T Dispatched, Assigned Officer, D/T Arrived, D/T Cleared, Municipality, D/T Occurred From, and D/T Occurred To fields. Using the drop down lists and/or shortcut keys, enter the corresponding information into the Add/Edit Call window
 !Did You Know?
- The current timestamp can be populated into the Date/Time fields by using the F2, F6, F7, and F8 keys, or by clicking the blue labels for the Date/Time fields.
- The blue label for Municipality, How Received, and Call Type and Custom Field allow administrators to configure the items that display in the corresponding drop down lists.
- Selecting a value in the Custom Field drop down list will allow that value to be printed on the Call Summary Report.
- For agencies that are part of a CADLink integration, a field called “Dispatch Number” will be available above the Custom Field drop down list.
3. Save the changes to the call by clicking the “Save” button on the Add/Edit Call window.
Adding a Dispatch Location
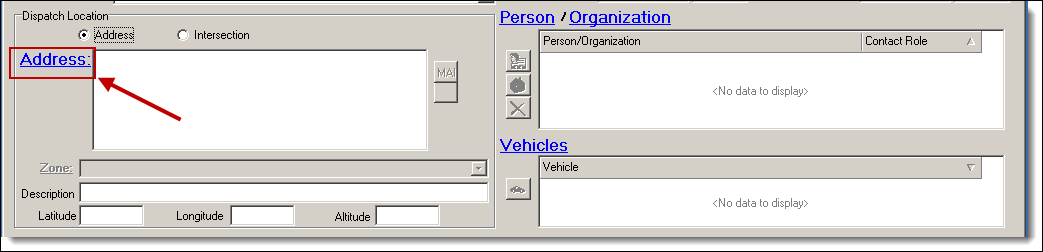
The dispatch location can be a physical address, general location, or an intersection. A physical address or general location can be added by selecting the “Address’ radio button, and clicking on the blue word “Address”. An intersection can be added by selecting the “Intersection” radio button and choosing an intersection from the drop down list. Intersections must be entered through Intersection Management prior to being available in the drop down list. For this example, a physical address will be used.
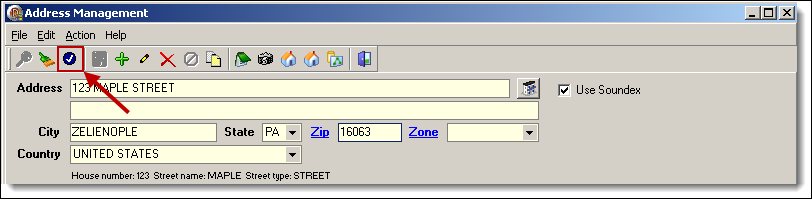
1. Click on the blue word “Address” to open Address Management.
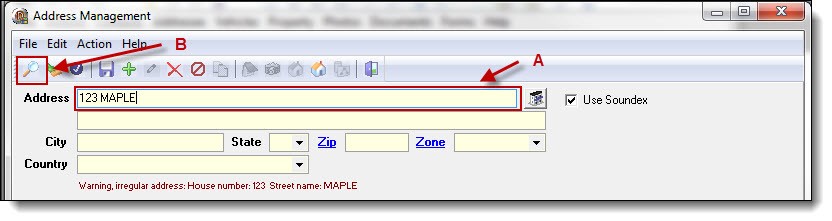
2. Enter part of the address (the house number, street name, or a combination of both) in the Address Line 1 box (A), and then click the “Search” button (B).
3. Follow steps 3a-4d from the Searching and Entering a New Address section of the Address Management chapter for details on saving a new address record or choosing an existing address record.
4. Click the “Choose” button from the Address Management window to link the address to the call.
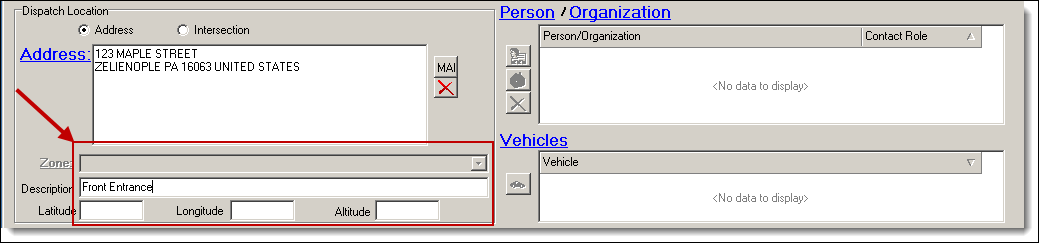
5. The address information will display in the dispatch location section of the Add/Edit Call window.
 !Did You Know?
- The Master Address Index can be accessed for the selected address from the Address drop-down menu or the button located on the Add/Edit Call toolbar.
6. Additional information such as the Zone, Description, Latitude, Longitude, and Altitude can be recorded about the dispatch location using the corresponding fields.
Linking Contacts to the Call
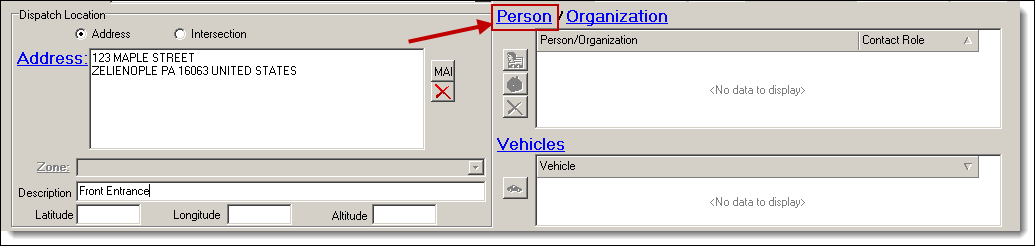
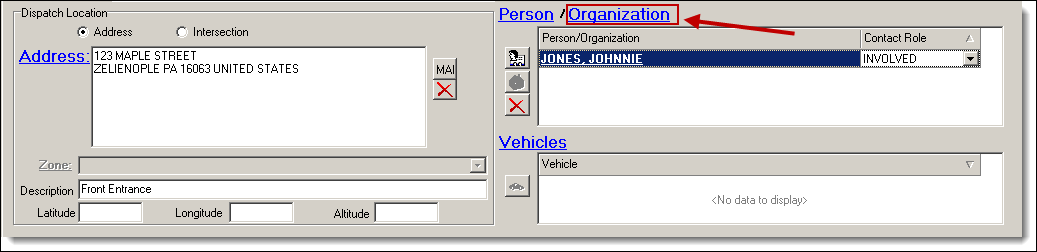
1. People and/or organizations can be added as contacts in a call. Click the blue word “Person” to open Person Management.
2. Enter part of the person’s last name, first name, or both (A), and then click the “Search” button (B) to see if the person exists in your database.
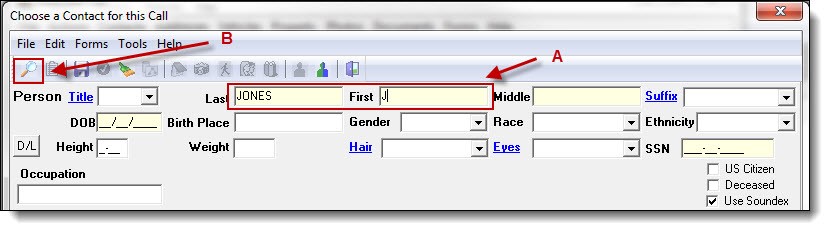
3. Follow steps 3a-4a from the Searching and Entering a New Person section of the Person Management chapter for details on saving a new person record or choosing an existing person record.
4. Once a person record has been created or chosen, click the “Choose” button at the top of the Person Management window.
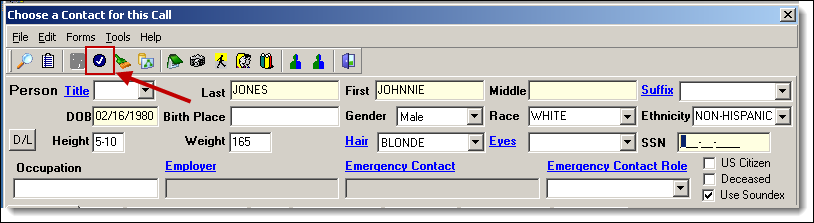
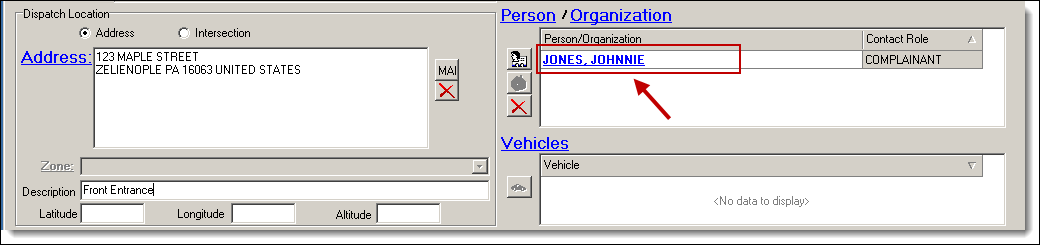
5. The person will be displayed in the Contact grid.
 !Did You Know?
- The Master Name Index, and Master Organization Index can be accessed for the selected contacts from the Contacts drop-down menu or the button located on the Add/Edit Call toolbar.
Choosing a Contact Role
*Tips:
It is required that every contact in a call have a contact role; otherwise, the call cannot be saved. The first contact entered will default to the role of “Complainant”; any other contact will have a blank role by default.
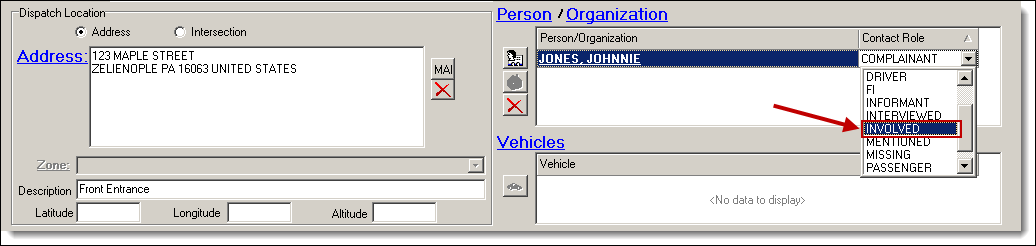
1. To change an existing role or select a contact role, click in the Contact Role box in the Contact grid.
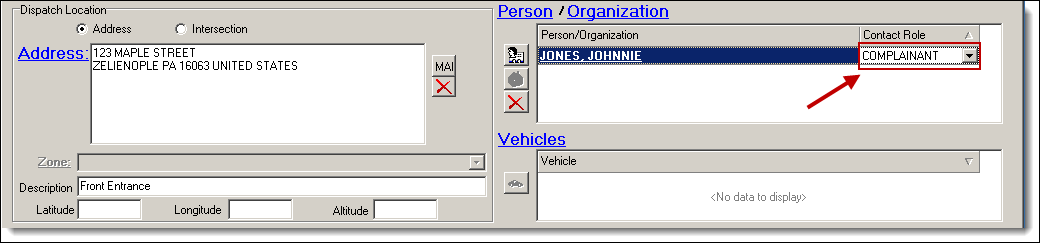
2. Select a role from the drop down list.
Adding a Secondary Contact
1. Click the blue word “Organization” to search open Organization Management.
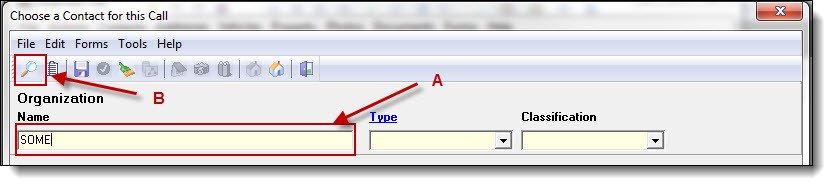
2. Enter part of the organization name (A), then click the “Search” button (B) to see if the organization exists in your database.
3. Follow steps 3a-4a from the Searching and Entering an Organization section of the Organization Management for details on saving a new organization record or choosing an existing organization record.
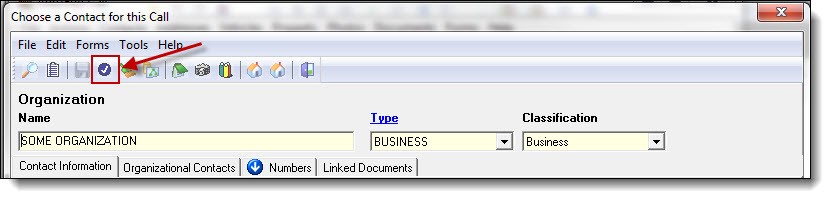
4. Click the “Choose” button at the top of the Organization Management window to link the organization to the call.
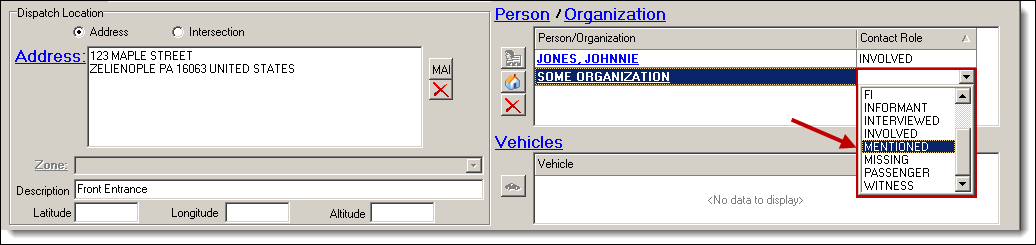
5. Choose a role for the contact.
!Did You Know?
More than one person or organization contact may be added to the call by repeating the steps in the sections above.
Entering Call Notes
*Tips:
Call notes can be typed directly into the Call Notes box. There are also “Timestamp” and “Spell check” buttons available from the Add/Edit Call window.
1. To access a larger Notes Editor window, click the blue words “Call Notes”.

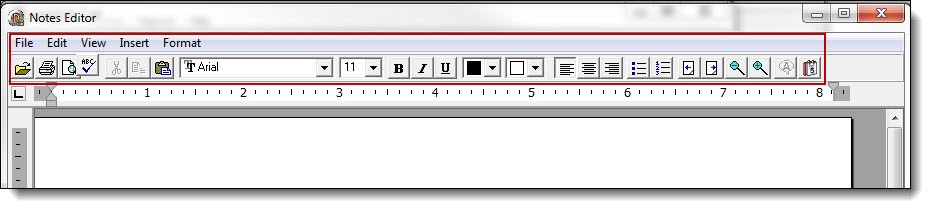
2. Formatting options are available at the top of the Notes Editor.
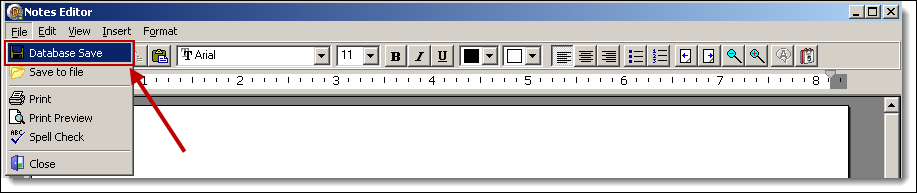
3. Save the call notes by selecting “Database Save” from the File drop down menu.
4. Exit the Call Notes Editor by clicking the “X” in the corner of the window.

5. Click the “Save” button in the upper left-hand corner of the Add/Edit Call window to save all of the recent changes to the call.
 !Did You Know?
- Press Release information can be entered in the same manner as call notes by selecting the Press release tab at the bottom of the Add/Edit Call window.
- Agencies that have a CADLink integration will see a third tab called “Dispatch Record”. This tab contains a summary of the information entered into the CAD software for the incident.
!
Was this article helpful?
That’s Great!
Thank you for your feedback
Sorry! We couldn't be helpful
Thank you for your feedback
Let us know how can we improve this article!
Feedback sent
We appreciate your effort and will try to fix the article
X