No recent searches
Popular Articles
Sorry! nothing found for
Adding Case Contacts
Created by Russ Hartle, Modified on Thu, 22 May, 2025 at 3:51 PM by Russ Hartle
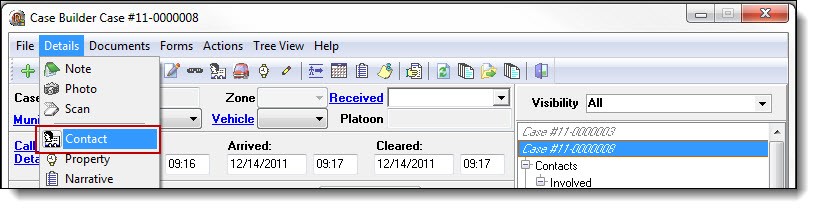
1. To add or view contacts associated with the case, select “Contact” from the Details drop down list.
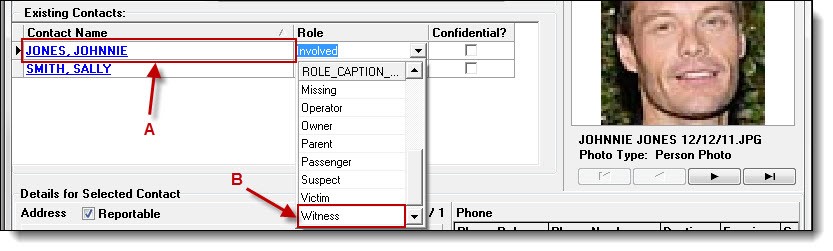
2. Contacts entered into the call will display in the Contacts window. The contacts will be listed with the role that was selected from the call details. To change a contact’s role, highlight the contact (A), and then click on the “Role” field to select a choice from the drop down list (B).
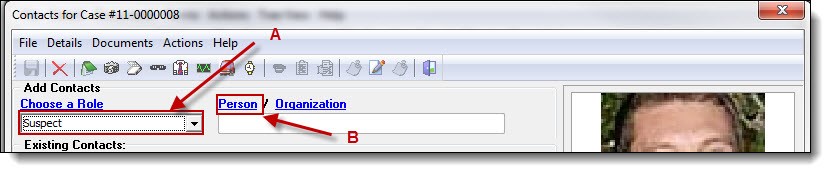
3. To add a new contact, select a contact role (A), and then click on the word “Person” (B).
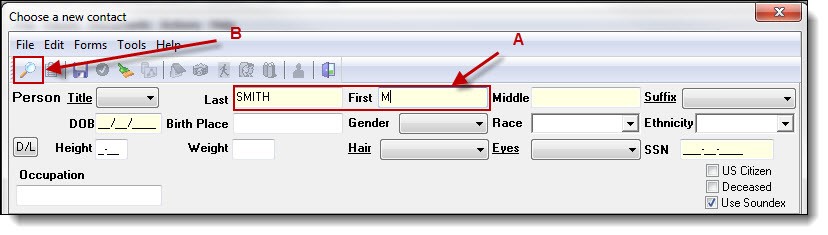
4. Enter part of the person’s last name, first name, or both (A), then click the “Search” button (B) to see if the person exists in the database.
5. Follow steps 3a-4a from the Searching and Entering a New Person section of the Person Management chapter for details on saving a new person record or choosing an existing person record.
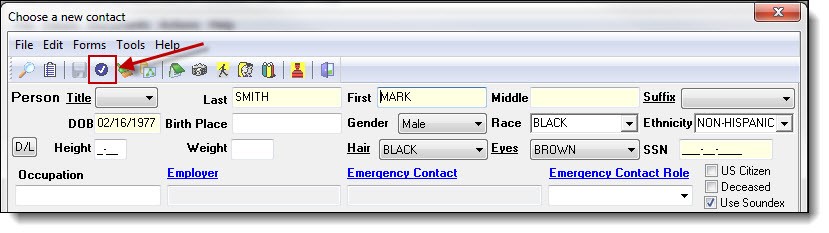
6. Once a person record has been created or chosen, click the “Choose” button at the top of the Person Management window.
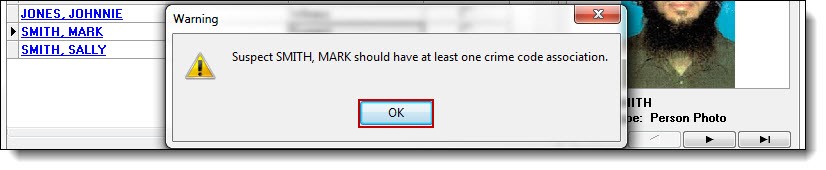
7. If you use the role of Victim, Suspect, or Arrestee, you will be prompted with a warning that the contact needs a crime code association. Click the “OK” button in the Warning box.
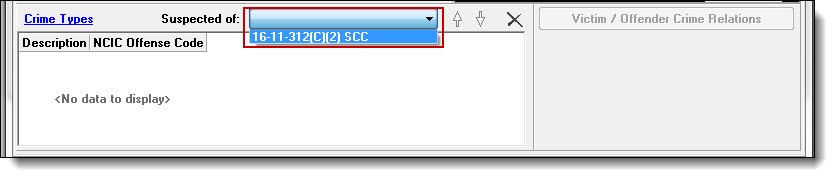
8. Crimes entered from the main Case Builder window will be available to link to the contact. Select at least one crime to associate with the contact from the drop down list.
 !Did You Know?
- The crime association drop down list is labeled according to the role that was selected for the contact. It can display “Suspected of”, “Victim of”, or “Arrested for”.
- Choosing the role of Arrestee will display the Date Arrested and Arresting Officer fields to the right of the contact’s crime associations.
- Repeat steps 1-8 above for any additional contacts that need to be entered into the case.
- If an organization contact needs to be entered, select a role, then click “Org” rather than “Person”.
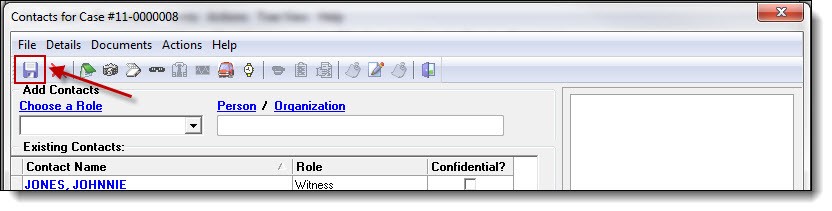
9. Once all of the contacts have been added to the case and associated with the correct crimes, click the “Save” button (if active), to save any outstanding changes.
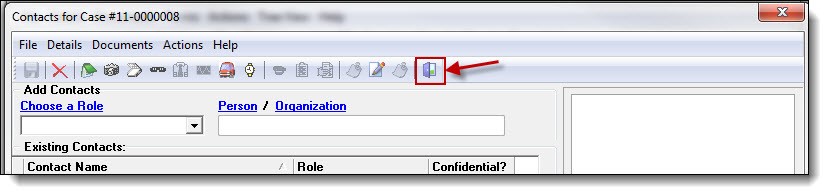
10. Click the “Exit” button to exit the Contacts window and return to the main Case Builder window.
Was this article helpful?
That’s Great!
Thank you for your feedback
Sorry! We couldn't be helpful
Thank you for your feedback
Let us know how can we improve this article!
Feedback sent
We appreciate your effort and will try to fix the article
X