No recent searches
Popular Articles

Sorry! nothing found for
Creating a Wanted Poster
Created by Russ Hartle, Modified on Thu, 11 Sep, 2025 at 3:43 PM by Russ Hartle
Creating a Wanted Poster
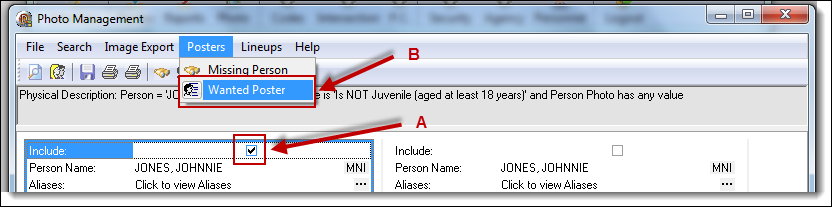
1. From the search results, select the check box of the photo you wish to include on the poster (A), and then select the “Wanted Poster” button from the Posters drop down list (B).
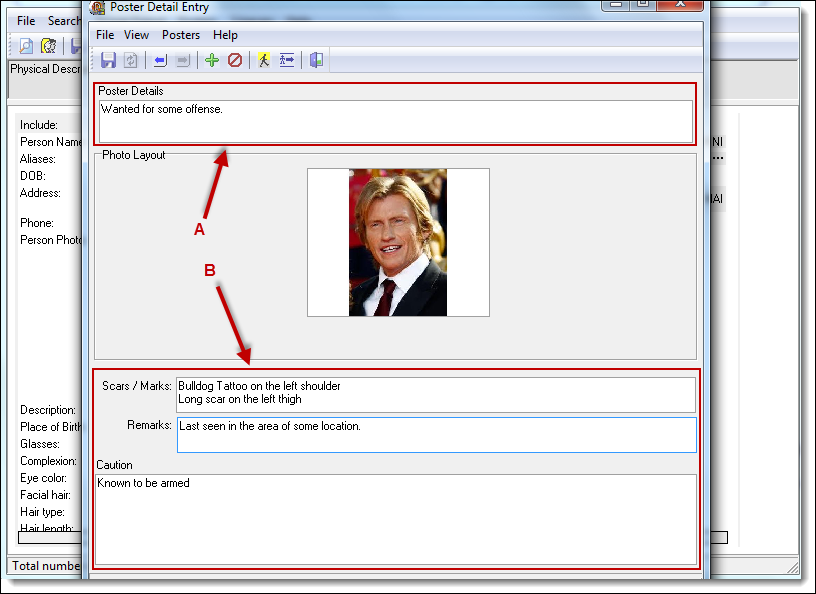
2. Enter the Poster Details field (A) and any “Scars/Marks”, “Remarks”, and “Caution Information (B).
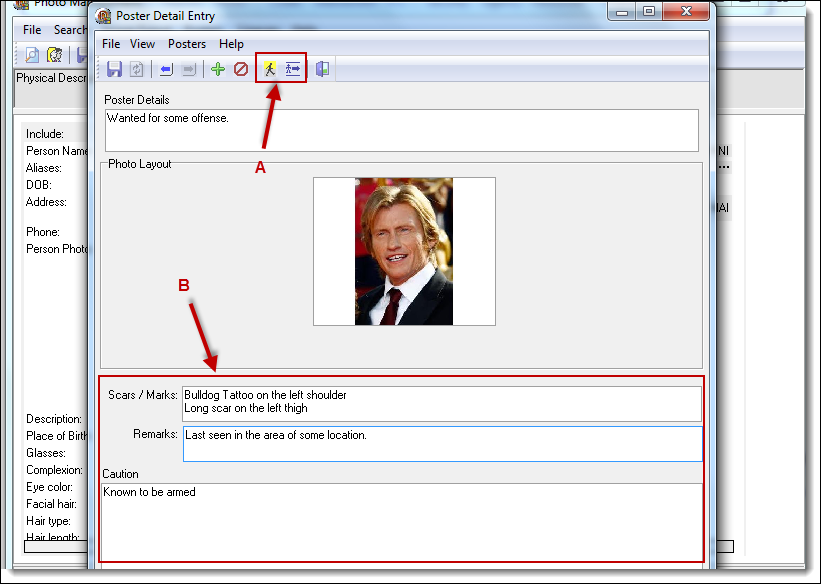
3. There are buttons for Physical Description and Aliases (A) available from the toolbar. These buttons contain information regarding details about the person and can be copied/pasted to the “Scars/Marks”, “Remarks”, and “Caution” sections (B) of the poster.
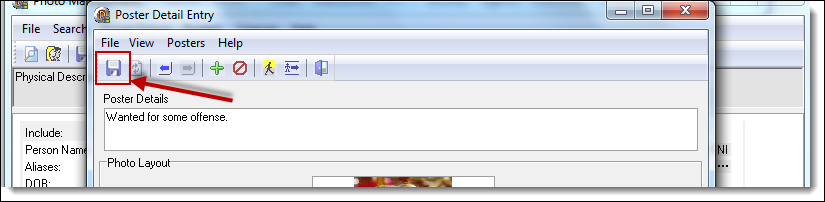
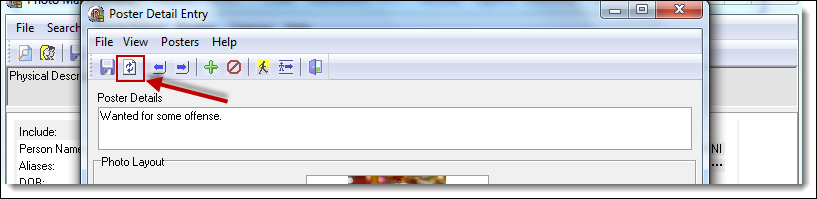
4. Once the poster details have been entered, click the “Save” button.
5. To preview the poster, click the “Preview” button.
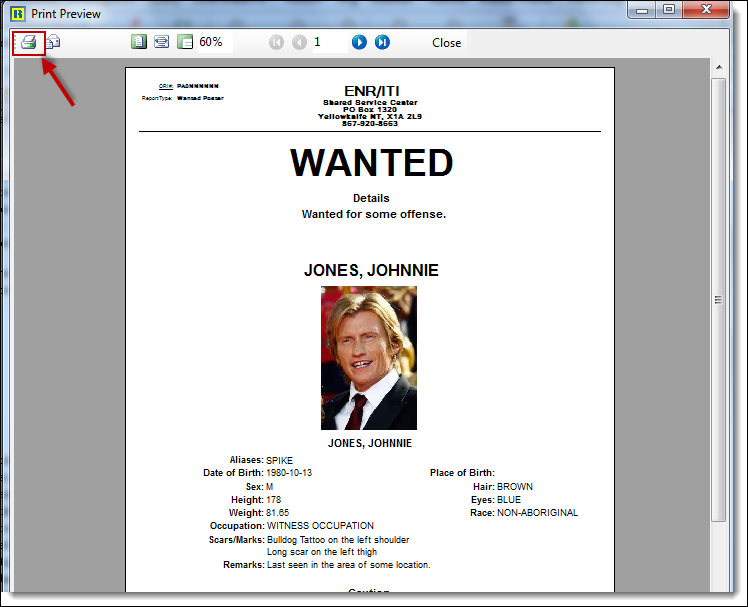
6. From the Print Preview window, click the “Print” button to print the Wanted Person poster.
 !Did You Know?
- You can select up to 3 photos from the results to print on a Wanted Person poster.
- If a Wanted Person poster already exists for the person, you can create additional posters by clicking the “Add” button from the Poster Detail Entry window.
- When 3 photos are selected, the user has the ability to choose which picture displays on the left, center, and right side of the poster.
- There are buttons on the Poster Detail Entry window to navigate between posters when more than one poster is present.
Was this article helpful?
That’s Great!
Thank you for your feedback
Sorry! We couldn't be helpful
Thank you for your feedback
Let us know how can we improve this article!
Feedback sent
We appreciate your effort and will try to fix the article
X