No recent searches
Popular Articles

Sorry! nothing found for
Example Queries
Created by Russ Hartle, Modified on Fri, 20 Jun, 2025 at 2:40 PM by Russ Hartle
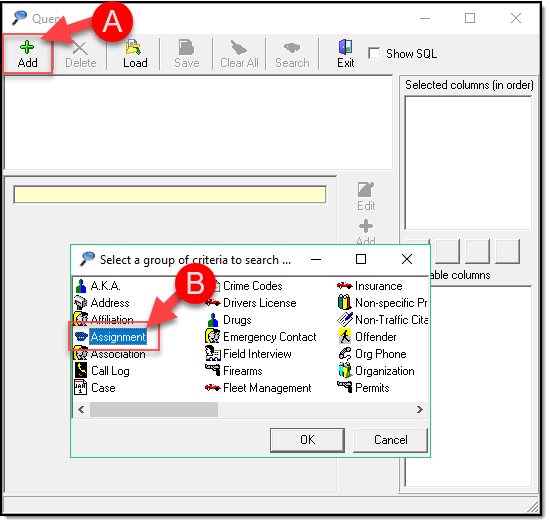
Example 1: We will be looking for All Pending or Rejected Assignments to Officers.
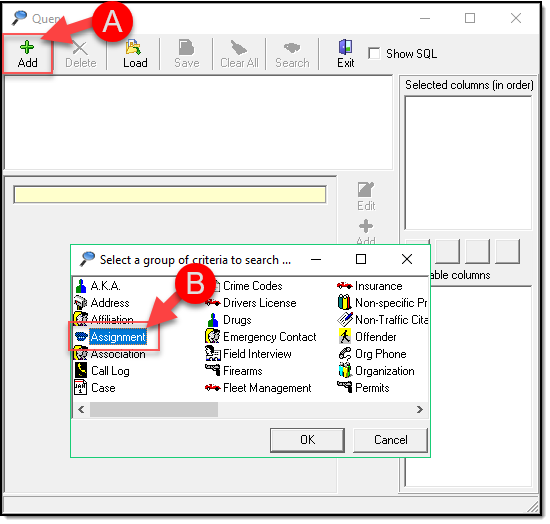
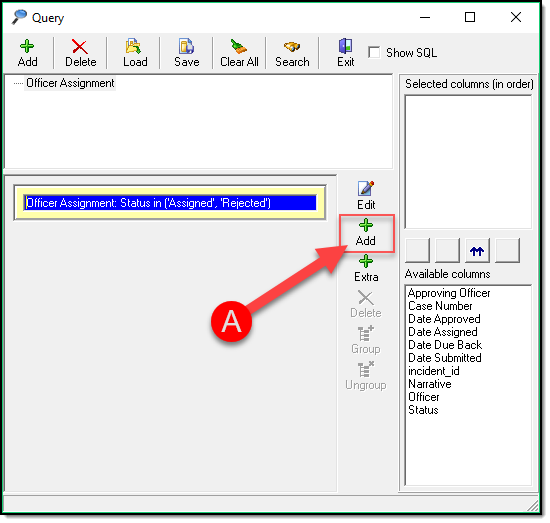
- Add (A) and choose Assignment (B)
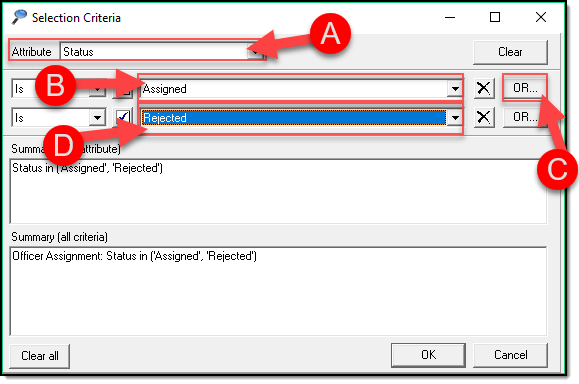
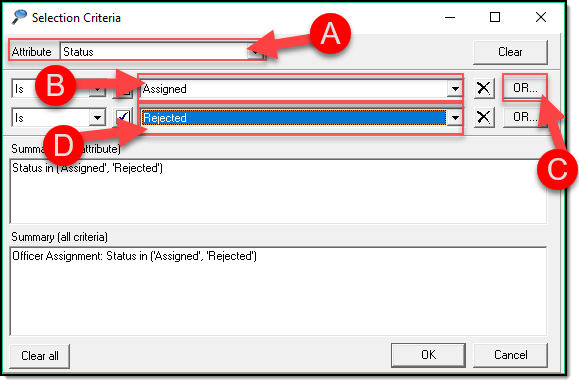
- Choose Status (A) as your attribute, Assigned (B), Click the OR button ( C ) and choose Rejected (D)
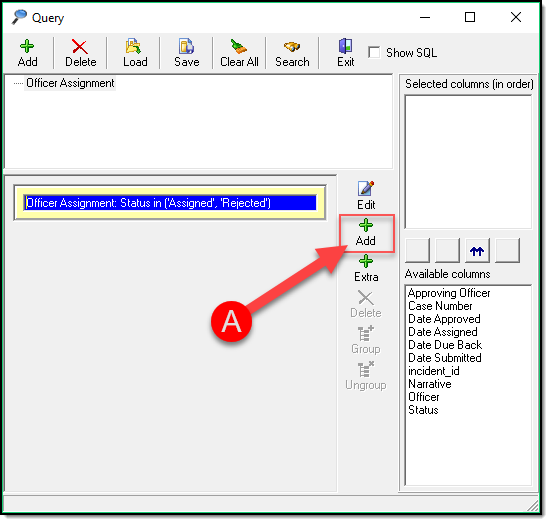
- We now will add a second Attribute of Officer by clicking Add (A)
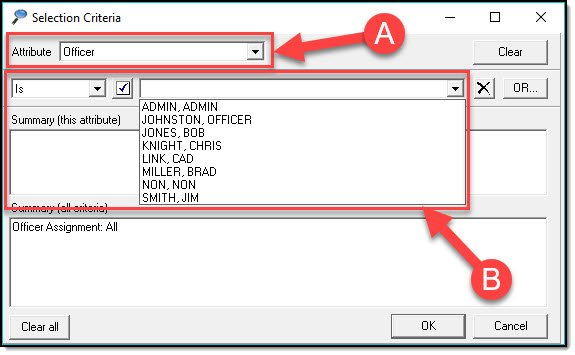
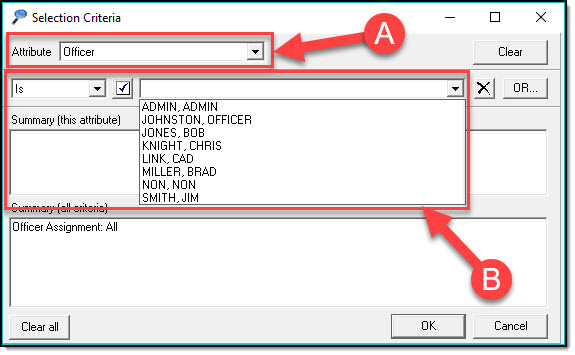
- Choose Officer (A) as your attribute and in the Is section (B) select an Officer name from the drop down and click OK.
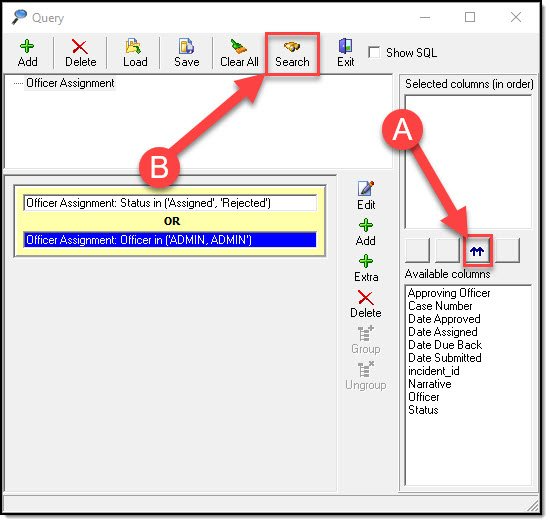
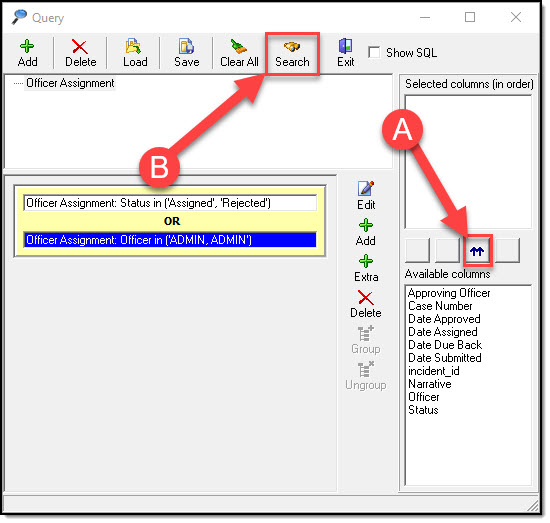
- Click the double UP Arrows (A) to choose all columns and hit Search (B)
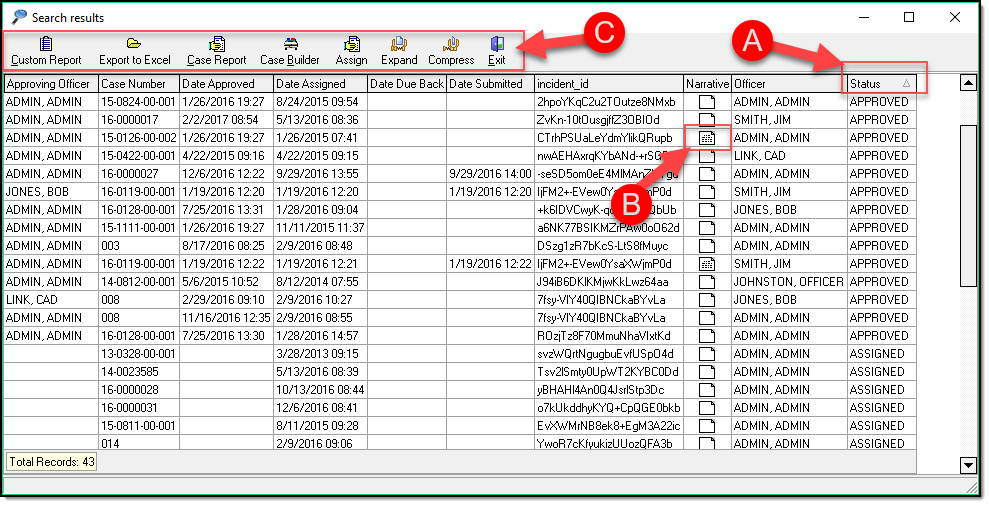
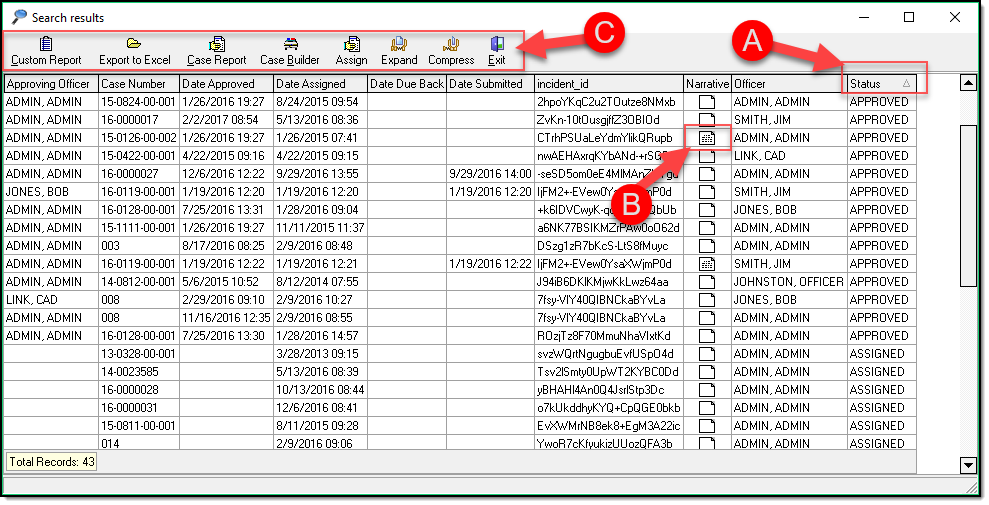
- The results will populate in your Grid similar to what is seen below. Note that you can sort by clicking the Column Header (A), you can preview narratives by hovering over the text box (B), and you can Work with the Query Results using the Toolbar Icons ( C )
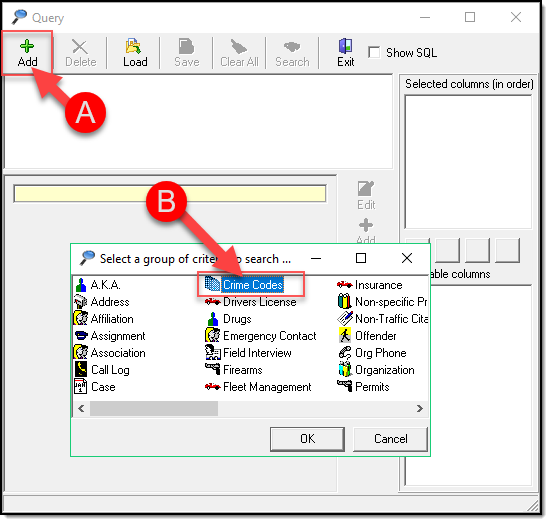
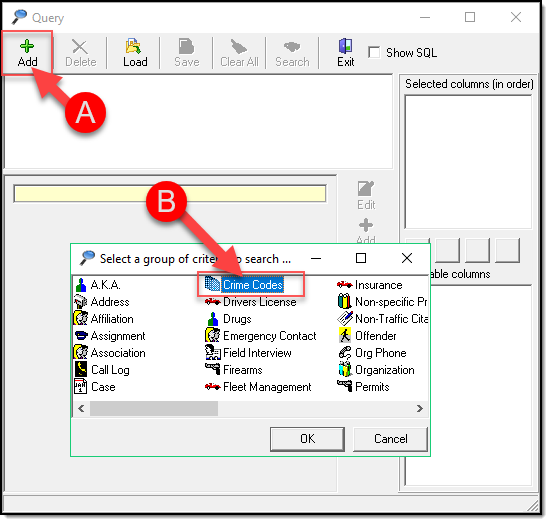
Example 2: We will be looking for all Cases that have a certain Crime Code Section in a defined time frame
- Click Add (A) and choose Crime Code (B)
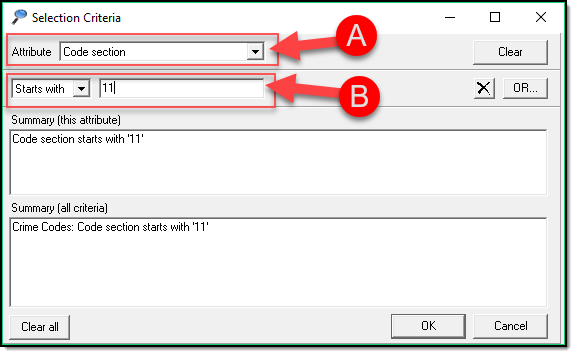
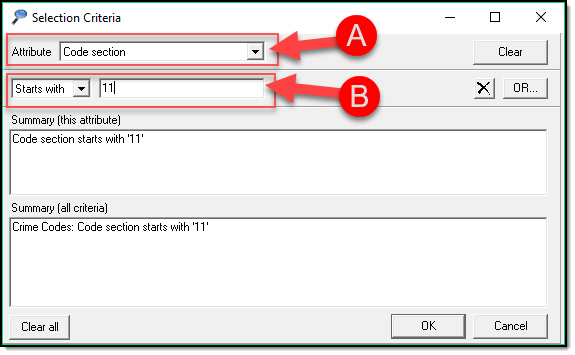
- Choose the Attribute of Code Section (A) and Enter a Criteria (B) and click OK. For this example, I will be using starts with 11. You have various options in the drop down list other than starts with.
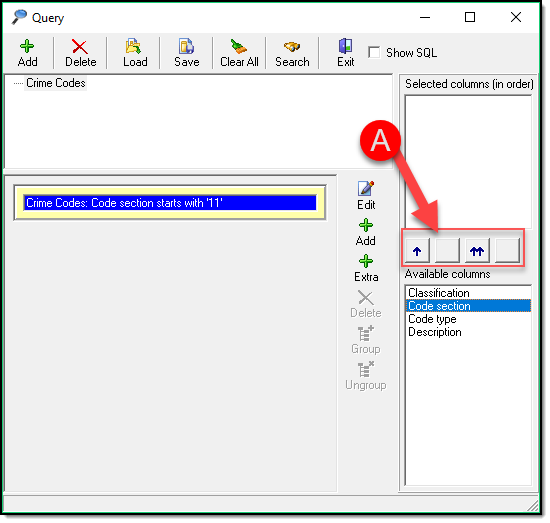
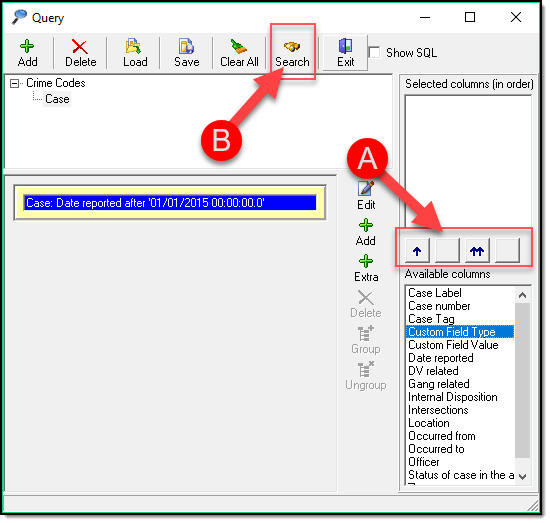
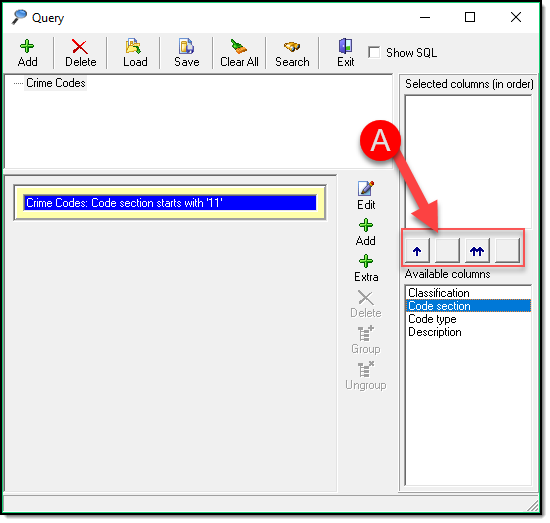
- Use the Up Arrow Selection (A) to choose what columns will be visible (for this example I will use the double Up Arrow to select all columns)
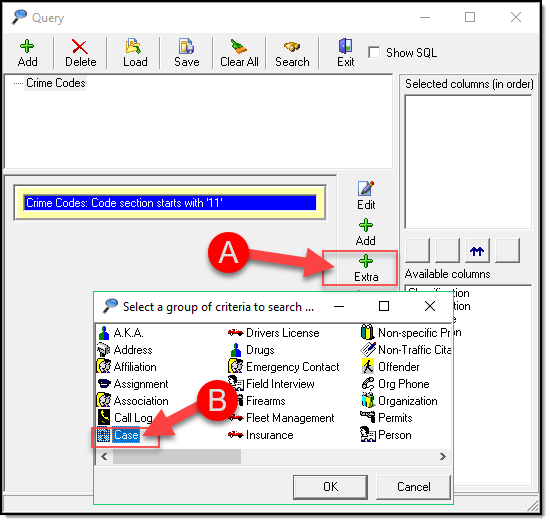
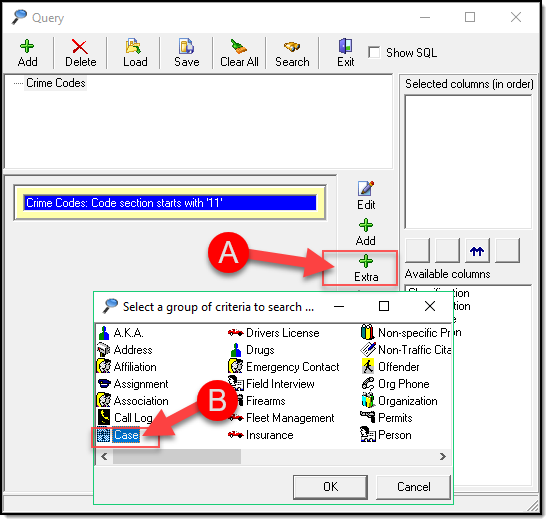
- Click Extra (A) to add a second Search Criteria and Choose Case (B) and click OK.
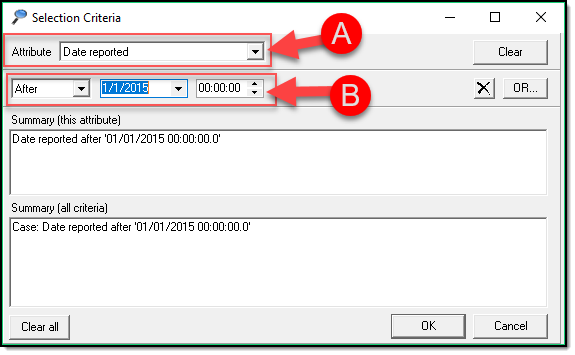
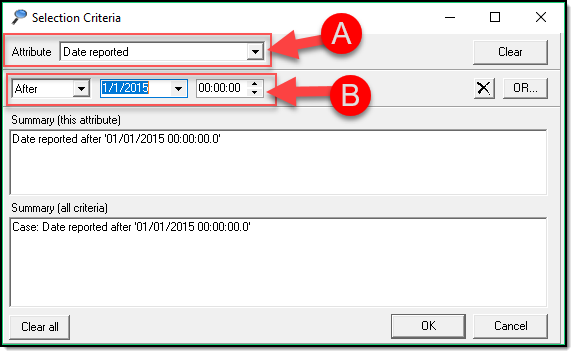
- Change the Attribute (A) to Date Reported and define the Date Criteria (B) and click ok. (for this example we will be looking at a Date Criteria that is after January 1st of 2015 at 00:00:00 hours
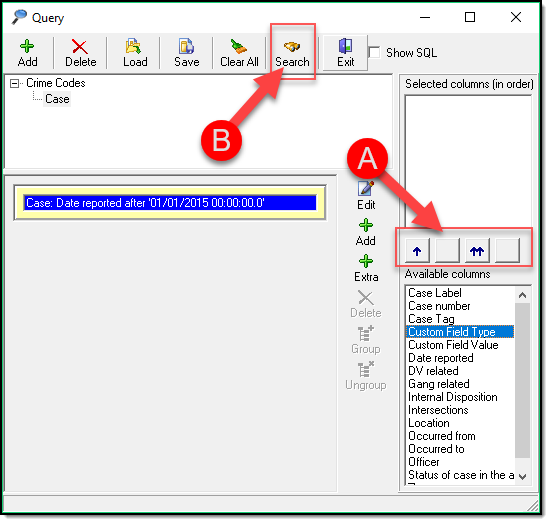
- Use the Up Arrow Selection (A) to choose what columns will be visible (for this example I will use the double Up Arrow to select all columns) and click Search (B)
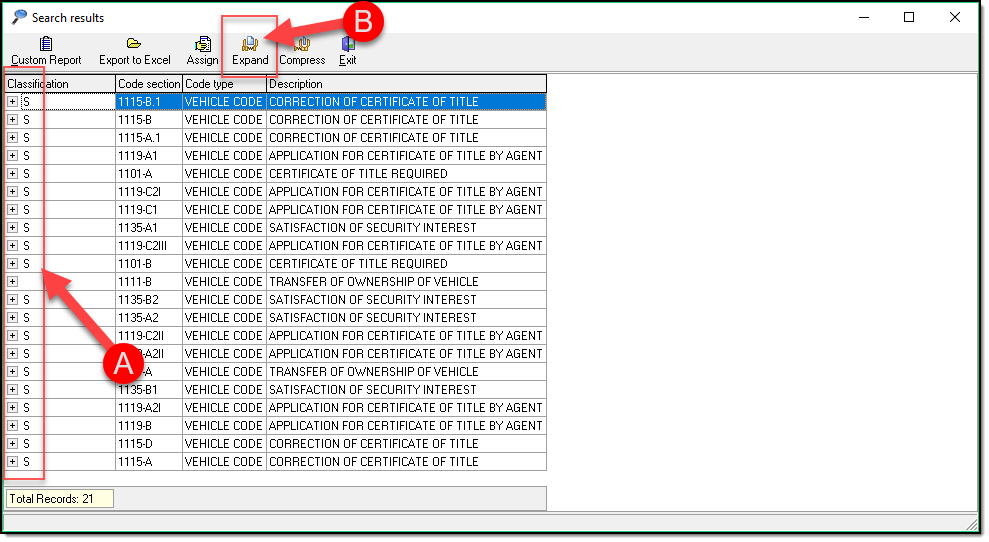
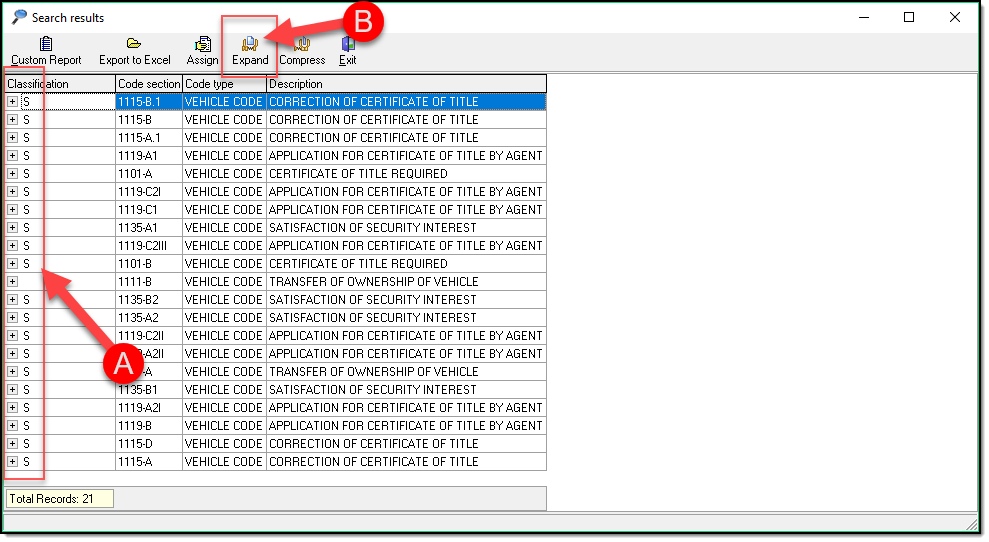
- Your initial results will look as if it only returned the Code Section. However, if you notice the PLUS sign (A) in the left-hand column this indicates there are more details available. This is because we did a multi-layered Query by adding the Extra Criteria. You can now Click (B) to expand your results.
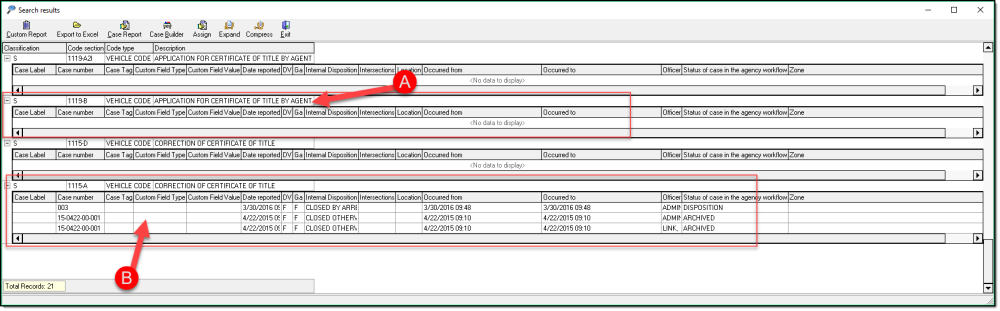
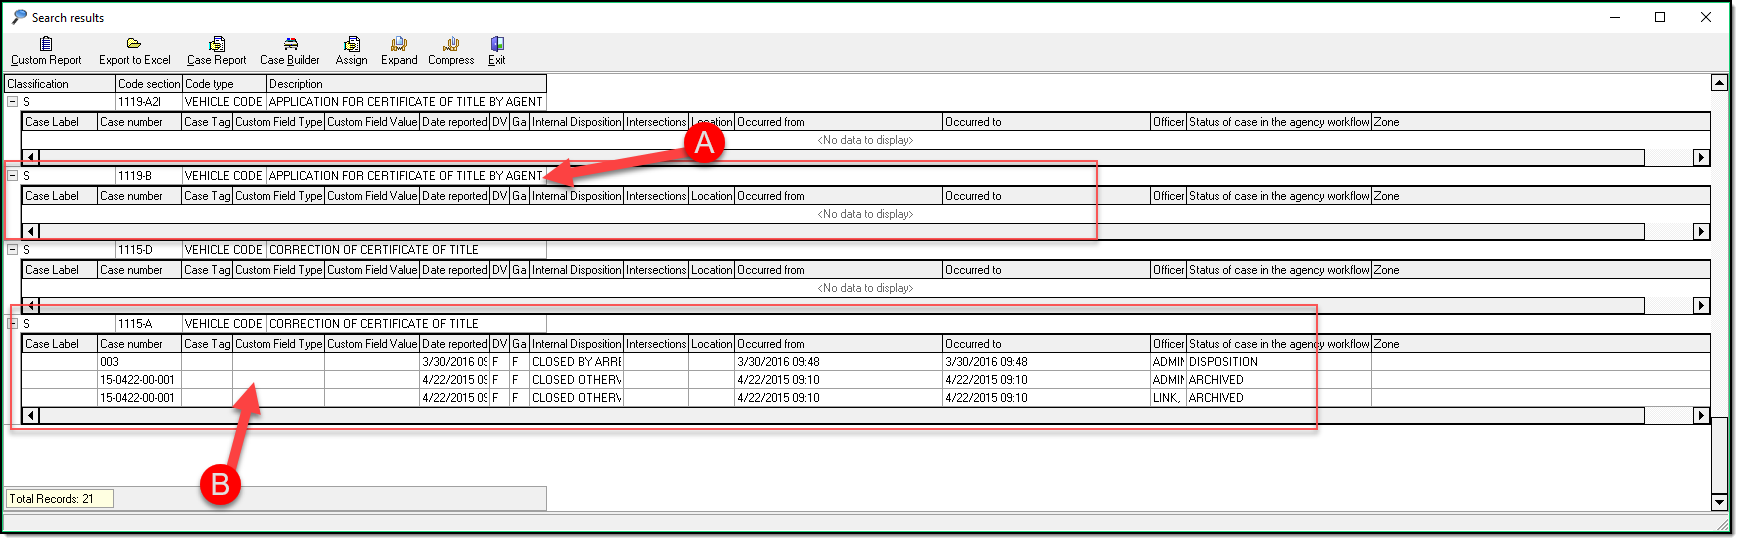
- With your results expanded you can now see that some Code Sections do not contain any Case Data under them (A) However any that do have Case Data will now have it listed under the Code Section similar to (B). With a Multi-Layer Query, you will need to follow the Steps in the Custom Reports Section to be able to print your data.
Was this article helpful?
That’s Great!
Thank you for your feedback
Sorry! We couldn't be helpful
Thank you for your feedback
Let us know how can we improve this article!
Feedback sent
We appreciate your effort and will try to fix the article
X