No recent searches
Popular Articles

Sorry! nothing found for
Getting Started/Prerequisites
Created by Russ Hartle, Modified on Thu, 3 Apr, 2025 at 3:18 PM by Russ Hartle
The Alarm Billing Module is for managing false alarm billings. False alarms are registered in Call Log whenever you choose a Call Type that has been associated with an alarm event.
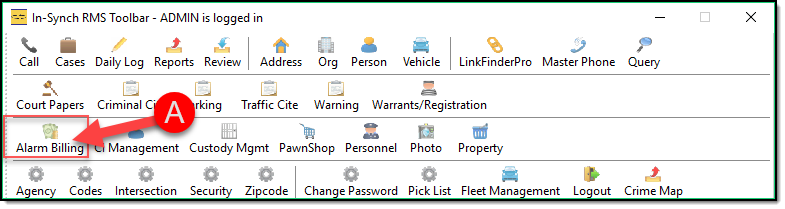
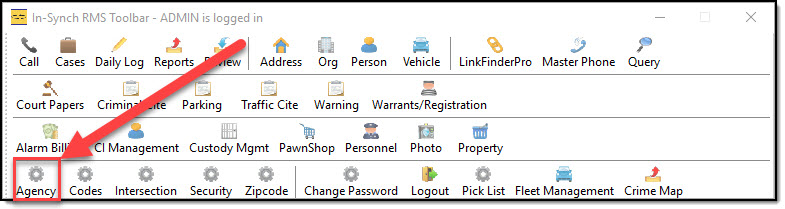
To Open click the Alarm Billing Icon (A) on the main RMS toolbar.
There are several things that need to be configured before you can begin using the Alarm Billing module.
Configure Call Triggers
First, you must set triggers in Call Log, for the false alarm events that you wish to bill.
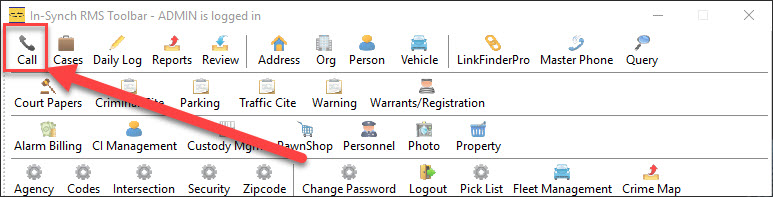
1. Launch Call Log by pressing the Call Log button on the main RMS toolbar.
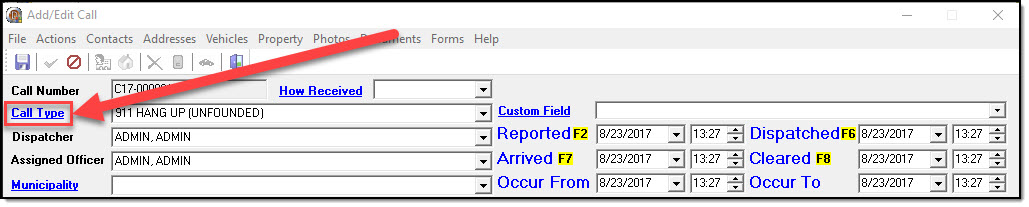
2. Select, and edit an existing call (A), or add a new call (B).

3. Click the blue hyperlink for Call Type, to open the Call Type Management window.
4. Select an existing Call Type (A), or add a new Call Type (B).
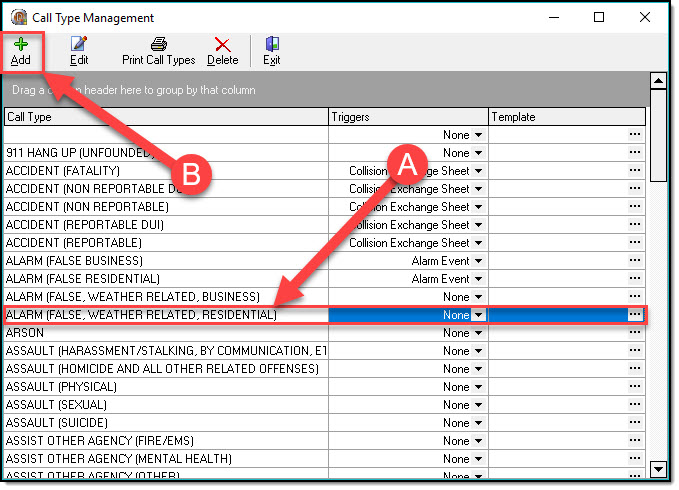
5. In the Trigger field, use the Drop Down list to check Alarm Event (A), then close Call Type Management (B), and the Add/Edit call window (C.).
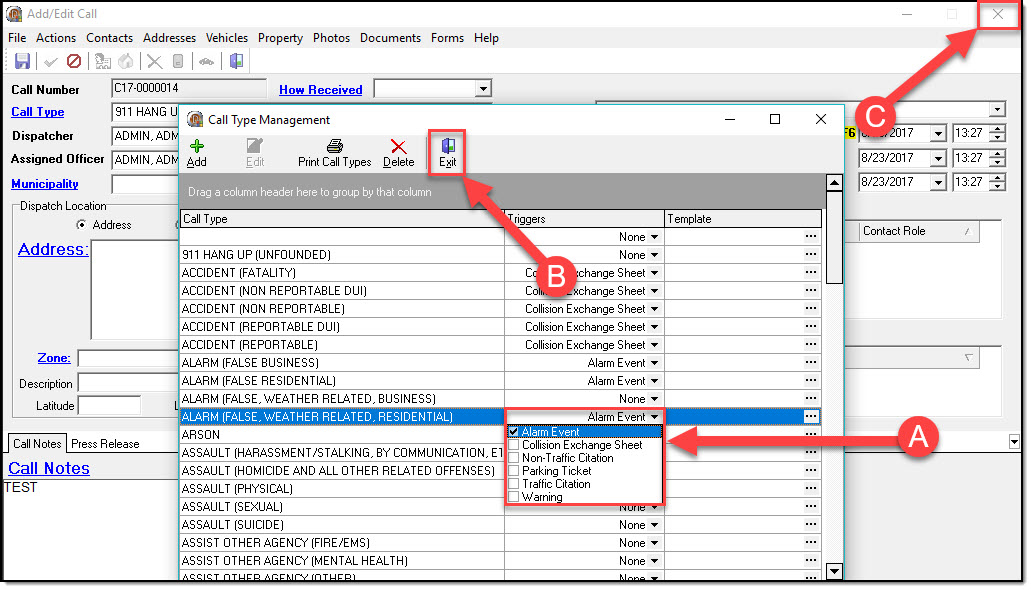
!Did You Know?
The RMS System comes with two call types predefined as ‘Alarm Events’. They are Alarm (False Business), and Alarm (False Residential).
6. Once the Alarm Call Types are set, be sure to inform the users, so they use the appropriate Call Types in their calls for service.
Configure Fine Maintenance
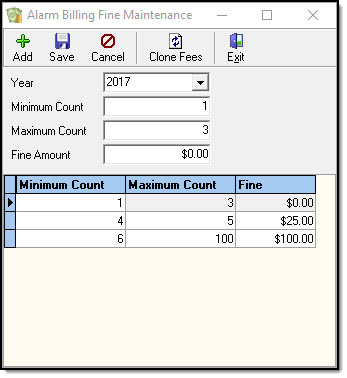
The fine tiers need to be configured, so the system knows at what point to stop issuing warning letters, and start generating fine letters. Here is an example. An agency sends a warning for the first 3 false alarms in a year, charges a 25 dollar fine for the next two fines, and 100 dollars for every fine over 5. Here is how this would be set up in the RMS.
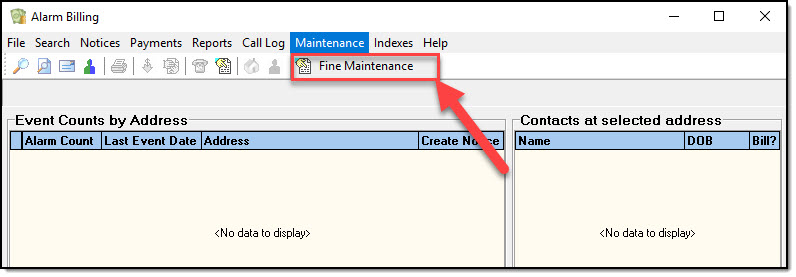
1. From the Alarm Billing Module, choose the Maintenance drop down, and select ‘Fine Maintenance’.
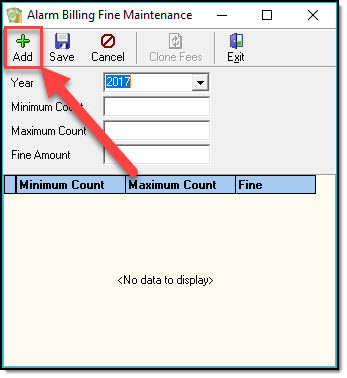
2. With Alarm Billing Fine Maintenance open, press the Add button.
3. Select the year (it defaults to the current year), the minimum count, maximum count, and the fine for that level (A), and then press the Save button (B).
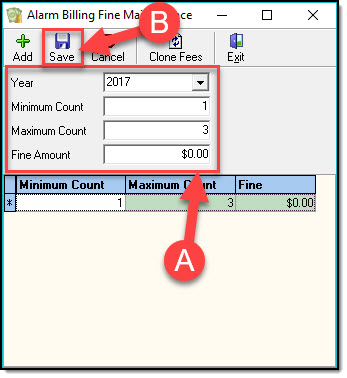
4. Repeat steps 2 and 3 for each fine tier that needs to be defined. This is how the fine tiers would look for our example.
Configure Alarm Grace Period
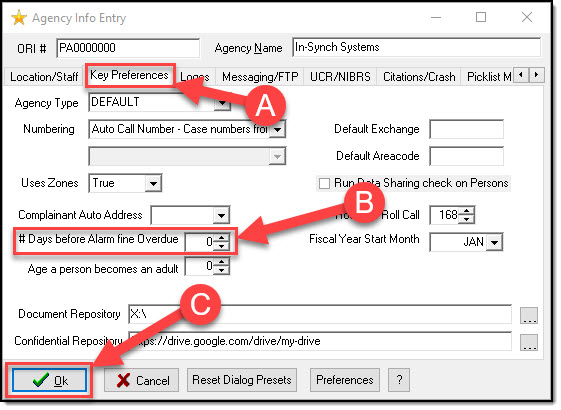
Agencies often give a grace period from when the fine is due, till when it becomes overdue, and thus incurs additional penalties. This can is how to set that grace period in the RMS system.
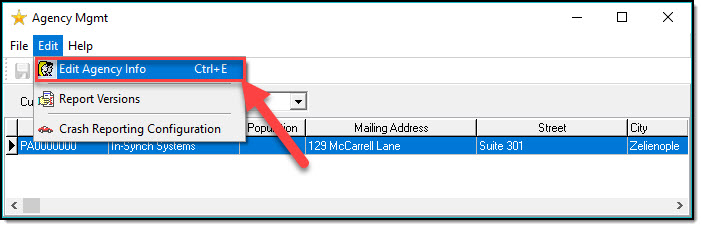
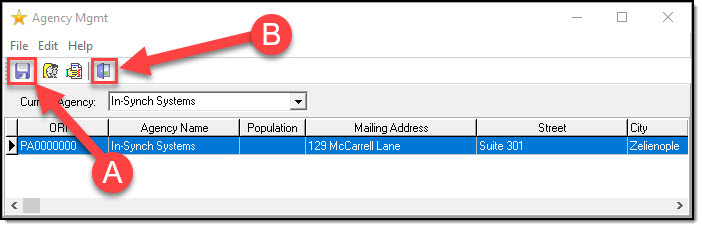
1. Launch Agency Management from the RMS Toolbar by pressing the ‘Agency’ button.
2. Open the Agency Info, by select ‘Edit Agency Info’ from the Edit drop down.
3. On the Agency Info Entry form, select the Key Preferences tab (A), and then either type or use the arrows to set the ‘# Days before Alarm fine Overdue’ (B). When finished, press the Ok button (C.).
4. On the Agency Management screen, press the Save button to save the changes (A), and then exit the module with the Exit button (B).
Warning Designer
The In-Synch RMS has a default Warning letter built into the system. This letter can be edited to meet the needs of an agency. The Warning Designer is used to edit this letter.
!Did You Know?
To save a custom Warning letter, the RMS system needs a ‘Custom_Reports’ folder in the In-Synch directory.
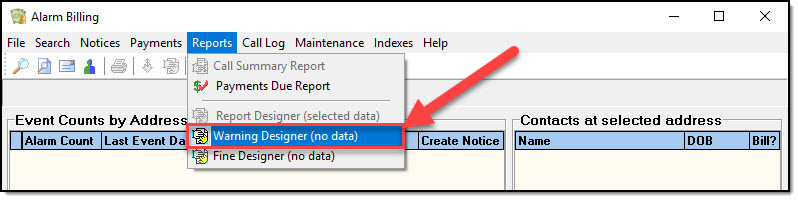
1. From the Reports Drop down, select Warning Designer.
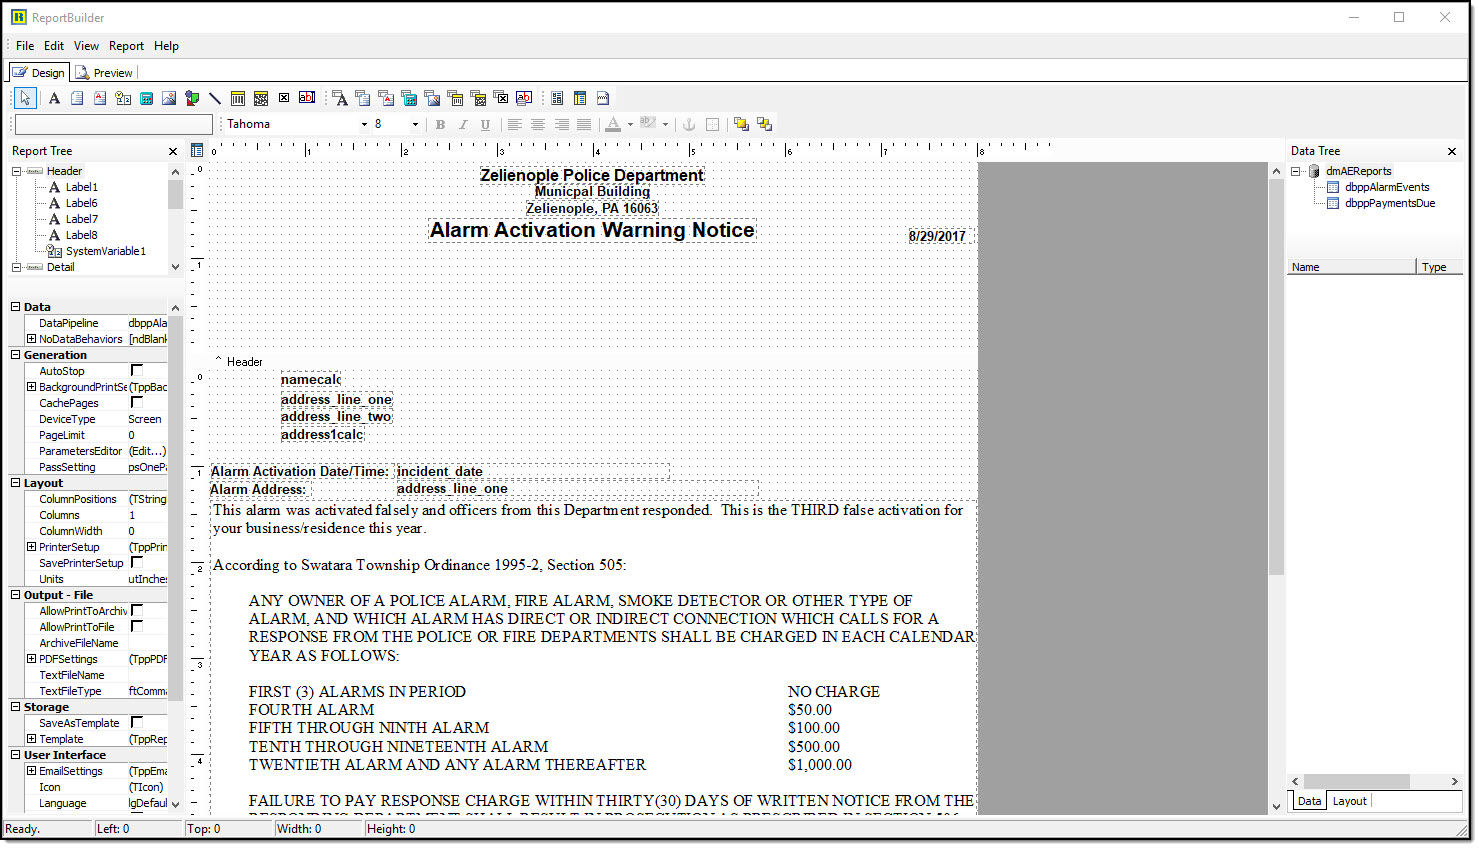
2. This opens the ReportBuilder in Design mode. Some of these fields pull data from the database, others are static, and can be edited.
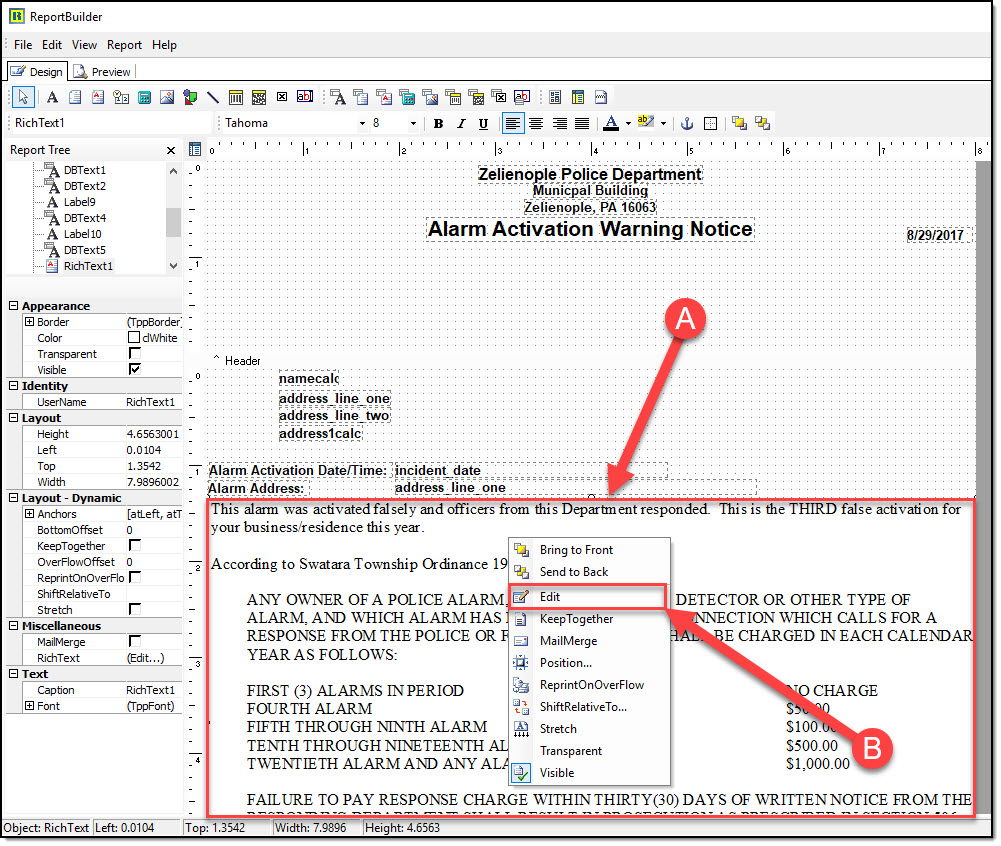
3. To edit the main body of the Warning letter, select the text field (A), then right-click to bring up the context menu, and select edit (B).
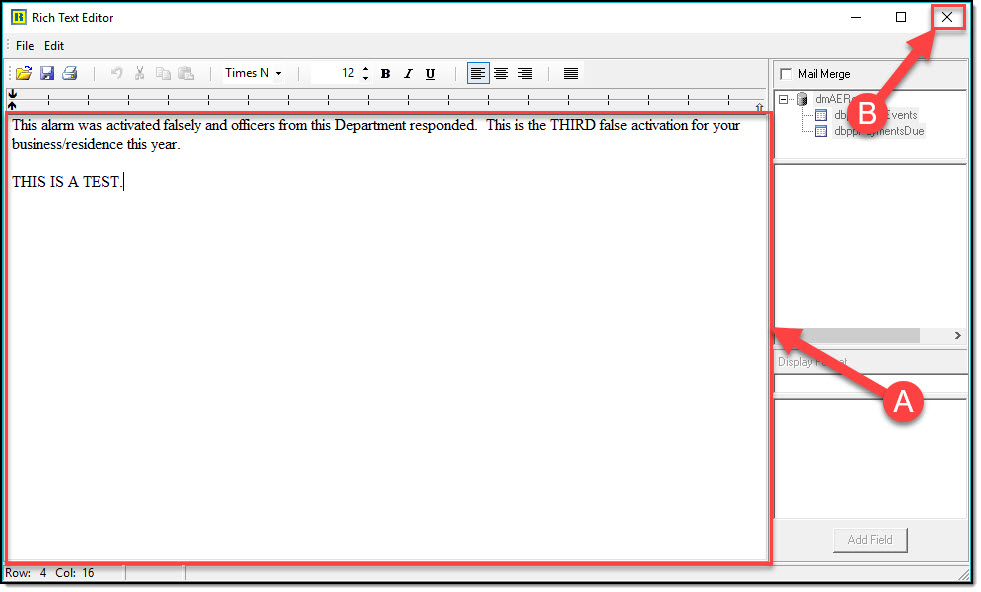
4. This opens the Rich Text Editor. Edit the text (A), and then press the exit button (B). On the pop-up window, say ‘Yes’ to save your changes.
5. Other fields can be moved by dragging and dropping them to where you would like them to show up on the Warning letter.
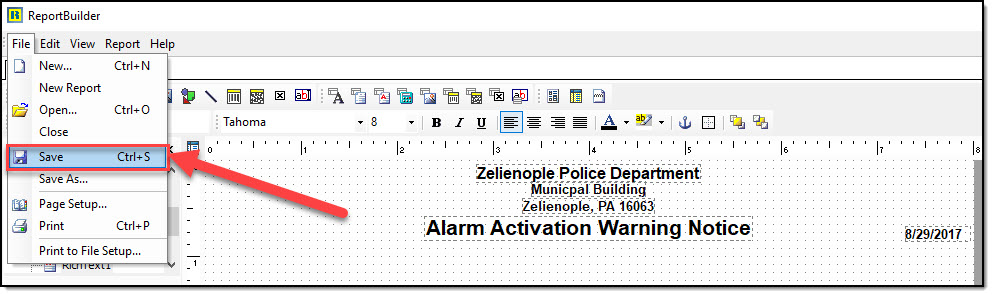
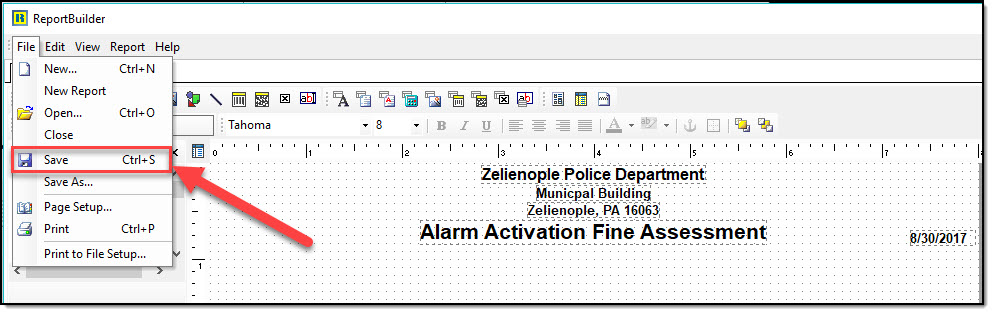
6. Once the changes have been made, select ‘Save’ from the File drop down menu.
*Tips:
If a field is bold in the ReportBuilder window, then it is not a Rich Text Field that can be edited. Call the In-Synch Help Desk to find out if, and how one of these fields might be edited.
Fine Designer
Fine Designer operates the same as the Warning designer. It allows an agency to configure a Fine letter, to be generated when enough false alarms have been accumulated by an individual or business.
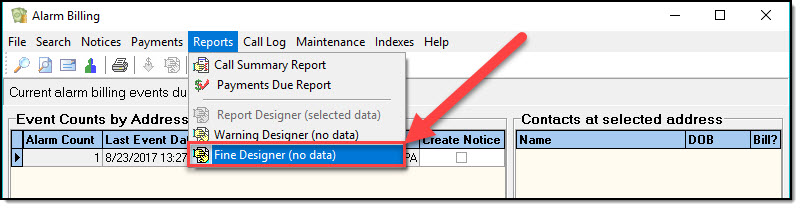
1. From the Reports drop down, select Fine Designer.
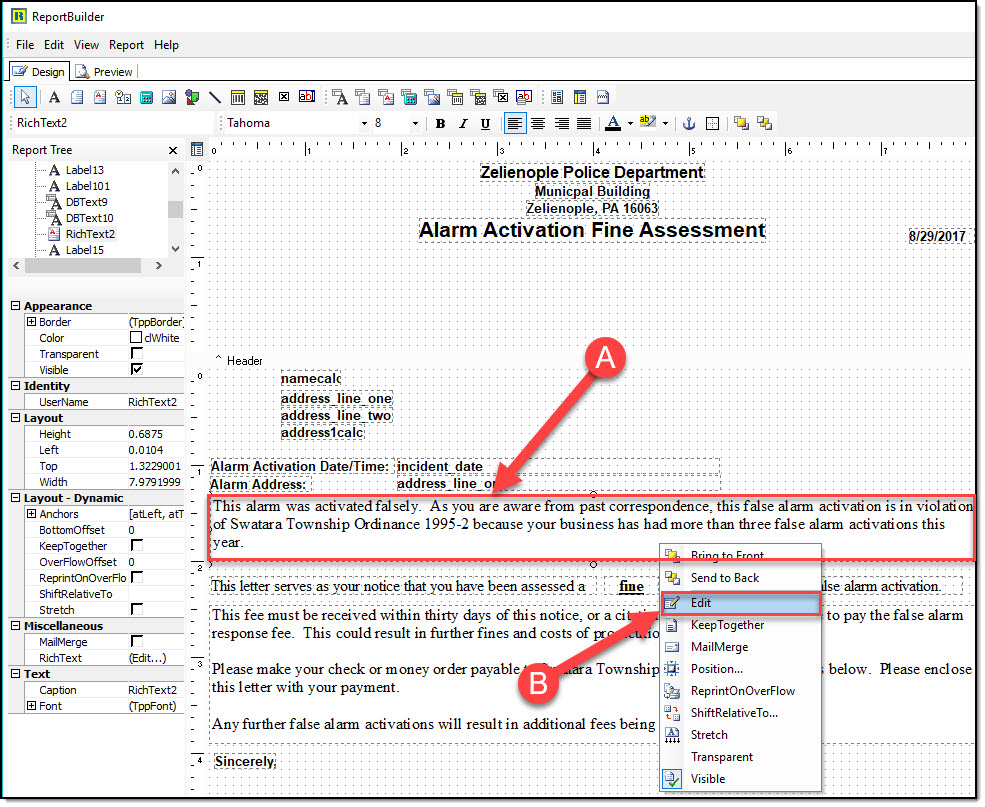
2. Most of the fields on the Fine Designer are Rich Text fields, which can be edited in the same way as step 4 of the Warning designer.
3. Once the changes have been made, select ‘Save’ from the File drop down menu.
Was this article helpful?
That’s Great!
Thank you for your feedback
Sorry! We couldn't be helpful
Thank you for your feedback
Let us know how can we improve this article!
Feedback sent
We appreciate your effort and will try to fix the article
X