No recent searches
Popular Articles

Sorry! nothing found for
Previewing and Printing the Case Report
Created by Russ Hartle, Modified on Thu, 22 May, 2025 at 3:53 PM by Russ Hartle
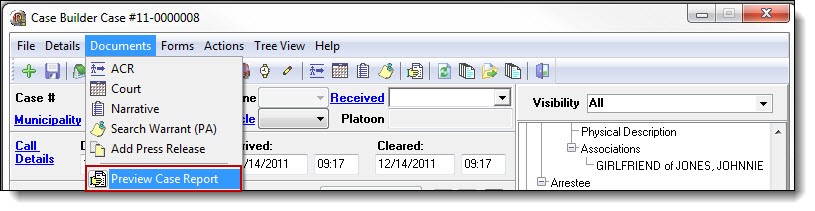
1. To preview the case report, select “Preview Case Report” from the Documents drop down list.
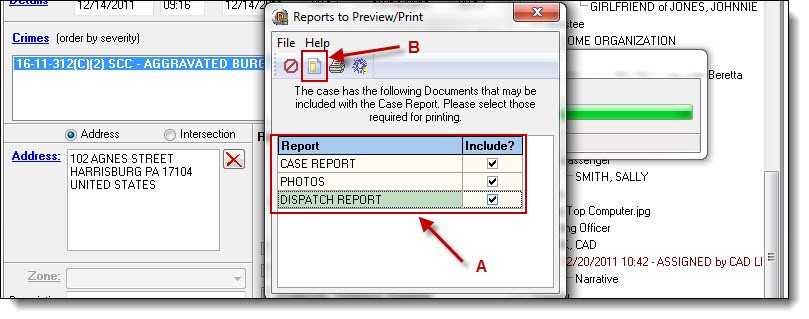
2. Select the items to preview from the Reports to Preview/Print grid (A), and then click the “Preview” button (B).
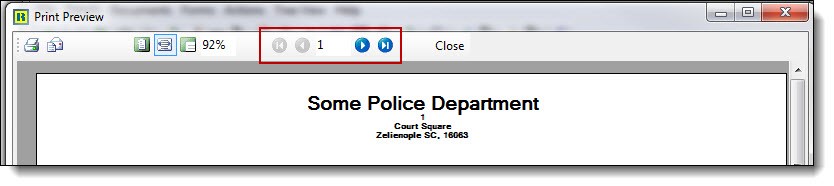
3. If selected, the Dispatch Report will preview first, followed by the Case Report, Case Photos, and any other External Links. Use the arrow buttons to navigate between pages on the Print Preview.
 .
.
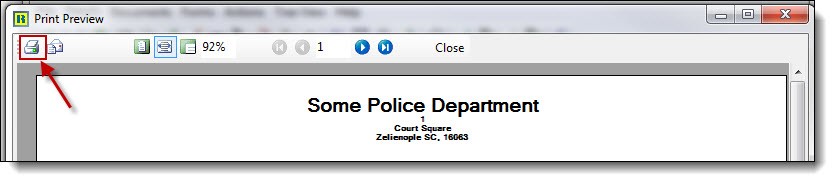
4. To print the case report, click the “Print” button on the Print Preview window.
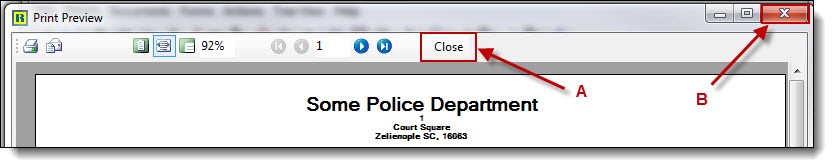
5. After previewing or printing the case report, click the “Close” button (A), or the “X” (B) to exit the Print Preview window.
 !Did You Know?
- If photos, scans, external documents, etc. were attached to the case, windows containing the attachments will open after the case report print preview is closed. Each of the attachments will open in their native program. Use the native programs’ features for printing, saving, viewing, etc.
- From the Print Preview window, there is also an option to email the case report. The email function must use Outlook. Web-based email accounts are not compatible.
- There is a zip function available from the Reports to Preview/Print window. This allows the case and attachments to be zipped into a folder and saved. Zipped case files can be sent as email attachments, burned to a CD/DVD, or saved onto a USB drive.
Was this article helpful?
That’s Great!
Thank you for your feedback
Sorry! We couldn't be helpful
Thank you for your feedback
Let us know how can we improve this article!
Feedback sent
We appreciate your effort and will try to fix the article
X