No recent searches
Popular Articles

Sorry! nothing found for
Property Check-in and Checkout
Created by Russ Hartle, Modified on Thu, 11 Sep, 2025 at 3:47 PM by Russ Hartle
Property Check-in and Checkout
The proper format for property check-in and checkout is as follows:
Reporting Officer
- Enters property into the case.
- Selects a role for the entered property.
- Selects a storage location. (This storage location should be a temporary locker or an agency specific storage container.)
Property Tech
- Searches for the entered property through Property Management.
- Verifies the entered property is located in the temporary storage location that the reporting officer had listed.
- Checks in the property to the temporary location.
- Checks out the property from the temporary location.
- Checks in the property to the permanent location.
- Prints bar code label. (If applicable)
!Did You Know?
For an exact chain of custody, the property should be checked in/checked out of the temporary location. However, the check-in and check-out from the temporary location can be skipped, and the property can be checked directly into the permanent location if the agency doesn’t require records of temporary custody information.
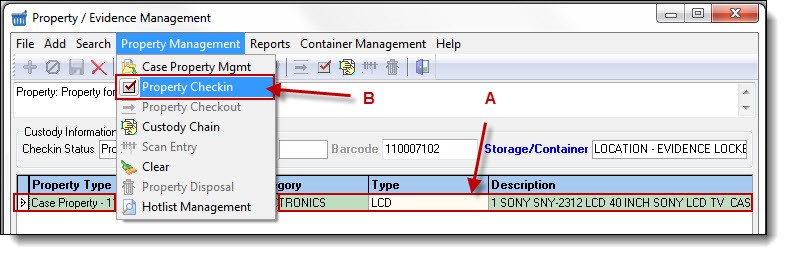
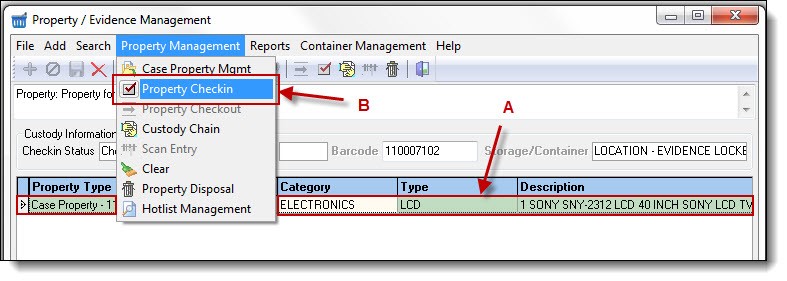
1. Using one of the search methods listed earlier, make sure the property you wish to check-in is available from the results window. Highlight the property item (A), then select “Property Check-in” from the Property Management drop down list (B).
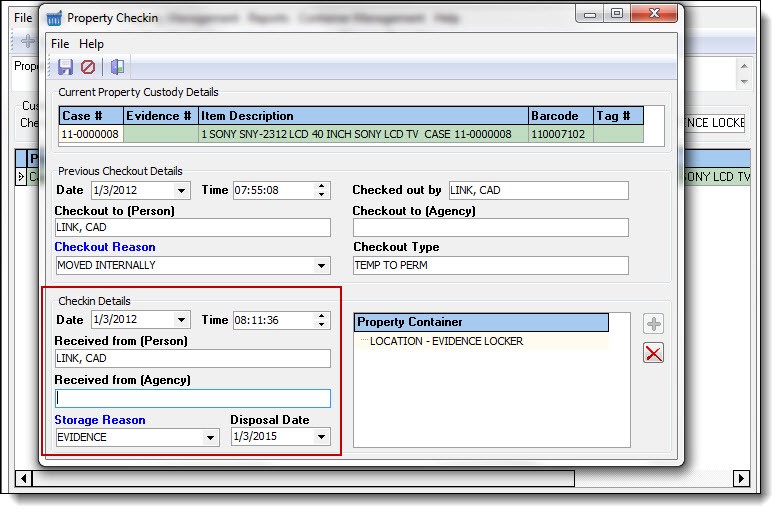
2. Enter the check-in details and storage reason.
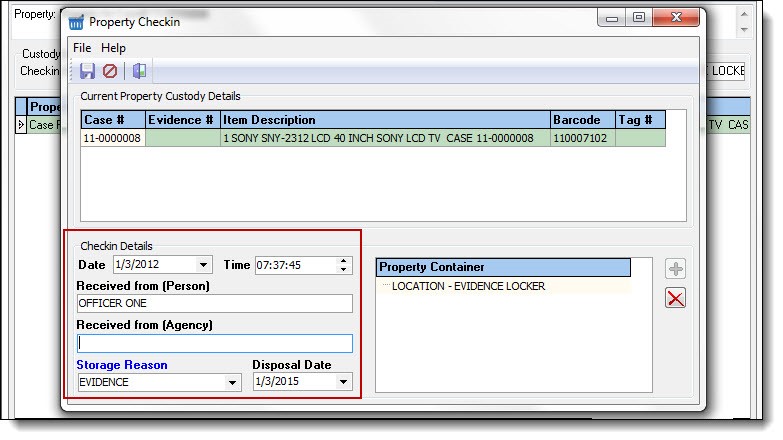
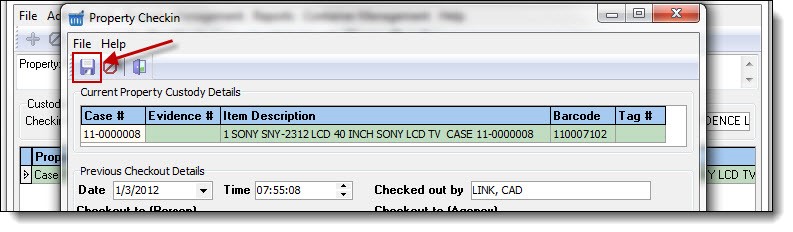
3. Click the “Save” button on the Property Check-in window.

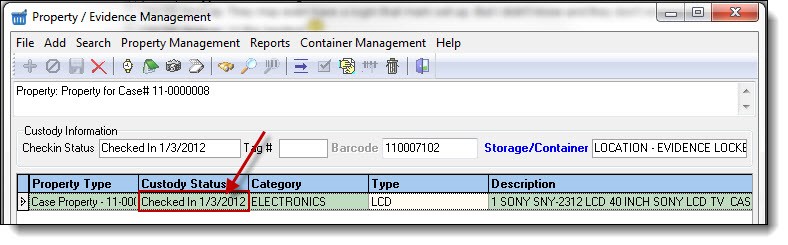
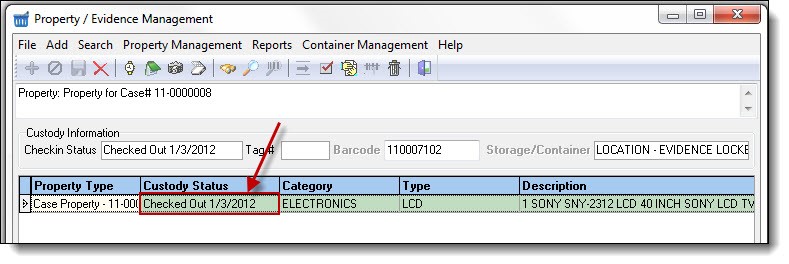
4. The custody status will have changed from “Property not in Custody” or “Property in Custody” to “Checked In”.
5. To check the property out of the temporary location, highlight the property item (A), then select “Property Checkout” from the Property Management drop down list (B).

*Tips:
You cannot check out property that hasn’t been checked in. Make sure the status is “Checked In”, and not “Property in Custody”, before attempting a property check out.
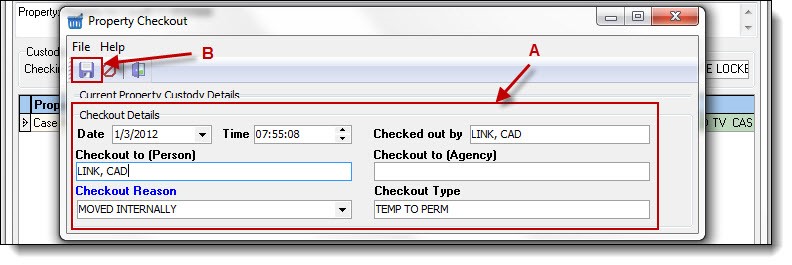
6. Enter the checkout details (A), and then click the “Save” button (B) to check the property out of the temporary location.
7. The property status will now show “Checked Out”.
8. The property now needs to be checked into the permanent location. Highlight the property item (A), then select “Property Check-in” from the Property Management drop down list (B).
9. Enter the check-in details.
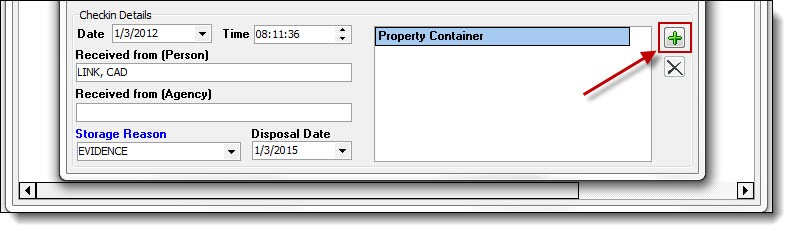
10. Next, select the proper storage location. Highlight the current storage location (A), then click the “Delete” button (B).
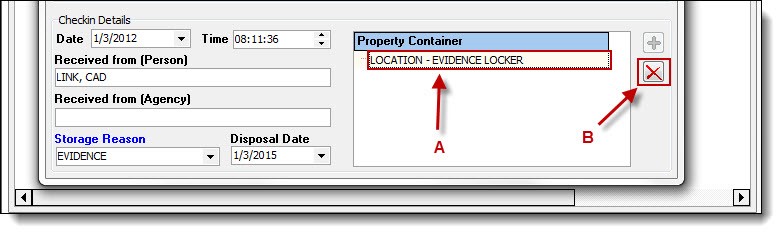
11. Click the “Add” button to select a new storage location.
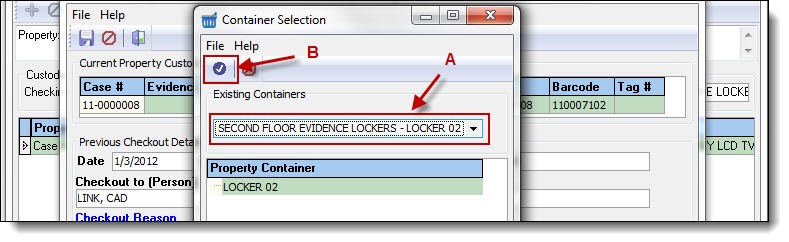
12. Select the new location from the Existing Containers drop down list (A), and then click the “Choose” button (B).
13. Click the “Save” button to save the check-in details and new location information.
 !Did You Know?
- Follow steps 1-13 above any time you are checking in or checking out the property for the court, the lab, move internally, etc.
- As mentioned earlier, agencies that do not wish to track the temporary location details, can skip to step 8, and enter the permanent location details on the initial check-in.
- When property is checked out, it is assumed that the same property will be checked back in at some point in time. To permanently dispose of the property, follow the instructions in the Property Disposal section of this chapter.
Was this article helpful?
That’s Great!
Thank you for your feedback
Sorry! We couldn't be helpful
Thank you for your feedback
Let us know how can we improve this article!
Feedback sent
We appreciate your effort and will try to fix the article
X