No recent searches
Popular Articles

Sorry! nothing found for
Setup and Configuration
Created by Russ Hartle, Modified on Tue, 15 Apr, 2025 at 9:41 AM by Russ Hartle
1. The following in-synch.ini settings will need to be modified and put in place on the RMS server. Please ensure line beginning with “ConnectionString” and “Catalog” are on the same line. Below they are on separate lines but that will cause an error.
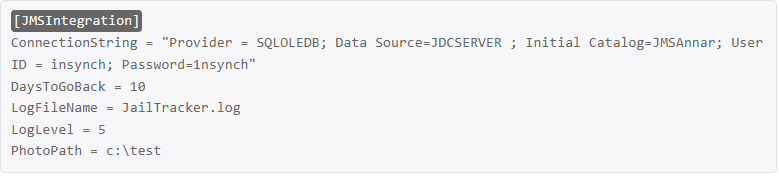
- The above ini settings will need to be modified for each installation, here is a breakdown of the settings.
- ConnectionString
- Provider —> The value of “SQLOLEDB” will never change.
- Data Source —> The name of Jailtrakers server. Should be provided.
- InitialCatalog —> This is the name of Jailtrackers database. Jailtracker should provide this information.
- User ID / Password —> Login credentials will be provided my jailtracker. Every install so far has had different credentials that Jailtracker provided.
- DaysToGoBack
- This value is the amount of day’s back our application will query Jailtracker for each time it runs.
- PhotoPath
- This value is the patch to the Jail Tracker photo repository on the jail tracker server. This value can be UNC.
- ConnectionString
2. Modify the in-synch.ini setting “DaysToGoBack” to a value of 60.
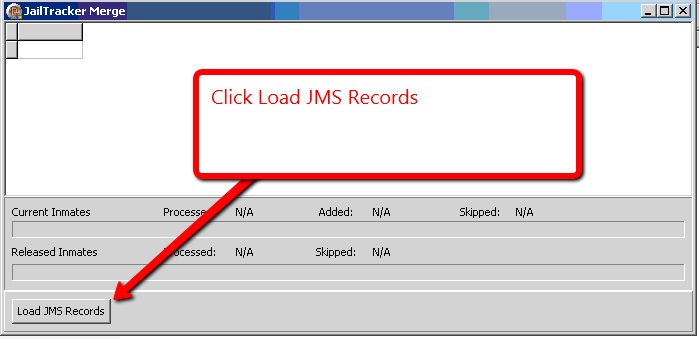
3. From within the in-synch directory run the application jmsintegration.exe
4. Click “Load JMS Records”
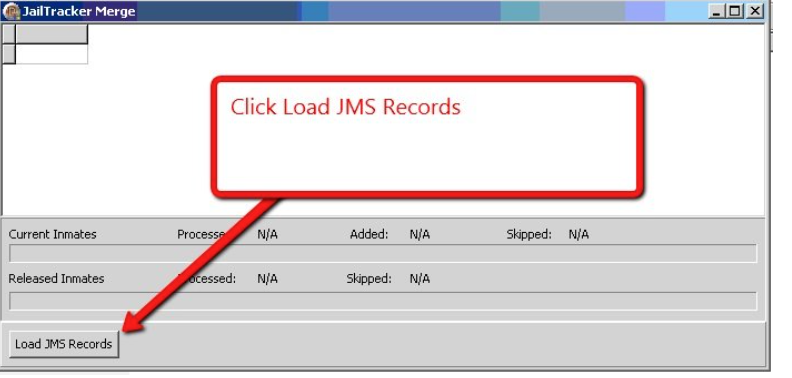
5. If you get an error message regarding “JAIL_INFO” when you click Load JMS Records then do the following; otherwise jump to next step:
- Insert the following agency preference JAILTRACKER4 and set it to T.
- Click Load JMS Records so that the application can run.
6. Once our application has completed it will pop up a small dialogue box stating it is done. At this point go ahead and close jmsintegation.exe
7. Modify the in-synch.ini setting “DaysToGoBack” to a value of 10.
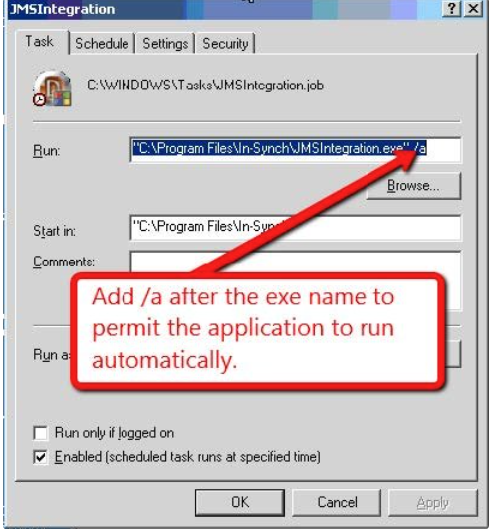
8. Create a scheduled task to run jmsintegration.exe once a day. After you create the task right click on the task in schedule tasks and chose properties. Once properties is displayed please add “ /a “after the exe as shown in the picture below. This flag lets the application run automatically in the background.
Was this article helpful?
That’s Great!
Thank you for your feedback
Sorry! We couldn't be helpful
Thank you for your feedback
Let us know how can we improve this article!
Feedback sent
We appreciate your effort and will try to fix the article
X