No recent searches
Popular Articles

Sorry! nothing found for
Time Limit Error
Created by Russ Hartle, Modified on Tue, 1 Apr, 2025 at 1:56 PM by Russ Hartle
In-Synch RMS requires the Windows clock to be correct so that proper time stamps are created for entered data and to keep the client machine(s) synchronized with one another. By default, In-Synch RMS has a 10 minute buffer, where the system will synchronize even if the system clock is fast or slow. If the time on your local machine(s) and RMS server drift outside of this 10 minute window, the client machine(s) will start to receive synchronization errors. The steps in this month's tip can help you reset the clock on the local machine(s) and resume synchronization. The ability to edit the Windows Clock may be restricted by your Network Administrator.
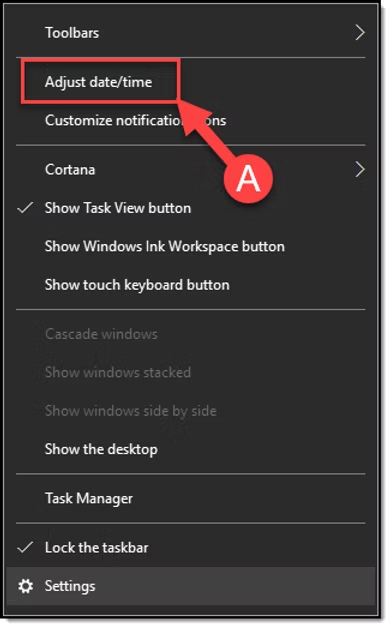
Correcting the Windows Clock (Windows 8/10)
From the desktop, right click on the Windows clock, and select 'Adjust date/time' (A).
Tips:
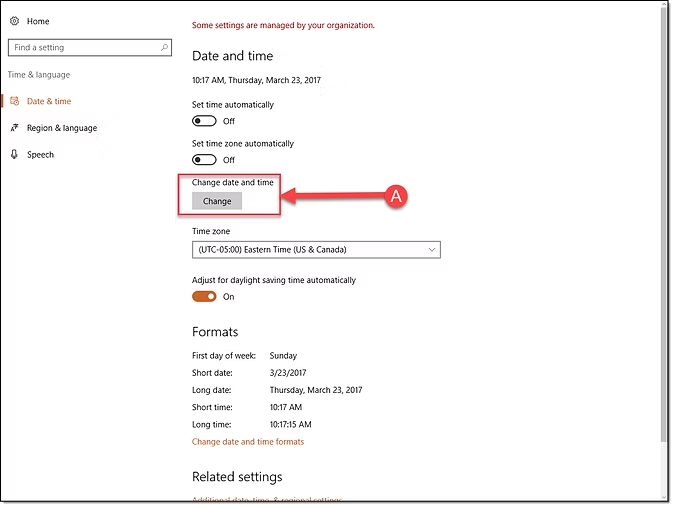
In Windows 8/10, you can also correct the Windows Clock through Control Panel or the Settings menu.
In the Settings window, under the Date and time section, press the 'Change' button (A).
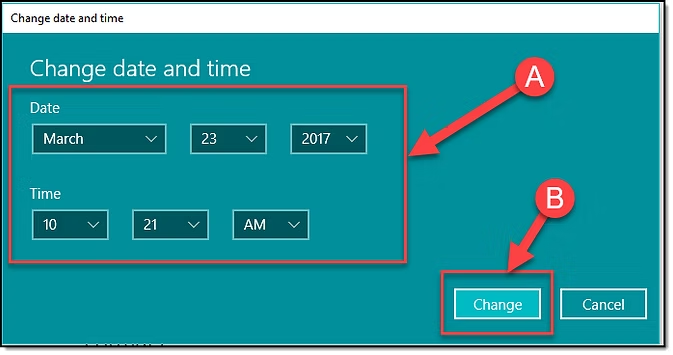
In the Change date and time window, adjust the Date and/or Time (A) and then press the Change button (B).
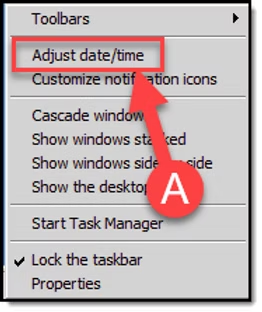
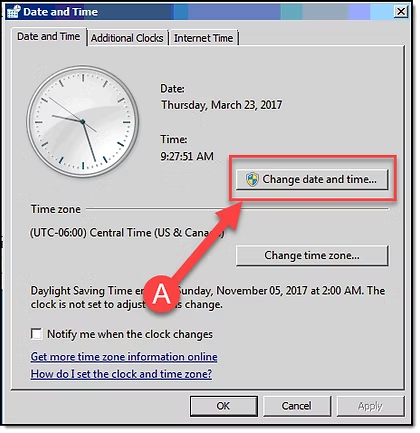
Correcting the Windows Clock (Windows 7)
From the desktop, right click on the windows clock, and select 'Adjust Date/time' (A).
Tips:
In Windows 7, you can also correct the Windows Clock through Control Panel.
In the Date and Time window, press the 'Change date and time' button (A).
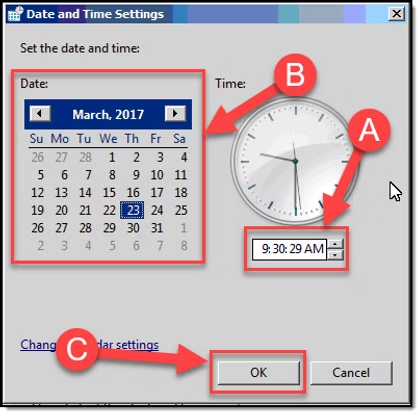
In the Date and Time Settings window, adjust the Time (A), and/or Date (B), and then press the OK button (C).
Was this article helpful?
That’s Great!
Thank you for your feedback
Sorry! We couldn't be helpful
Thank you for your feedback
Let us know how can we improve this article!
Feedback sent
We appreciate your effort and will try to fix the article
X