Adding a Name to a CAD Event
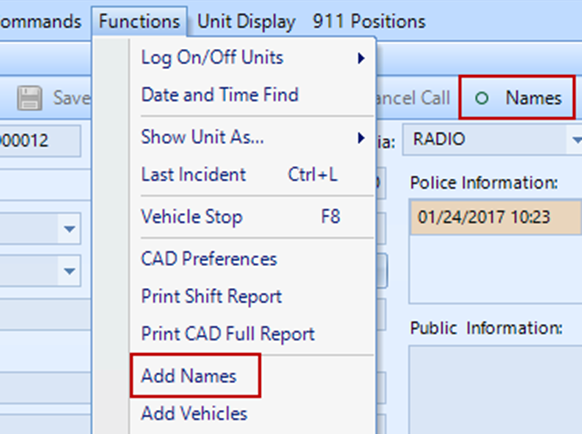
Names can be added to CAD events by going to the CAD Functions menu and selecting the Add Names menu item or by selecting the Names field in the top right of the CAD screen. The Add Names window allows users to make entries into the Master Name File that are associated with a CAD event number. The CAD Add Names window will also show all names that are associated with the current CAD event.
The Add Names window can search for existing names as well as associate additional information such as Multiple addresses, Phone numbers, Photos, Vehicle Information, and Aliases. Required fields are marked red. These fields must be filled out before saving a Name.

|
Text Field |
List Value |
Description |
|
CAD Nbr |
Read Only |
Displays the CAD event number that the name will be associated with. |
|
Last Name |
No |
The last name of the individual is added to the Master Name file. |
|
First Name |
No |
The first name of the individual is added to the Master Name file. |
|
Mid Name |
No |
The middle name of the individual is added to the Master Name file. |
|
Suffix |
No |
The suffix of the individual’s name is added to the Master Name file. |
|
DOB |
No |
Date of Birth of the individual |
|
Age |
Read Only |
The individual’s age is based on the entered DOB. |
|
Race |
Yes |
The individual’s race. |
|
Sex |
Yes |
The Sex of individual. |
|
Ethnicity |
Yes |
The ethnicity of the individual. |
|
SSN |
No |
The social security number of the individual. |
|
Driver License |
No |
The driver’s license number of the individual. |
|
DL St |
Yes |
The state the driver’s license was issued from. |
|
Student Id |
No |
Student Id number. |
|
Classification |
Yes |
The individual’s classification. |
|
Involvement |
Yes |
The reason the individual is being linked to the CAD event. |
|
Name Type |
Yes |
The individual’s name type. |
|
|
No |
The individual’s email address. |
|
Officer Safety |
Yes |
Officer safety information regarding the individual. |
To lookup records in CAD start by selecting the Search button. A user can search by entering First or Last names. If no exact matches exist a list of near matches will display.
To add a new name, begin by entering any known information about the individual such as their First Name, Last Name, and Social Security Number. For text fields with a drop-down menu, the dispatcher can select the correct input from the drop-down.
When done entering information select Save. The name will now appear in the Involved Parties data grid located in the top right corner. Add a red box around the involved parties section
After saving the initial information entered into the Add Names window, additional information can be entered within the bottom tabs.
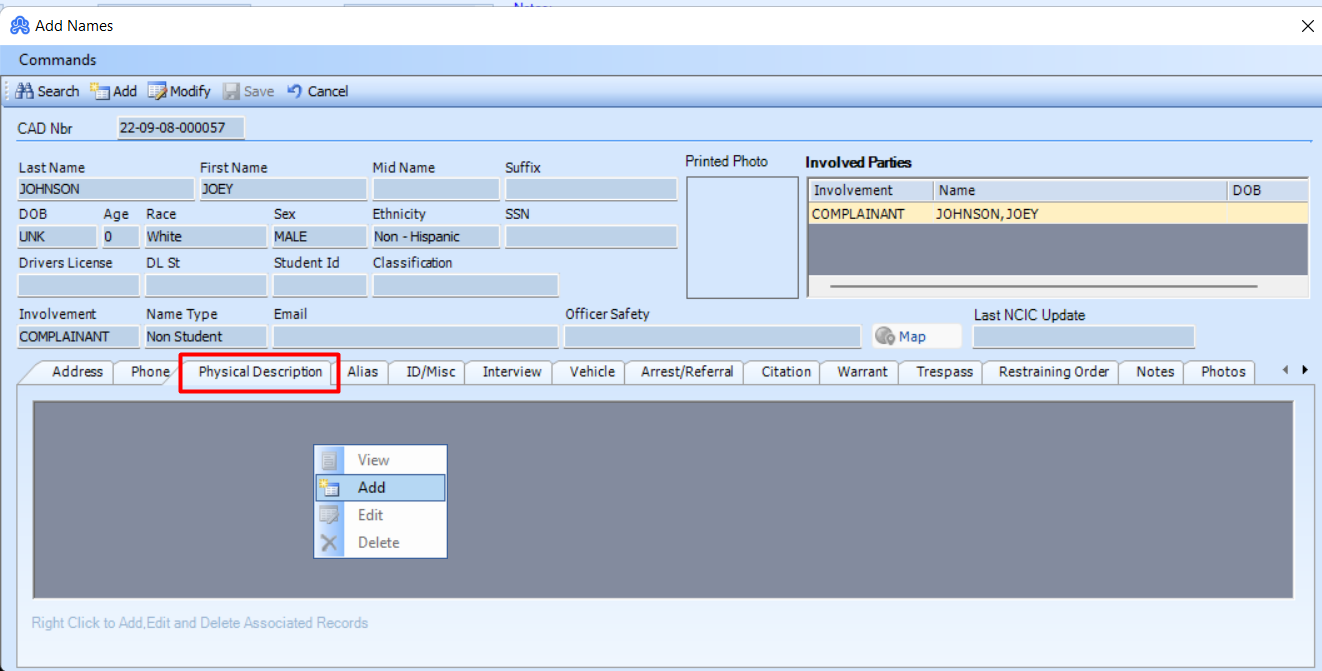
Using the mouse, click on the desired tab. The dispatcher will notice that the bottom half of the Add Names window will change depending on which tab has been chosen.
To add associated information into a tab, right-click into the dark gray and choose Add.
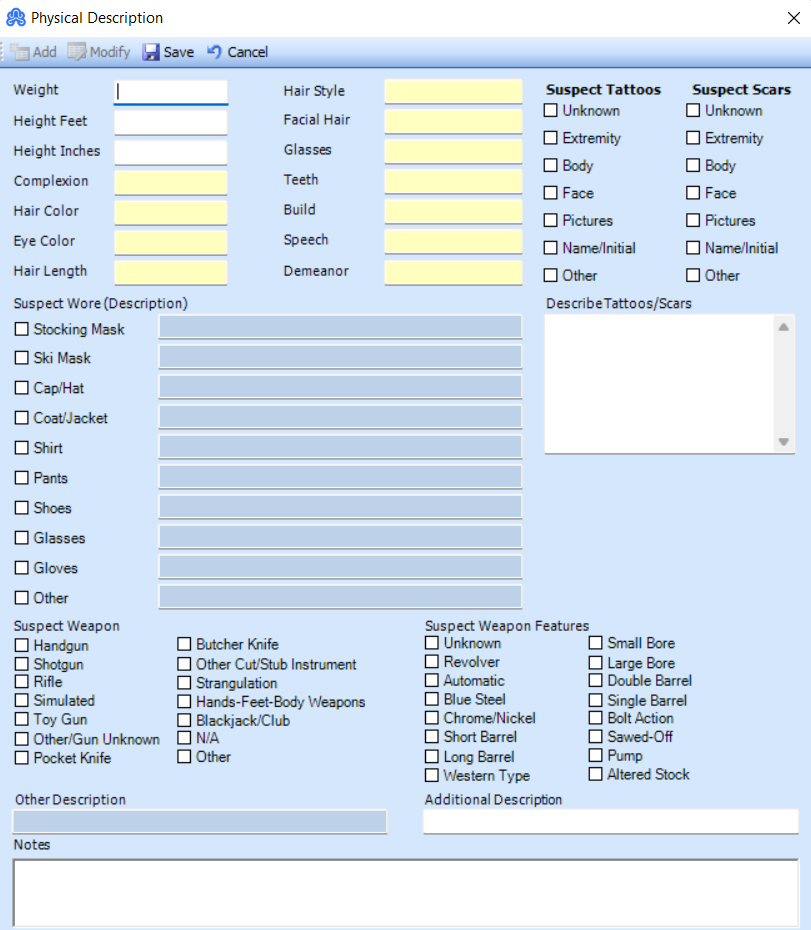
A new window will appear. A user can enter any additional information into the applicable fields. Use List Values where possible. Press the “Save” button.