Click Here for more information on the permissions
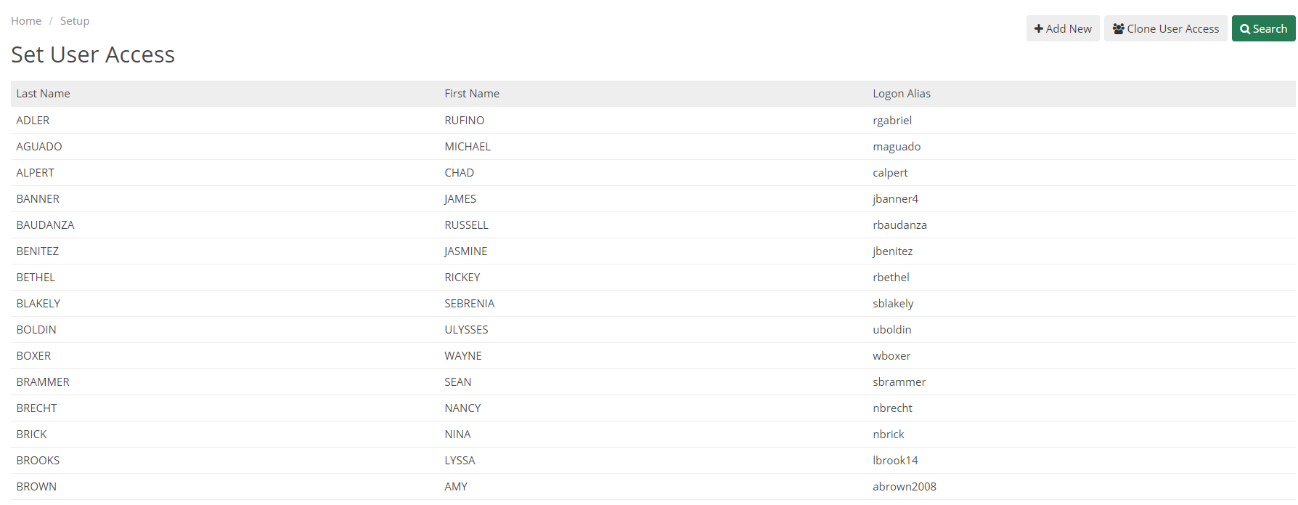
The User Access section is where Admins can create new user access profiles for users, or modify existing ones. User Access is what allows users to login to/access ARMS, and controls exactly what they have access to within ARMS. Before a user access profile is created there must be an employee file in ARMS for the user.
User Access Fields
|
Text Field |
List Value |
Description |
|
ID |
No |
The ID number of the employee |
|
Last name |
No |
Last name of the employee. This is auto-linked when the ID is entered. |
|
First name |
No |
First name of the employee. This is auto-linked when the ID is entered. |
|
Logon Alias |
No |
The username the employee will log in to ARMS with. Please note that if you are using an active directory, you will still need to set the username and password. |
|
Password |
No |
The password the user will use when they log onto ARMS. Must be 8 characters long and contain a number, symbol, upper-case letter, and lower-case letter. |
|
Active
|
Checkbox |
Must be checked to allow the user to access ARMS. When a user is no longer active this should be unchecked. |
|
Change Password Every |
No |
Sets ARMS to automatically prompt the user to change their ARMS password. This is not needed if you are using an active directory. The maximum is 90 days |
|
Next Change Date |
No |
Automatically fills out based on the changed password every field. |
|
Currently Logged On |
No |
Shows if the user is currently using ARMS |
|
Last Logged on |
No |
Shows the last log-on date for the user. |
|
CJIS Username |
No |
If you are using our NCIC module, then you will need to enter the CJIS username the user would log in with |
|
CIJS Password |
No |
If you are using our NCIC module, then you will need to enter the CJIS password the user would log in with |
|
Active Directory User |
No |
Allows you to set the active directory account to associate with the user access record. |
Setting up the User Access
To setup User Access for a user, an Admin will need to create a profile for an employee. They can do so by selecting the Add New button or using the clone function (which is explained in more detail in the next section). When an Admin selects Add New, they can begin creating a a user access profile for a new user. They will need to link the profile to the user by selecting them by selecting them in the Link To Employee dropdown box. Even if a user will be using active directory to log into ARMS, they will still need an ARMS username and password created. The Active Directory Domain and Active Directory User boxes are where the Admin can enter the needed AD information for the user.
Setup Menu
This will give the user access to the Administrator functions in ARMS, which will allow them to make any changes within the system. It is recommended that users only have Setup Menu access if absolutely necessary.

Juvenile, Sex Offense, Confidential, and Sealed
These settings give the user access to any cases that have been marked with these permissions.

CAD
Gives the user access to the dispatch portion of ARMS. Please note that there are additional permissions that are set by clicking on the CAD button.

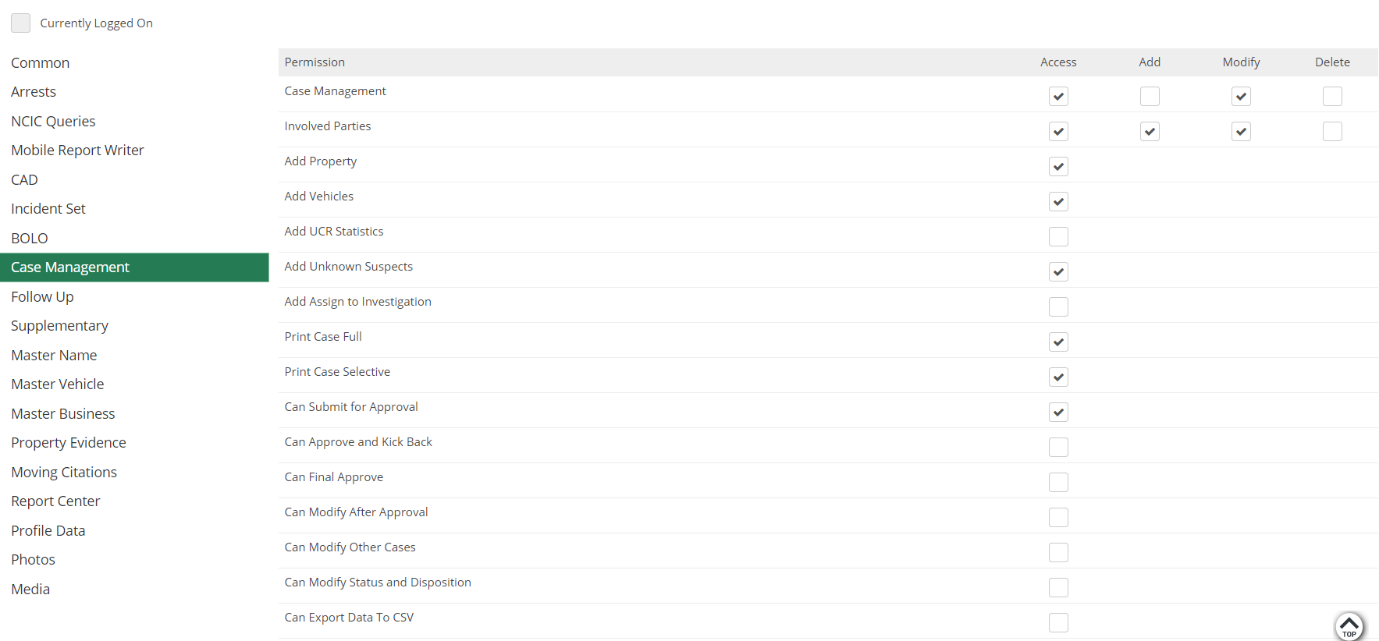
Case Management
Gives the user access to Case Management and allows the user to fill out and submit case reports. Please note that the highlighted permissions allow the user to access the approval management module in ARMS.