ARMS Mobile Website Overview
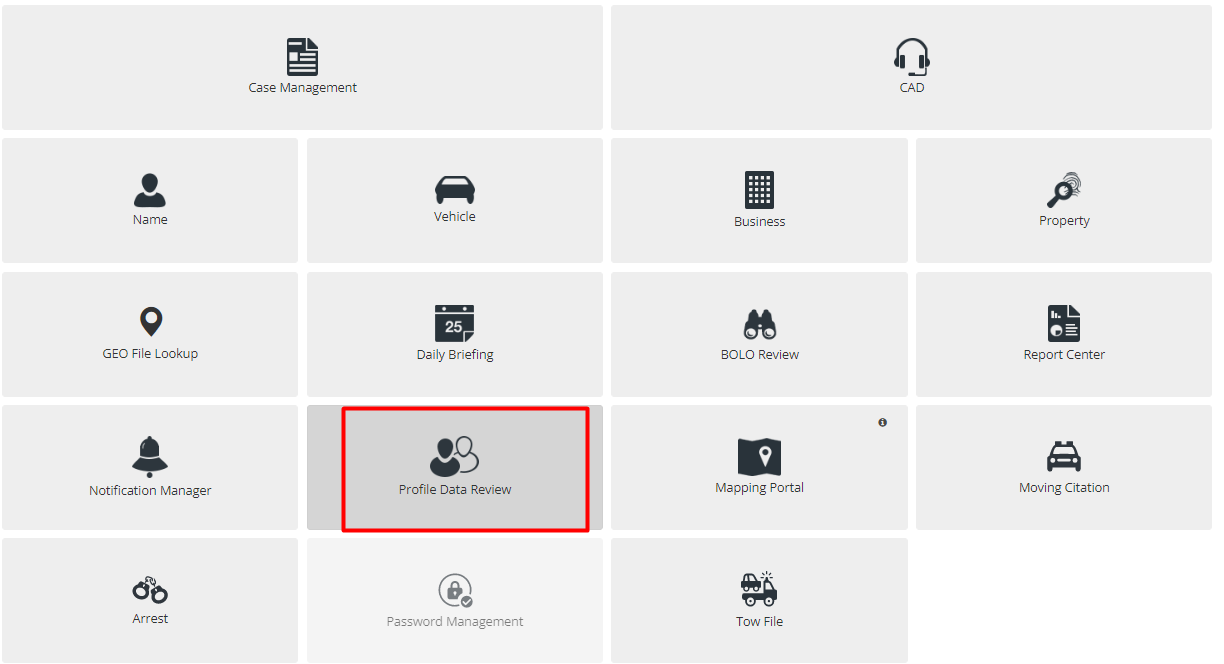
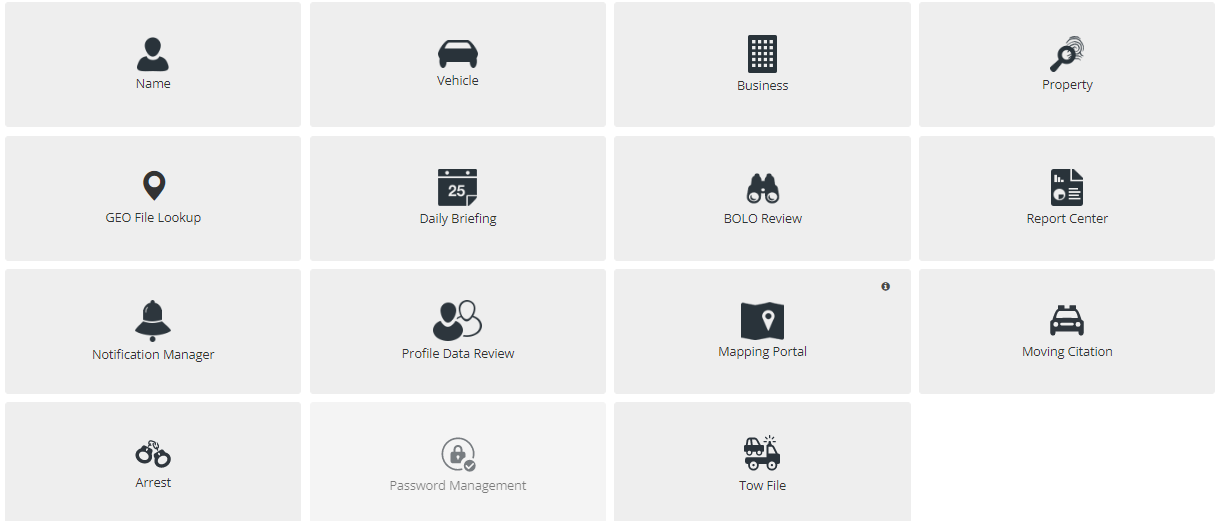
The first screen that officers see after login is the Home Screen, as shown below. This screen will provide the Officer access to each section of ARMS Mobile.
Officers can check the current version of their ARMS by hovering over the ARMS logo at the upper left corner of the page. This can also be considered a home button, so no matter where the Officers are on the ARMS Mobile website, clicking on that logo will bring them back to the Home Screen.

At the bottom left corner of the page, the Officer can see three buttons named "NTF", "Message" and "Officer".

The First option is "NTF", which notifies the Officer when they receive any notifications.
The "Message" button with the envelope icon will take the Officer to the Instant Messaging page. This page is for communicating with other officers, dispatchers, and administrators through the ARMS system. This is also where Officers are alerted if they have a case submitted, approved, or kicked back to them.

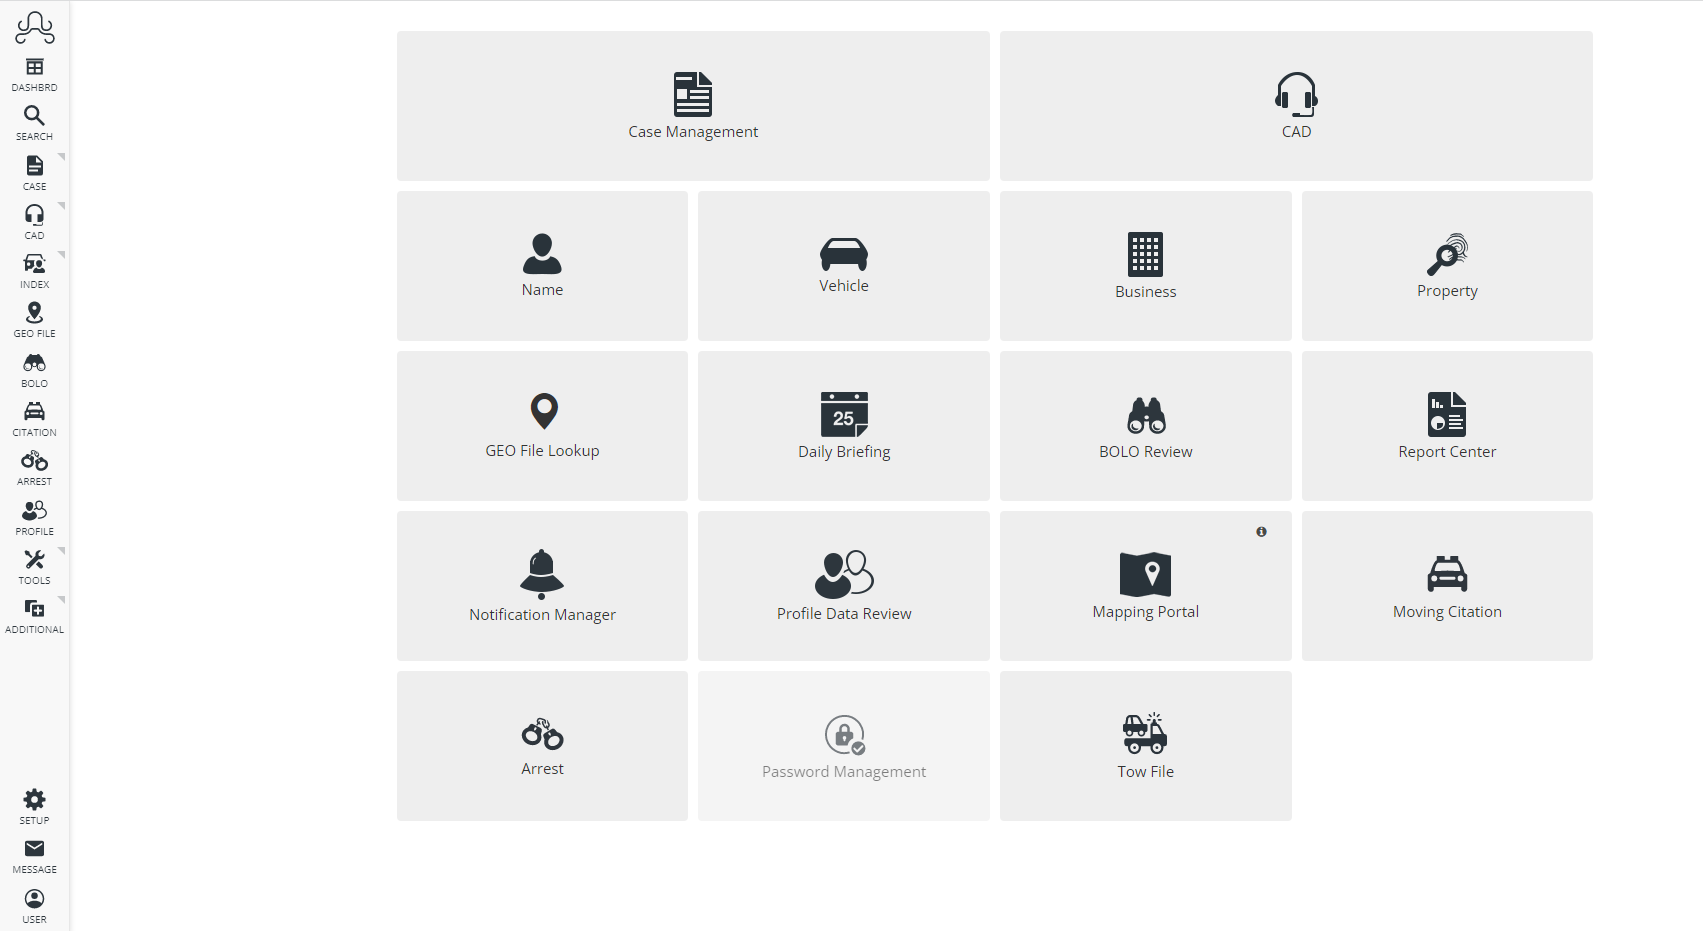
The "Officer" button has a small menu with multiple options that appear when the officer clicks the button.
The very first option is "About". It shows the ARMS version number and information about their department according to their ARMS Support Site records. It includes information such as Site name, Department Name, Address, Chief of Police, Chief Police Email Address, Next Support Due date, Invoice Address, Invoice for the department, and email address that the invoice will be sent.

Under that, a button lets the Officer toggle between day mode and night mode. Day mode has a white background so that the dark icons are easier to see in sunlight, and night mode has a background so that the site is not too bright. Below is an example of the Home Screen in night mode.

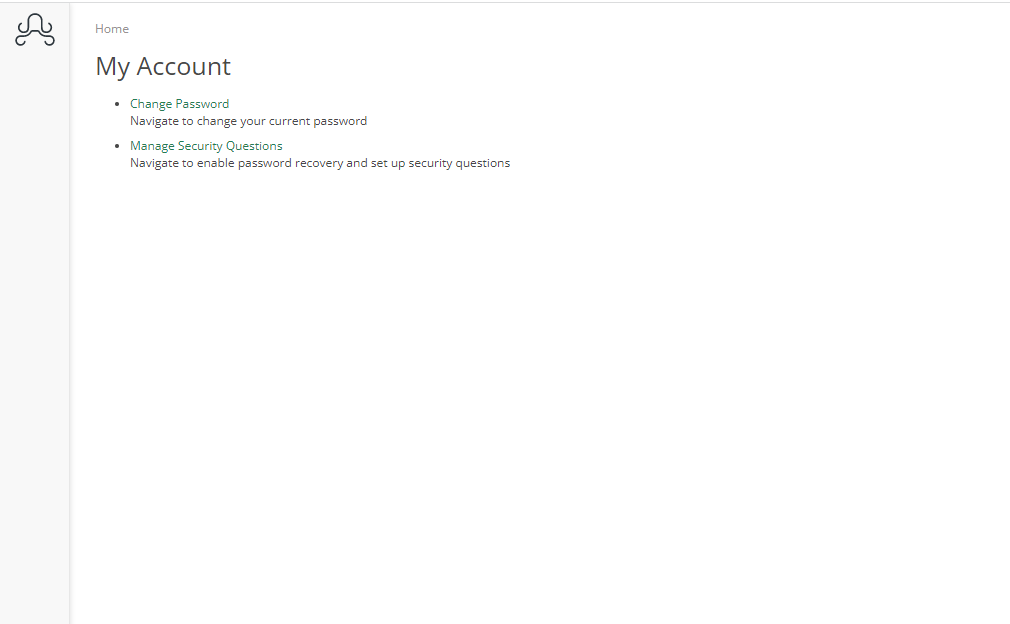
Next to it is "My Account", which allows Officers to change the password for their account and Manage Security Questions to enable password recovery, if they have permission.
The final button on the menu is the "Logout" button for when Officers are done in ARMS and need to log out or log in as a different Officer.
ARMS Mobile CAD
ARMS CAD Overview
ARMS Mobile CAD is a way for officers be able to view their call or add their calls as per the permissions they have. If an officer might be using a vehicle, then they can specify that vehicle and starting mileage for that vehicle.

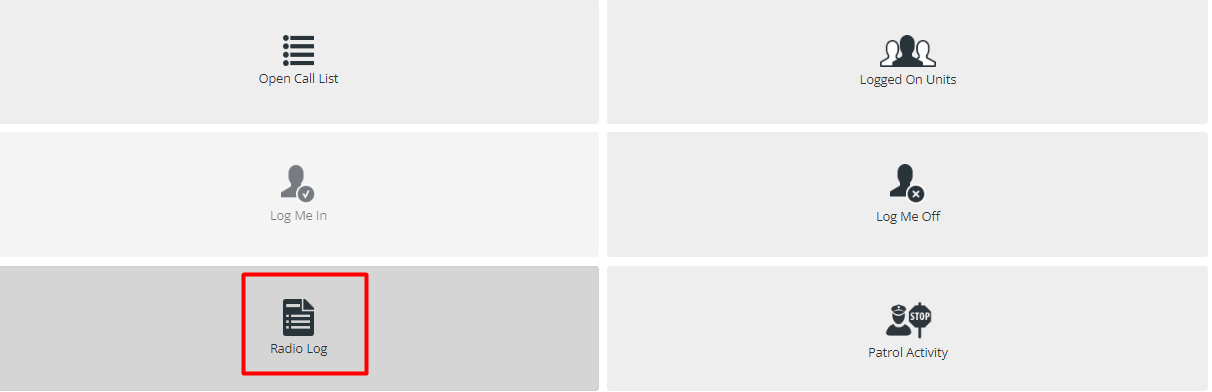
Officers can see the Call List, Log-On Units, Log Me In and Log Me Out, check the Radio Log and add Patrol Activity.

Radio Log
The Radio Log allows Officers to search and browse through CAD events from the convenience of the Mobile CAD dashboard.
Users can also get to this Menu from the Side Bar menu.

This will open the Radio Log Search screen, allowing Officer to browse through your CAD events using various fields and filters.

Final Incident allows the officer to search for CAD events with their chosen Final Incident(s). They can also use the drop-down arrow to select incidents via the checkbox. If they want to remove their previous selections, they can select the Clear button. Leaving the Final Incident field empty will return all incidents.
Officers can select a Date range using Date and time filters and if they want to search for events that occurred in a specific location, use the Common Name, Street Number, Street Name, City, State, Zip Code, and Country fields. Again, anything left blank will return all records.
Officers can filter CAD events by their disposition. Use the drop-down arrow to select which disposition they want to pull back. Selecting N\A will again return all records regardless of disposition.
The next available filter allows the officer to search by the Reporting Party of the CAD event. Enter their first and last name, or business if applicable.
The last two fields are Activity and Unit. Just as it says, the officer can search using the drop-down menu to select the desired Unit and unit Activity. This will return all CAD events of the same Unit/activity.

Once officers have their desired search criteria entered, they can click on the Search button at the bottom to pull their records. They can view the basic information of the event like date, disposition, and incident as well as the Case number if one was issued. Use the arrow key to page through your results.
Patrol Activities
This feature helps the officer record any kind of Patrol Activity that officer does. They can record after the patrol is done or before.
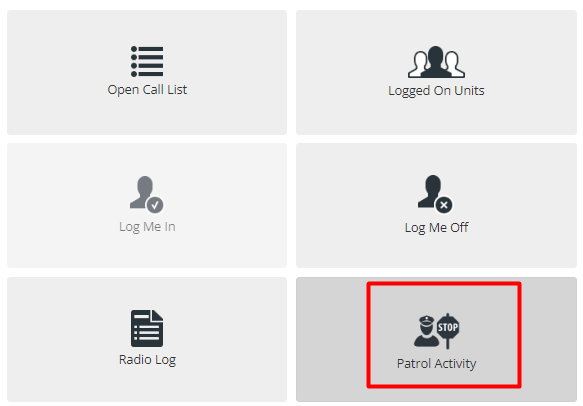
Once officer clicks on this tab, they are navigated to a screen with a list of records.
There are two buttons on the top right corner of the screen.
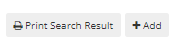
The Print Search Result button allows the officer to print their search result and Add button allows them to add new patrol activity.
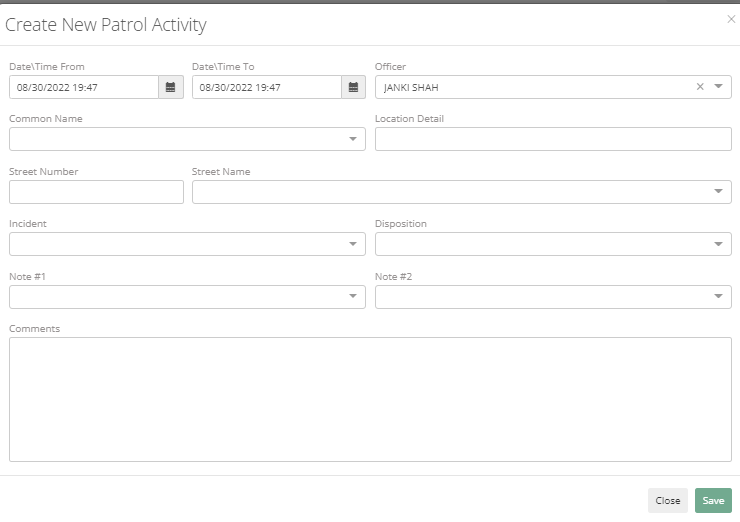
They can put a future date range for any patrol activity they would be doing. They can fill in other details like Common Name, Location Detail, Street Number, Street Name, Incident, Disposition, and Notes and comments if any.
After filling in the data click on Save and it will show the list. Once officer completes patrolling, they can edit disposition from not completed to completed for this activity.
They can also access patrol activity from CAD>Open Call List>New> Patrol Activity.
Log Me In
This tab allows officers to log in/log off through CAD mobile, this takes a lot of load from the dispatcher. A dispatcher can still log them in and log them off. Log Me off is greyed out until Officer has logged in, as they can't log off until they are not logged in.

This will open a new screen where officers can select their CAD Unit, Shift, Beat, and Vehicle from the drop-down menus. Only the fields marked with a red asterisk are required for logging in, just like the desktop version of ARMS, but the officer can fill in data to other fields such as Site, Beat, Location, Vehicle, and Staring Mileage.

Once they are finished entering their information, hit the Save button found on the bottom right of the Log in the menu. The officer should get a Success notification pop-up and be returned to the CAD Dashboard
Log Me Off
This tab allows officers to log off from ARMS CAD Mobile. This will open the Log Me Off page.

Officers can select checkboxes next to their respective call numbers to choose the officer they want to log off. The Select All button will allow the officer to log everyone off with one click, while Clear allows them to start over if they have selected an officer by accident.

If any vehicles are assigned to the unit, they must be logged off as well. Officer will require to put in the new mileage as well.
Hit the Save button found in the bottom right-hand corner of the page when finished. Officer will be logged off and returned to the CAD dashboard.
Open Call List
If any officer has permission to add a call. The officer can go to this section and can add calls.

Here the Officers can view the history of the calls that have taken place over the past 12 hours, view the current open calls, or view all open calls. Officers can also filter it site-wise. Officers can add themselves to any active call to show that they are acting as a backup unit. Once an Officer has been dispatched to a call, they will see it in the My Open Calls list.
Officers can modify the calls and update the time to show enroute and arrival times, add involved parties, vehicles, and property, and enter police information that the dispatcher can see and interact with.

From the top left corner, clicking on your name will show a small menu. Officers can view the call on the map, see the vehicle history, and log themselves on the call.

The map view will show locations on the map if officers have them mapped in their geo file.

Officers can also add in an open call using show open calls. The officer can also sort calls and filter them as all calls and My calls.

Logged on Units
This mobile CAD module allows officers to view all logged-on units.

Through this screen, officers can see who is currently logged in, what vehicles they are using, what sites they are at, what their last known location was and what was their last status. Cleared status indicates that they are not on call right now.
Officers can click on the field to sort the results in ascending or descending order. Officers can sort any of the fields with this method.
Information such as the unit's code, Description, Employee Name, Vehicle, Site, Last known Location, and Last known Status of logged-on units can be viewed.

The Unit# field returns the unit number set up in the CAD unit menu.
The description of the Unit can be anything from call signs to attached officer names.
Employee name as the name suggests displays the name associated with the Unit.
Vehicles show the vehicle attached to the unit.
Logged On Units also display the Last Known location and Last Know Status of the unit. This allows Officers to check on the status and location of all logged-on officers at once.
New Calls
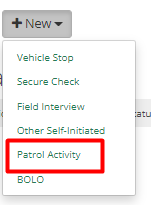
On the top left corner of the Open Call List, there is a "New" button, on the click of this button, the officer will see a small menu with multiple options. On entering details in this option, the officer can create new calls.

Vehicle Stop
Here the Officer can add all Location fields and vehicle information. From there it will create a vehicle stop as a new call.

Secure Check
This is for building checks or any things like that. Only crime codes that are checked to be secure check will show in the incident field. The officer can add call information and add reporting person details if there are any.

Field Interview
Officers can add field interview details through this option, the officer can field interview details and information about the person with whom they are conducting the field interview.

Other Self-initiated
Officers can pull up any crime code that is in the system and can add reporting party information. Just like other options, this will create a new call to which officers are now assigned.

Call Features
There are some call features that Officers can be in control of.

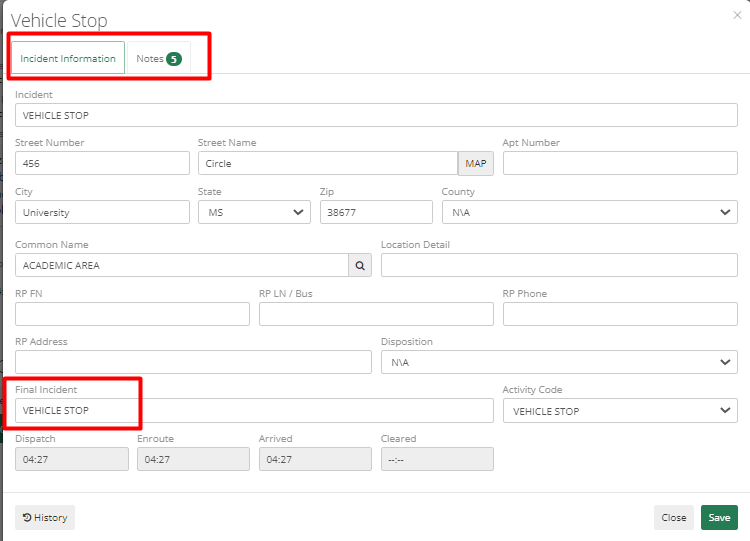
Edit – As the name suggests, it modifies details of the existing call. Usually, the officers may require this when they need to change the Final Incident. Officers can also go to the Notes section to add any notes if required.
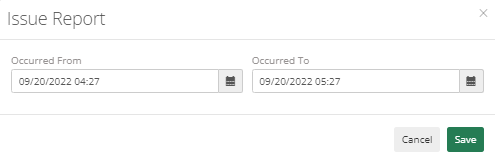
Issue Report – This will help an officer to issue report, to issue a report, to make sure occurred from and occurred to date are accurate.
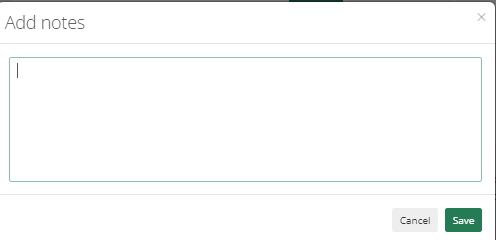
Add Notes - This allows the officer to Add Notes to the call. The dispatcher will be able to view notes added by Officer.
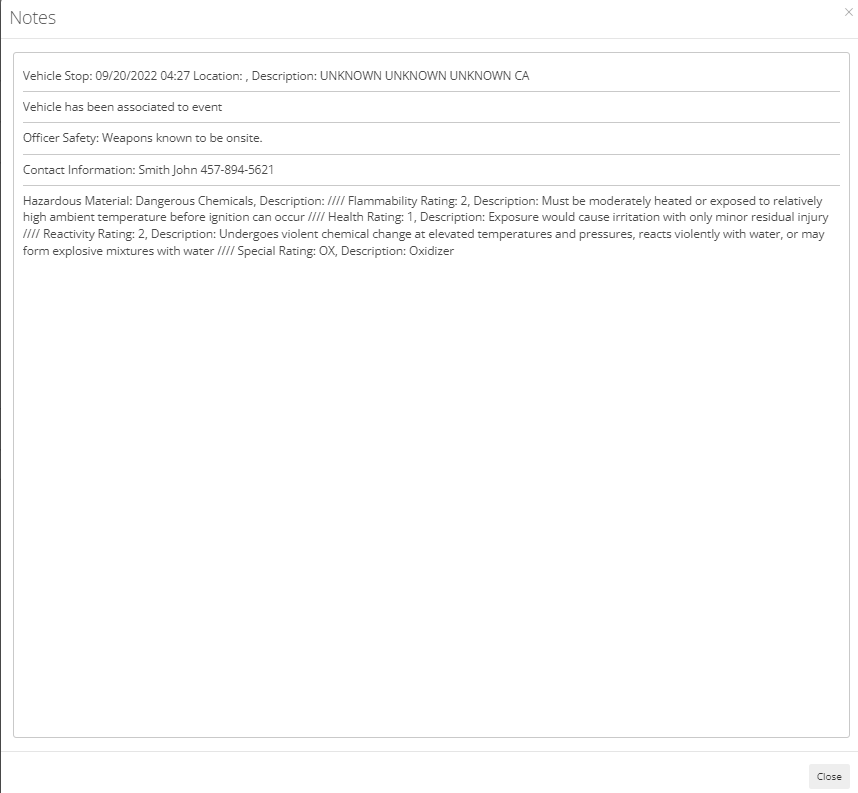
Read Notes – This will allow the officer to Read Notes already added. It will show in order when they were added.
Print – This will help to print call details.
Common Name - It will show all details of the call like General Info, Call History, Security Matrix, Misc./HazMat, and Officer Safety. Contact Info, Photos, and Other Media.
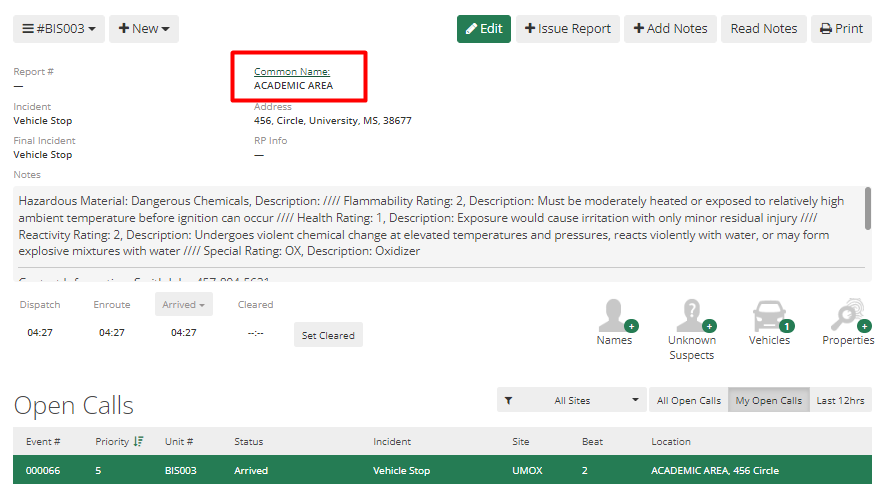
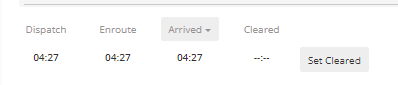
Dispatch, Enroute, Arrived, and Cleared time these buttons help an officer to log time, if the department uses Custom Officer status, then the officer can change time by clicking on it.
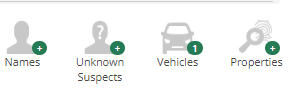
Names, Unknown Suspects, Vehicles, and Properties will help an officer to add those to the call as required.
Officer Case Management Basics
Case Management Overview
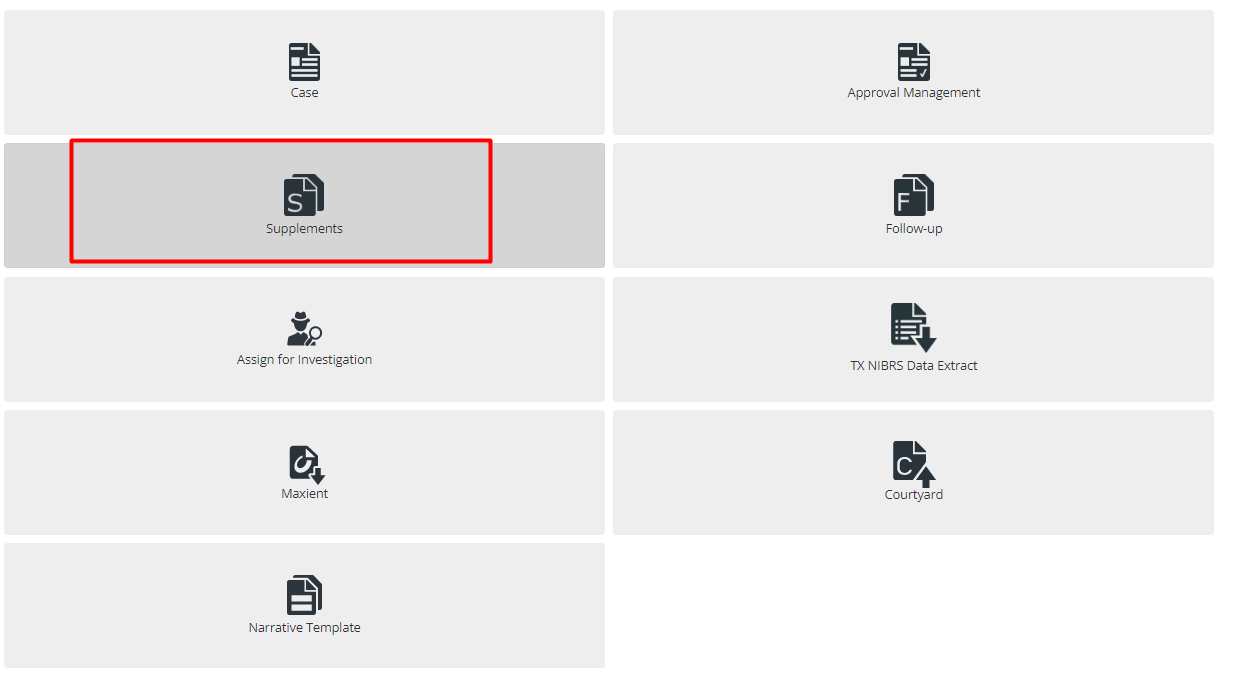
The Case Management module allows the Officer to search, view, and edit Case records within ARMS. Officers can manage Case records through Case, manage approvals through Approval Management, manage supplements through Supplements, attach Follow-Up reports, assign for Investigation, TX NIBRS Data Extract, Maxient, Courtyard, and manage templates for Narrative through Narrative Templates.
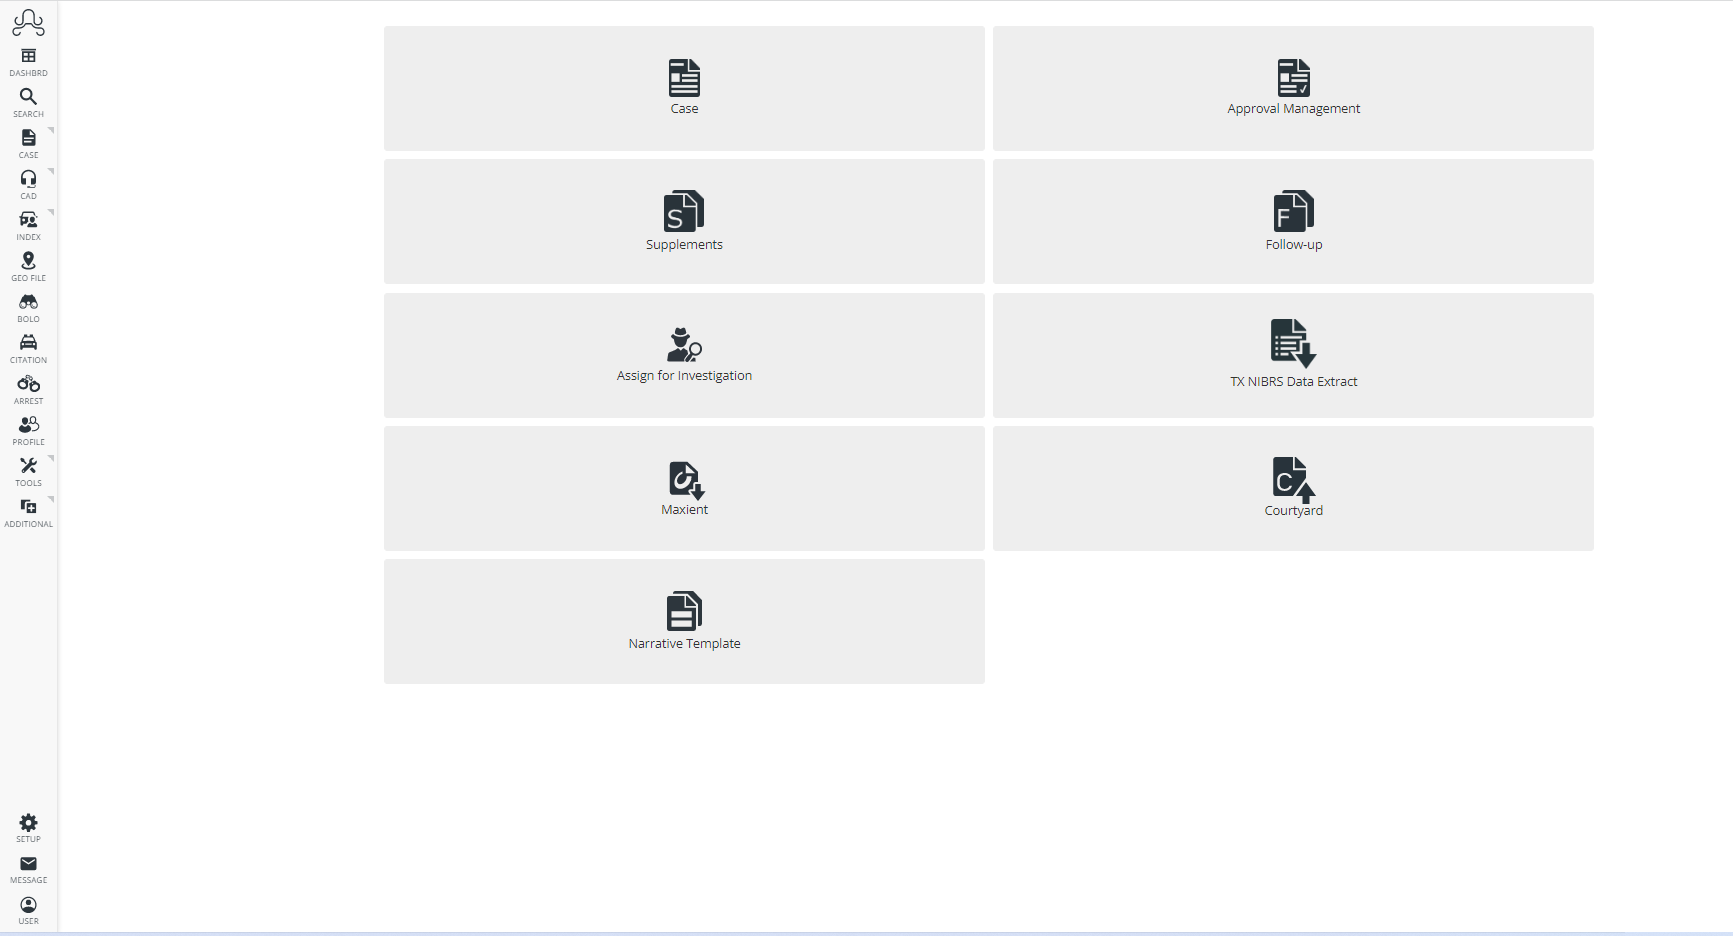
Case Module
In this module, Officer can manage Case records. To go to "Case", go to Home-screen>Case management>Case.
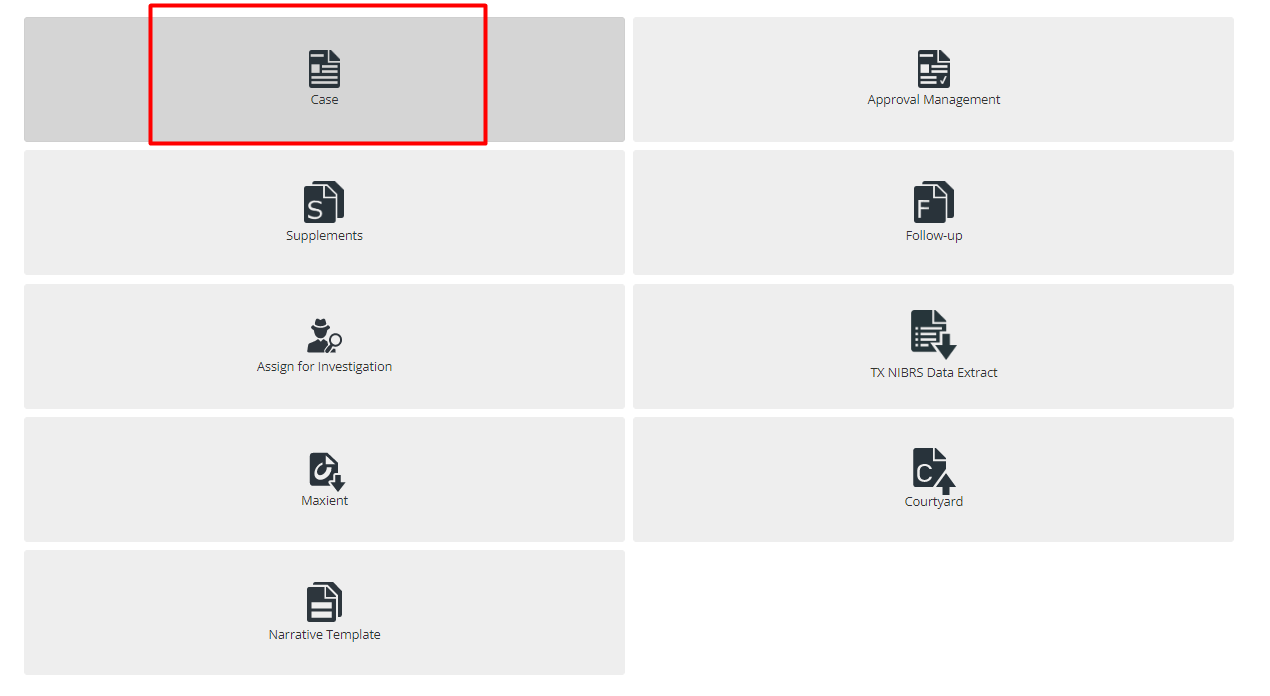
When first opening the Case module, the Officer will see the Last 10 Cases list (Here it displays only two records as two records are added). This is a list of the 10 most recently created, or modified, Case records that are associated with the Officer.
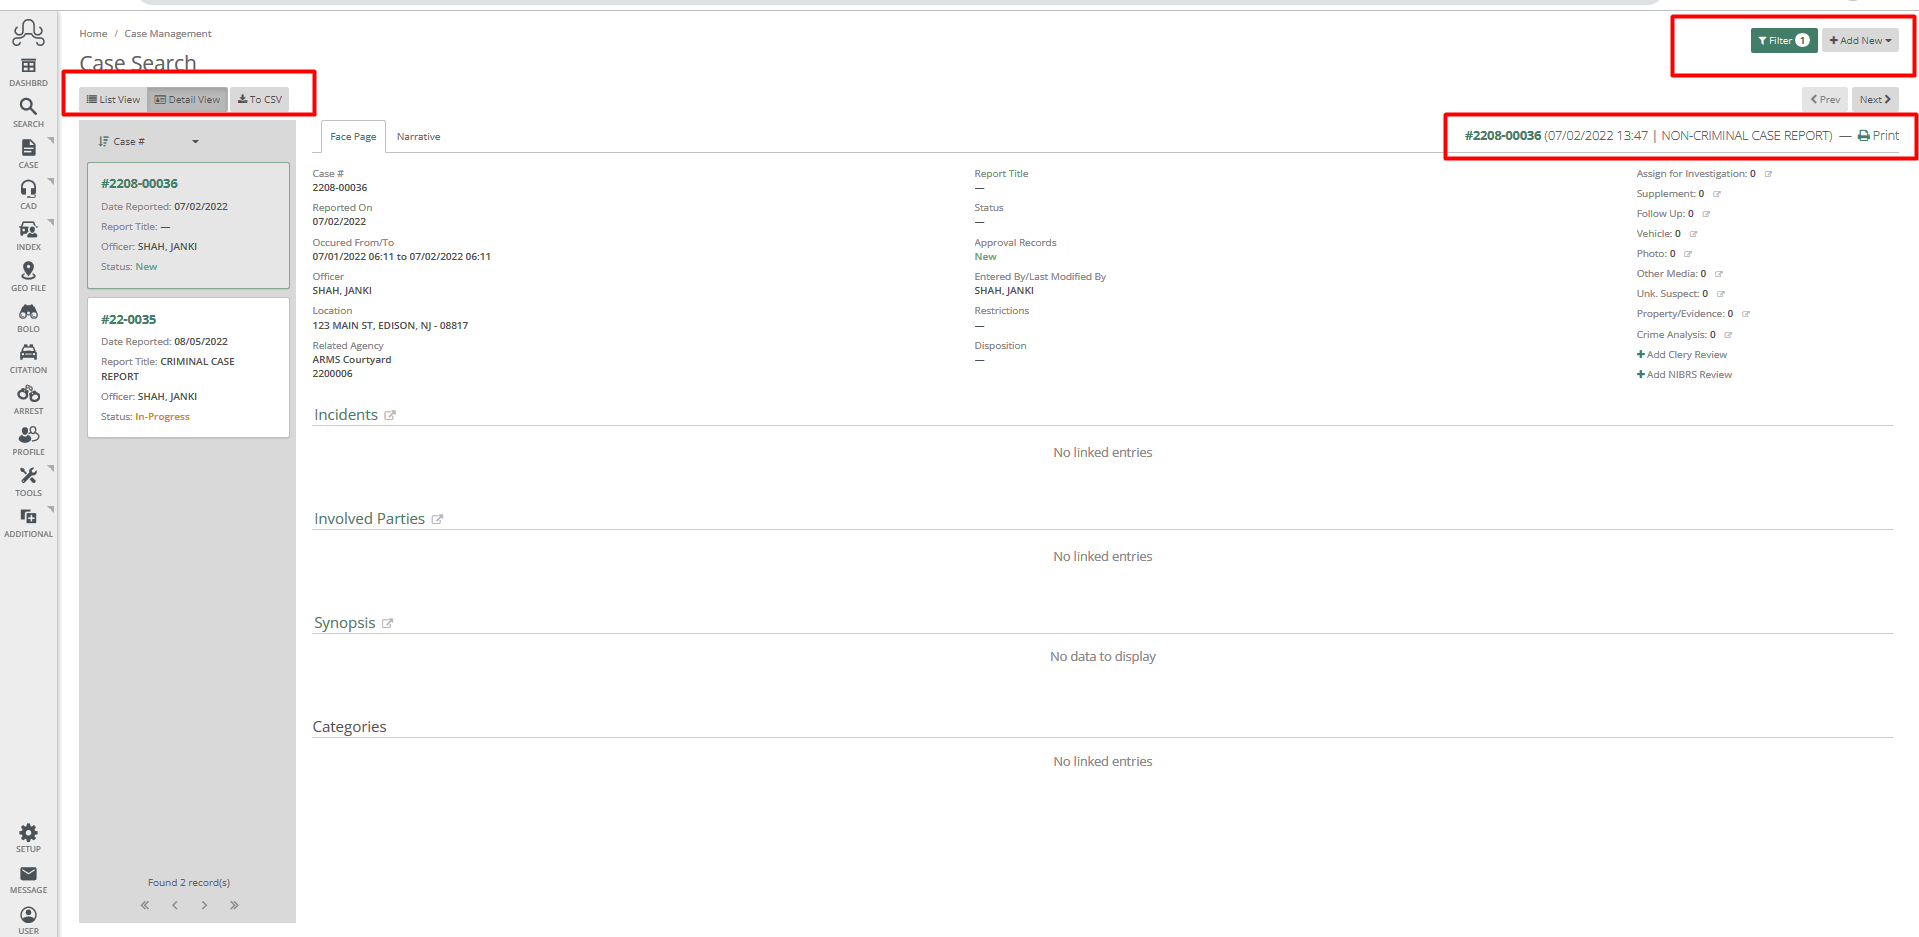
On the top right corner, the Officer can see two options Filter and Add New. Add New allows the Officer to add new cases and filter helps the Officer to filter data and view a list of records according to it.
The Case Search form allows the Officer to search Case records based on a combination of the search parameters of Report Number, Related Agency, Related Number, Common Name, Street Name, CAD Number, Date Reported On (to and from), and Officer. By default, all cases are filtered as per the officer logged in.
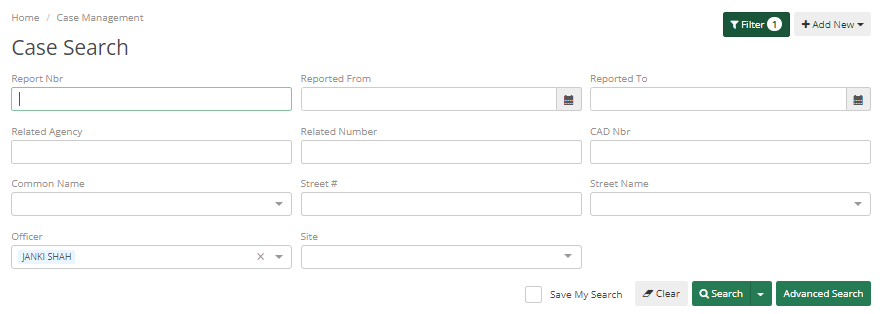
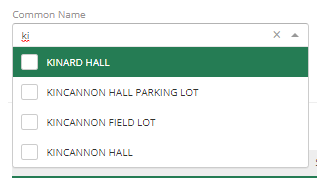
Certain fields will display a drop-down menu when the Officer starts typing in that search parameter. The drop-down menu will show the top 5 matches to what the Officer has typed in the field. The Officer can see below that where I have typed "Ki" into the Common Name field, it displays the top 5 matches.
To view the complete record of a Case in the list, simply click on the row; this will open the Case record for viewing/editing/etc. based on Officer permissions.
To save time Officers can use the advanced search option and save their search, so each time they log in they will see data as per their saved filter.

Case records can be displayed in two ways List view and Detail view. Officers can switch between those as desired. Each row in the list view represents a Case record, displaying the Report Number, Date Reported, Case Status, Name of the officer to whom the case is assigned, site, Location, Offenses, and Last modified date.
By clicking on the header, the Officer can sort data in ascending and descending order. By clicking on the case number, the Officer can see other information about that case.

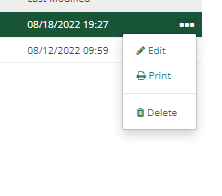
Three dots at the end of each row shows options such as edit, print, and delete. By using that, the Officer can edit, print, or delete that case.
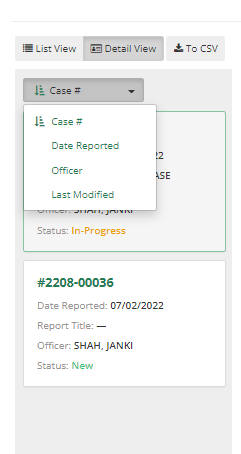
By selecting the Detail view option, the case can be viewed in detail straight from the main screen with the Next and Previous options. Officers can see all details related to the case. The Face Page and Narrative tab allow the Officer to view all aspects of the case without navigating to other screens. On the left, Officers can see case numbers and they can scroll and select the case they wanted. Officers can sort case numbers in ascending or descending order as the Officer was doing in List view.

Officers can change the order of cases by Case Number, Date Reported, an Officer, or by the Last Modified Date.
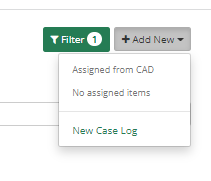
To add a Case record, click the Add New button in the top-right corner of the page. From there Officer will need to select New Case Log.
The case Officer will add is either Criminal or Non-Criminal. As per the case type, a few case types are set as "Criminal" by an administrator of the Officer's department. If the Officer selects a case with a Criminal type, then they must fill in the details required in a criminal case.
Once they have selected a Case record or created a new Case record, the Officer can then add information to or edit information in the different tabs of the Case record. These tabs are Face Page, Incidents, Names, Businesses, Properties, Vehicles, Narrative, Photos, Assign for investigation, Follow-Ups, Supplements, Complaints, UCR/CLERY, NIBRS, Other Media, and Crime Analysis. Any field that requires information will display a red exclamation dot next to the tab name.

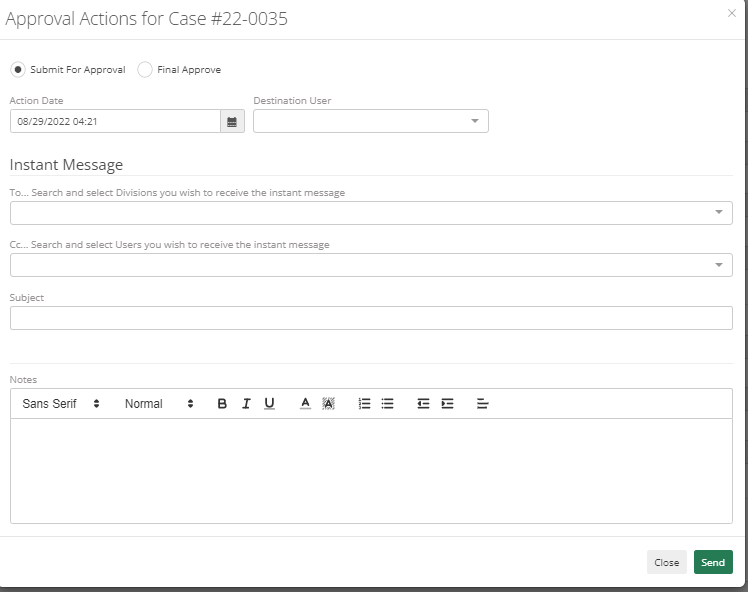
Once the Officer has finished filling out the Case report, the Officer can select the Approval Records button in the top right corner and submit the Case for Approval.

This will require Officer to choose a Destination Officer. The officer can add a division to also Instant Message or CC a specific Officer other than the Destination Officer, add a subject and notes to the submission.
To view the Case's Approval History, go to the History button from the top-right corner and click on it. In this tab, Officer can see Modification History as well as Photo/Media History. Officer can see a copy of the case report before the modification was made, so it can be downloaded in the case where it's required.

On clicking of Add New Case button, the officer will be navigated to the screen which contains an auto-generated Case number on the top. It can be edited if the Officer has the permission of editing it.
With the click of Modify button, the officer can start filling in data. Red dots in front of any tab indicates that the officer needs to fill in data to successfully add a new case. Officer can also click on this red dot, and it will show a message indicating the fields which are required.
If any information needs to be added in any drop- then that can be added by the Administrator of your department. They can add/edit it in Code List and once added it will appear in that dropdown.
Face Page
For the Face page, the required fields are "Report Title" and "Status". Select as per your case from the drop-down.
If any department within your city or colony or area helps in that case then Officer can Related agency and related number
There are four checkboxes on the top they are "Confidential", "Juvenile", "Sex Offense", and "Sealed", Only officers who have access to this can check or uncheck them for others it would be disabled. If one of these checkboxes is checked for any case and officers are not able to search that case, then it would be because Officer might not have access to such type of case.

Officers will only be able to add details once they click Modify button and Hit Save to save added details for that case.

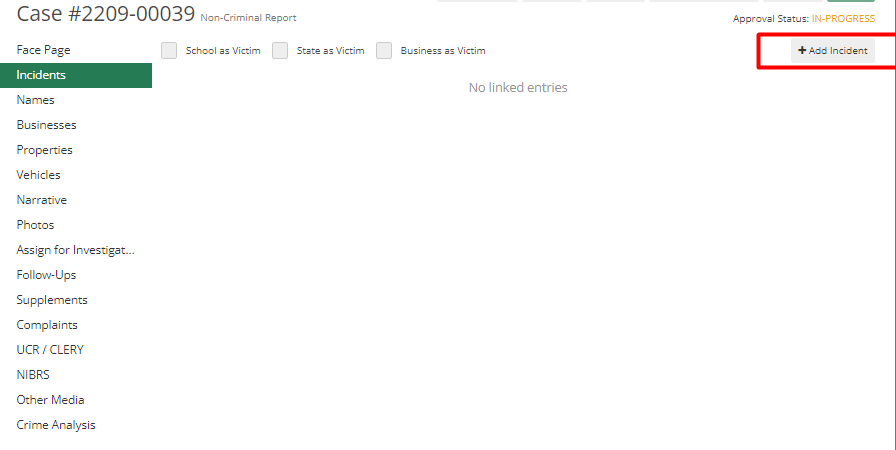
Incidents
If the case is issued by CAD, it will show "Dispatch" as a Crime Code. Dispatchers use this code for Aggravated assault, officers need to remove it and add more details by clicking on the "Add Incident" button.
The officer should type the incident in the incident field, and it will show the incident list to select from. It will show a list when the user starts typing.

Once the officer selects an incident, it will automatically fill in a few fields. This information is attached by Admin with the type of Incident and will be prefilled once it is selected by an officer.
All other fields are only added by the person who is reporting the issue. For officers, Incident type is the only required field.

Once Officer clicks on "Done", it will add the Incident to the case.
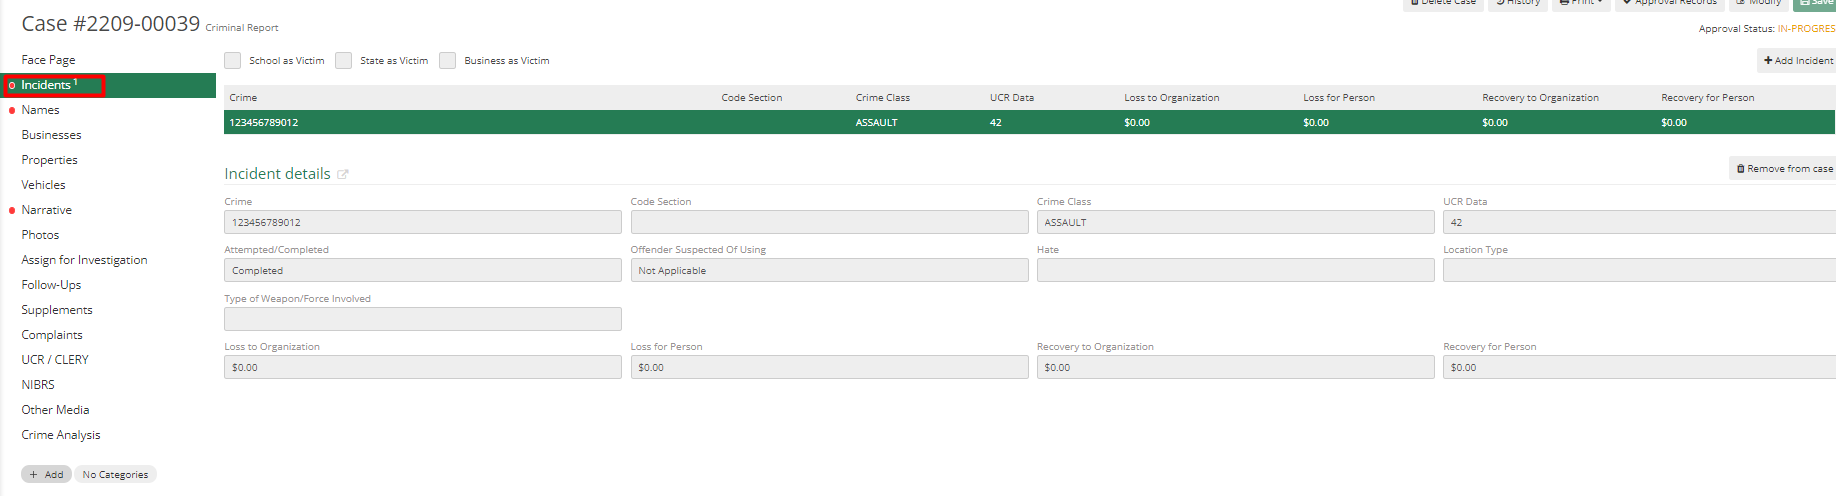
All data are added still it shows a red dot in an incident tab, it is related to the Names and Business tab. With the click of a red dot, it will show the reason. This dialog shows that criminal case requires victim details.

If the victim is a school, state, or business, the officer needs to check the mark-related checkbox at the top. If the victim is an individual, an officer can ignore this and move to the Names tab. If the business is a victim, then select the checkbox on top and add details in the Business tab. If there is a drug Charge, then nobody is a victim except the state. So, the officer needs to check "State as a Victim".
Names and Unknown Suspects
The red dot in Names indicates that there is a need for Victim details. To add victim details, click on Add Involved Person button on the top right corner of the screen.
![]()
Adding Involved Person
The first thing this does is to ask the officer to search first before adding it as a new entry to avoid duplicity of records. After adding the Last name officer can hit the Search button.

If there is no name matching or if the name is not what Officer is searching for then they can hit the "Add New" button on the bottom left corner of the screen or if they found whom they are looking for, then they can select the person from the list and hit "Next".

It's better to search small like just entering the last name, once you click on Add New button it will show all details prefilled that you added for the search. Race, Sex and Ethnicity are required fields, in case you don't know any of them you can select Unknown from the options. Multiple optional fields can also be added by an officer.
The Misc. tab is not used by all departments, some may use and some may not.
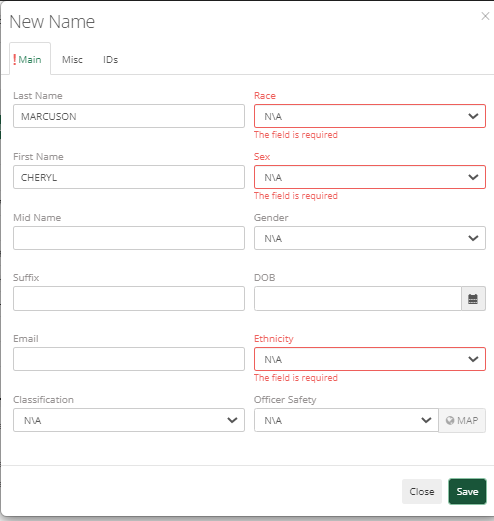

IDs tab allows to add users ID details like SSN (Social Security Number), FBI Id, Driver's License, Finger Print Id, Driver's License State, Alien Id, Student Id, CII number, and State Id. Once the officer hit the "Save" button, it will add that person to the Names List of ARMS.

After the officer receives the success message, ARMS will prompt him to link the name in ARMS, which requires him to enter the person's involvement and name type. Other than that, there are multiple other fields that an officer can add like Addresses, Phones, Descriptions, Field Interviews, Vehicles, Complaints, Moving Citations, and Warrants. Trespass Orders, Restraining Orders, Notes, Photos, Other Media, Licensing, Aliases.

After hitting Save, now it will show a success message associating a name with the Case.

Adding Unknown Suspect
The required fields are Sex, Race, Age from, and Age to. The rest is up to the officers. They can provide as many details as they know. Like name if the officer does not know the details, then they can select Unknown from the list.

Arrests
If somebody is apprehended for the case and has been arrested, then go to Names>Add Involved Person>Search Name> Add or Select the person from the list. Select Involvement type as Arrest (or whatever type is added by the department for arrests) and Name type, other information can be added if available.

Officer can see Add Arrest button for this person, for others it won't show.

On clicking Add Arrest, Officer can add information about this person's arrest. This information includes Arrest Date and Time, Officer Name, Second Officer, Type, Level, Status, etc. All dropdown lists will only have information if they have been added by the Admin of the Department. Before moving to any other tab officer has to hit "Save", to save the details added.

The charges tab will help to add details of charges applied to the person. If there are multiple charges, then that can also be added.

Other information like Spouse & Employer, Holding Information, UCR Statistics, Booking Photos, Presentment Details, Personal Effects, and Notes can be added. Hit Save to add all arrest details and hit the Back to Case button to go back to the case after saving all details.
Businesses
To add a business to the case, click on Add Business button on the top right corner of the screen.
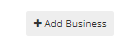

It will first ask involvement type of business, then it will ask to search for business details first. If it matches search officer can select a business from the list and if it doesn't match, then the user has to click on the "Add New" button.

Add New will show tons of information that can be added about the Business, officer can add whatever details they have. Business Name and Business Type are mandatory fields.

The vehicles tab allows Add Vehicles of that business if any and the same with Contact History.
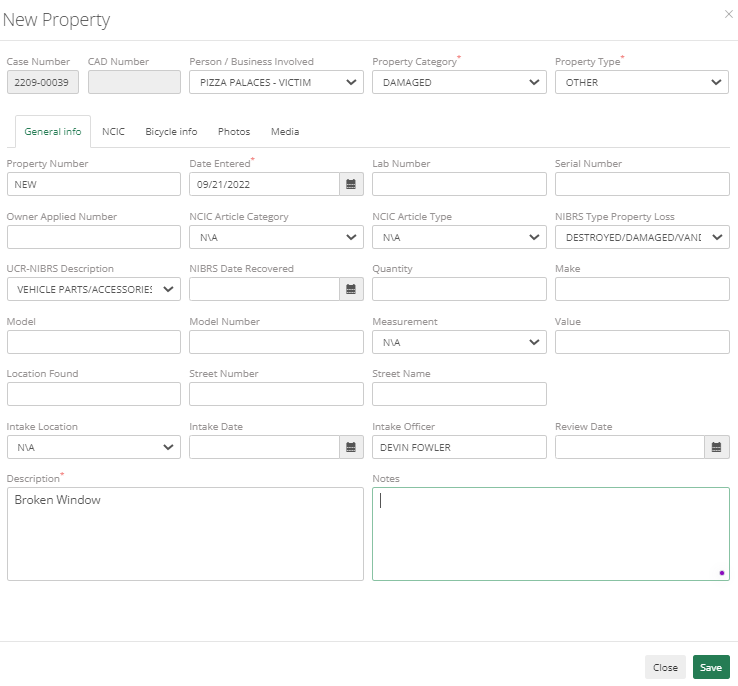
Properties
This will allow you to add a property, here it will not require you to search first as properties will always be new. Officers can directly hit Add New button.

Fields change depending on Property Category and Property Type and officers need to enter data accordingly.
Vehicle and Tow Files
Vehicles allow to add of vehicles to the case. To add a vehicle, go to the Vehicles tab and click on Add Vehicle button.
![]()
Before adding in the vehicle, it will first ask to search. The officer can add the license number and hit search.

The search result will show up the related vehicle if any and Officer can select from existing or Add New from that window.

Required fields to add a new vehicle are License, License State, and Vehicle Identification Number.

After hitting save, the vehicle gets added to the case and if the vehicle got towed for some reason, then that details can also be added by hitting Add Tow button.

All Tow details like keys location, Reason for Tow, Towed Status, Insurance Policy, Mileage, Common Name, Street Number, Street Name, Location Details, other towing information, Releasing Information, Owner details, Stolen details if any or other vehicle details can be added. The print option allows the printing tow information. Hit save to add details.

The newly added vehicle can be linked with Businesses or Names. To link it with Business, go to the Business tab>Business Details>Vehicles> Add Vehicle> Search for the vehicle> Select it and it will get linked to the Business

Narrative
The narrative Tab allows entering Case Narrative. To add details, click on Modify button.
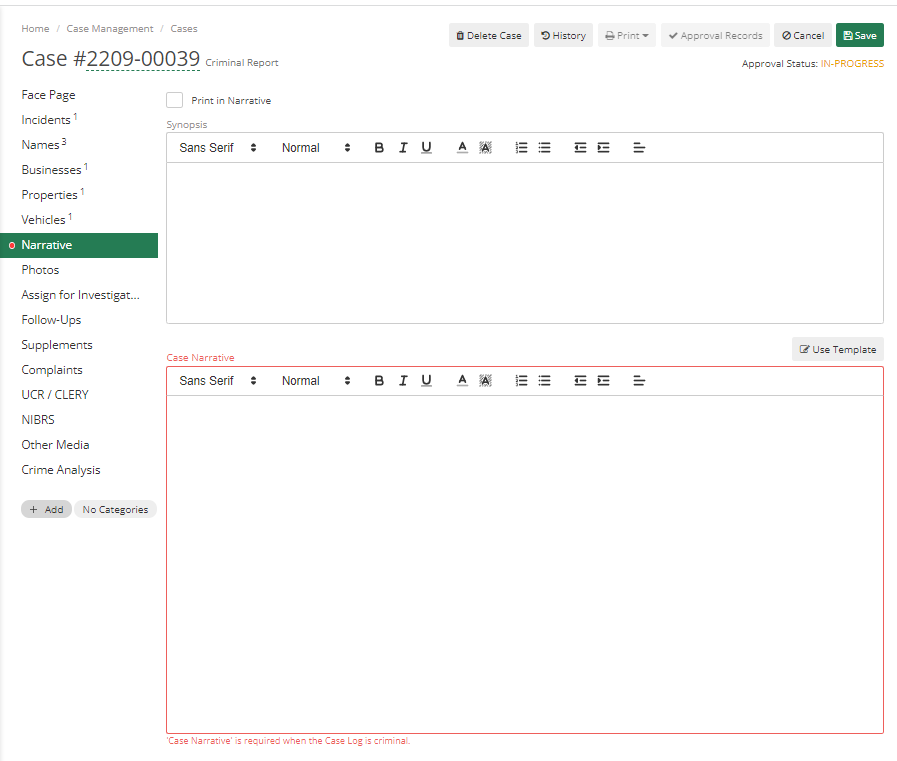
Tick Print in Narrative to print synopsis in the actual case with Narrative. The synopsis is a review of the call, if the dispatcher adds something to the public information, then that will be pulled into Synopsis. For case narrative, it will show a red line if there is any typo or spelling error, and it will automatically start saving as the user types in.
If an officer uses any device that has voice detection capabilities, then the officer can talk in through that device and use that to type as well.
Use template button can be used to add text to Narrative as per the template added by Admin. This will not overwrite already added text. On click of the Import button, it will import text to Narrative.

Approval Records
Attempting to click on the Approval Records button in the top right corner of the screen before adding all required fields will prevent the officer from sending it for approval.
There are two options here Submit for Approval and Final Approval, final approval option will be visible only to Admins or Higher Authority only. It will only appear if the officer has permission for it.

Action Date will automatically pull the date.
The destination User will be the supervisor to whom they need to submit. It will only show a list of supervisors who have kickback or final approval permission. It can be sent as per division as well.
Whenever this submission is made, it will send a notification to the supervisor. If the supervisor has an email id added to the employee file, then it will send a notification through email as well. Notes are used by supervisors if they need to kick back the case, then they can add Notes, and even officer can add their Notes if any. After adding details, Hit Send.

Once it is approved by the supervisor then it will change Approval Status from Submitted to Approved. Officer can't change anything to the case unless it is approved or kicked back to Officer.
Case Management Advanced
Photos and Other Media
Officers can add Photos through the photos tab.
Onclick of add new photo. It will show a dialog, where officers can select a photo, they want to add to the case.

Then after selecting, again a dialog will appear where Officer can add details about the photo like the Date Entered, Entered By, Description and Notes.
Officers can also print those details by clicking on the Print button. After adding details to Photo Hit Save. If Officer is using a device such as a Mobile phone, they can capture an image and can upload that image to ARMS.

For Photos, officers can Print, View, and Download uploaded files.
In the Other Media tab, officers can upload any type of File that is not a photo like documents, videos, audio, etc.
Other Media and Photos both allow multiple selections of items. Officers can upload multiple items together. They can View or Download uploaded files.
Assign for Investigation
![]()
Officers can take any case and can assign it to the investigator or investigation agency.

The case number and Date Reported will be pulled automatically, the officer needs to add information such as Status, As Of, Date Assigned, Assigned To, Review Date, Purge Date, Notes, Closed On, Cleared By, Reason Closed, and Solvability Factors.
Solvability factors state how likely it can be solved as per the officer. They can mark the score in front of each factor. If in the employee file email is added for assigning to a person, then when the officer saves this, it will send an email to that person.
Follow-up
The Follow-up tab in the Case Management module works very similarly to the Supplement tab. It will allow officers to view any Follow-Ups that they last modified, edit those Follow-Ups, submit them for approval, and add new Follow-Ups.

When Officer selects the Follow-Up tile the first screen will show them, are all the Follow-Ups they have last modified. For each Follow-Up, they will be able to see its Case Number, Follow up Date, Officer Name, Approval Status, Follow up status, Site, Date, and time when it was Last Modified.

Officers can also add Follow Ups to cases directly.

To create a new Follow-Up, Officer can click on Add New button and search by the Case Number for the Case they would like to add the Follow-Up to, or as mentioned above can go to the case directly.
For editing existing Follow-Up, Officer can select follow-up from the listing, and after that click on Modify button to modify it.

There are tabs within the Follow-Up that lets officers view and add information to the Follow-Up. The first tab is the Case info tab which lets them view some basic information about the Case that the Follow-Up is associated with. The remaining tabs are Names, Businesses, Properties, Vehicles, and Photos. These tabs can show them more information on the Follow-Up and add information to each of those tabs.
Officers can also submit the Follow-Ups for Approval the same way they do for Cases. The submitted Follow-Up will also show up in the Approval Management Module.
Supplement
Departments use a supplementary police report when additional information is brought forward after the initial report was filed. Also, crime investigations that involve several officers may contain supplementary reports from other officers. If there is any use of force involved in the case, then that can also be recorded as a part of supplements.
Officers can use Supplements search to search supplements by Case Number, Date From, Date To, Officer, Site, Status, and Use of Force.

Supplements can only be viewed if there is a case with supplements attached to them. If Officer wants to add a new supplement to a case, they must know the case number. They can add supplements to a case by going to Case > Select any case they would like to add supplements to > Add Supplements
Case details must be added completely before adding supplements to them.
The supplement includes Case Info, Names, Use of Force, Naloxone, Business, Properties, Vehicles, Photos, and K9
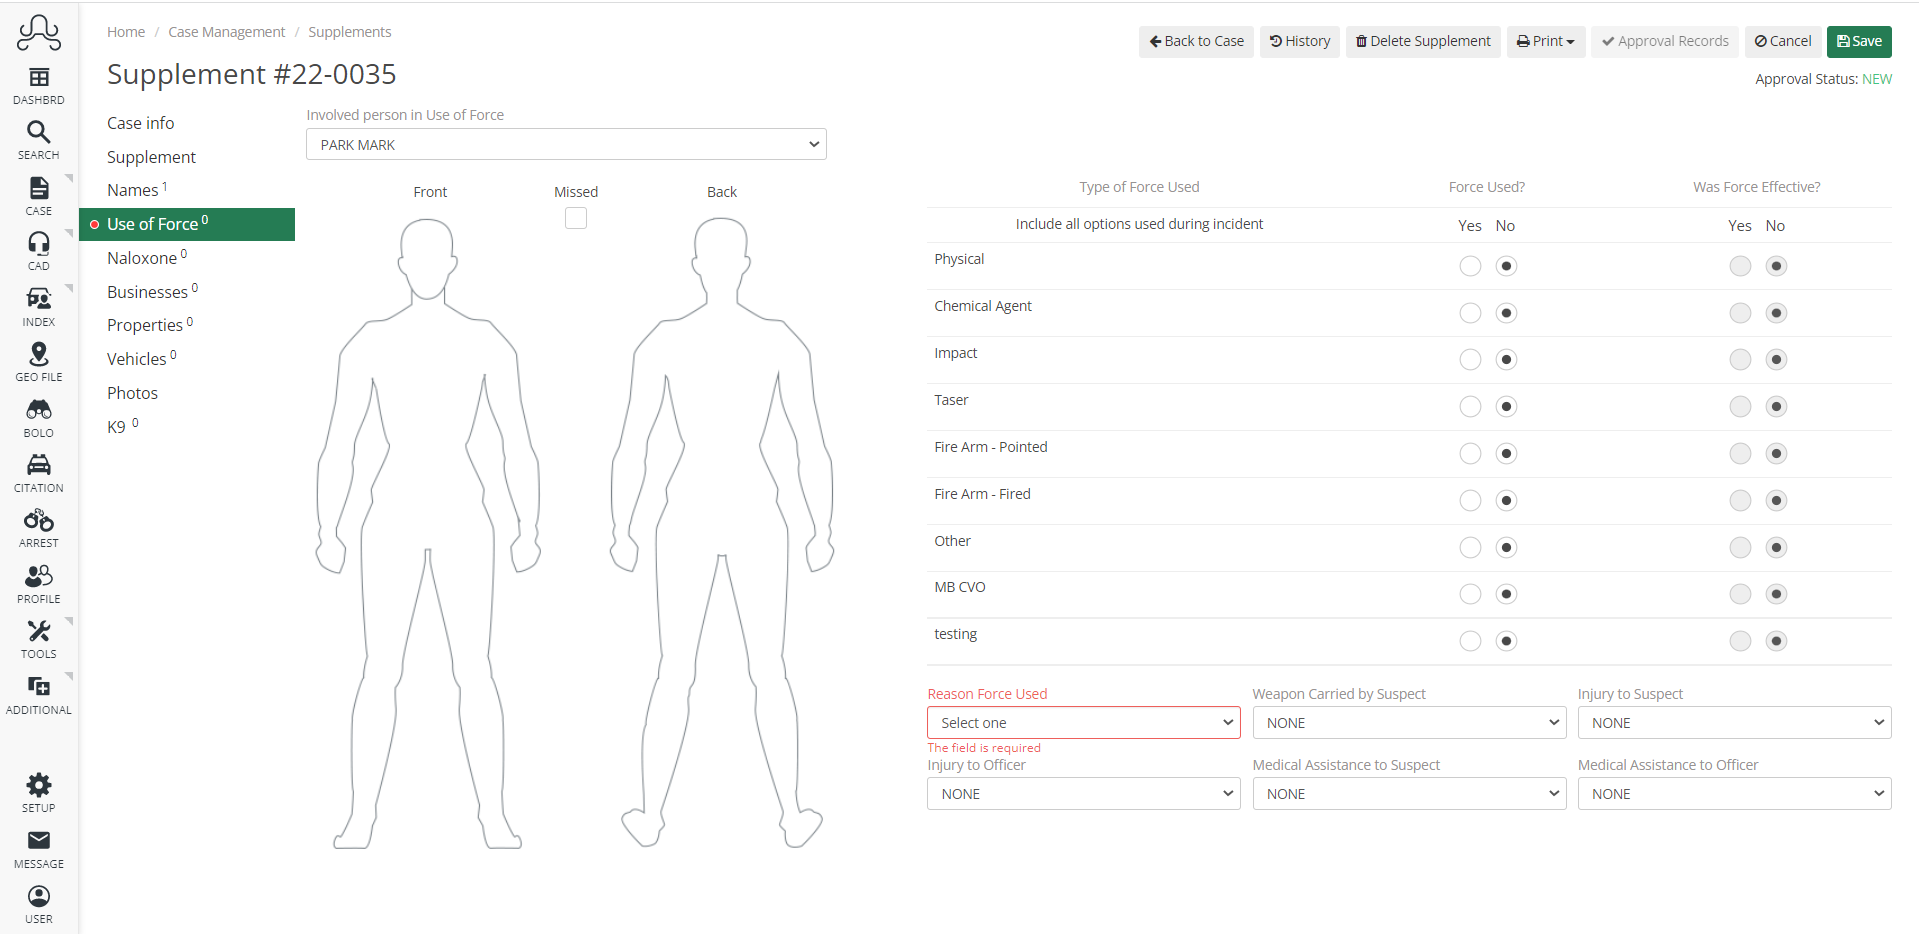
Use of Force, captures information about the involved person in the use of force, types of force used, the force used or not, whether force was effective or not, the Reason force was used, the weapon carried by the suspect, injury to the suspect, injury to the officer, medical assistant to suspect, medical assistant to the officer, front and back images to select the area where force was used.
Officers can print supplements and use of force reports by clicking on the print button in the upper right corner of the screen.
In the Naloxone tab, officers can report any overdose of naloxone or any other drugs.
It allows officers to add information such as the name of an involved person, signs of overdose, signs post overdose, amount of naloxone used, length of time taken effect, and other actions taken, the officer can also add details of a drug whose overdose is suspected, how is the response of the subject, did subject transport to hospital if yes then add hospital name and did subject survive

A police dog, also known as K-9 or K9 (a homophone of canine), is a dog specifically trained to assist members of law enforcement.
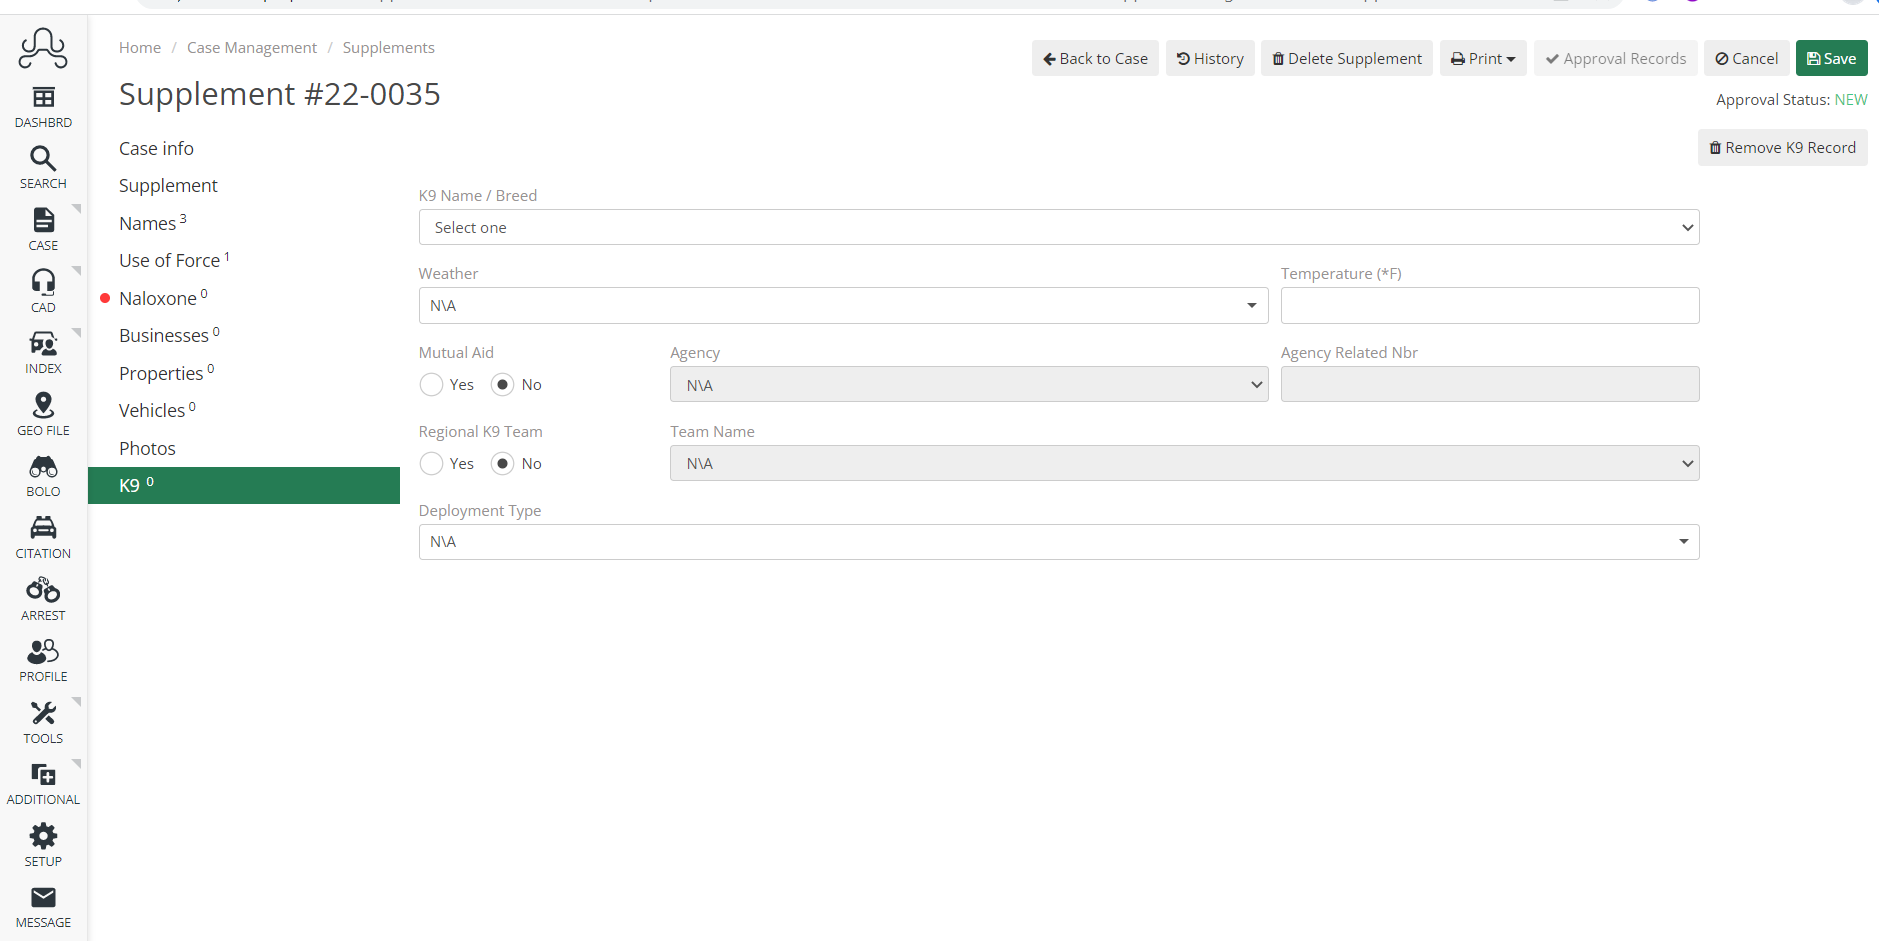
If K9 is used by an officer in the case, then its information is added here. It contains K9 name/breed, weather, temperature, mutual aid, its Regional K9 team or not, Agency name and number, Team name, and deployment type. The deployment type is used to add information for which reason K9 was used in the case.
Some departments use this section to just report the breed, so we have added the option to add the K9 name/breed.
Brief Overview of Reporting
There are tabs for UCR/ CLERY and NIBRS in Case
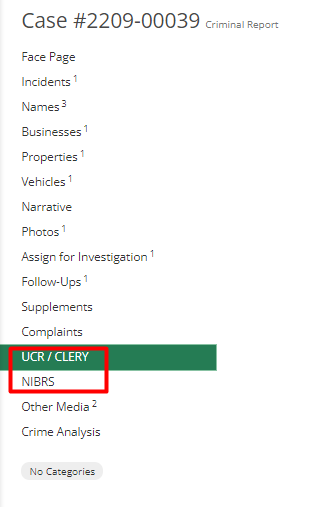
These tabs help an officer to submit UCR/CLERY or NIBRS, if an officer only wants to submit a CLERY report still they need to go to UCR/ CLERY tab and click on the Start UCR Review button.
![]()
This will automatically choose the crime code you have selected for the case. So, if all that is set up by the admin then it will automatically pull that data.
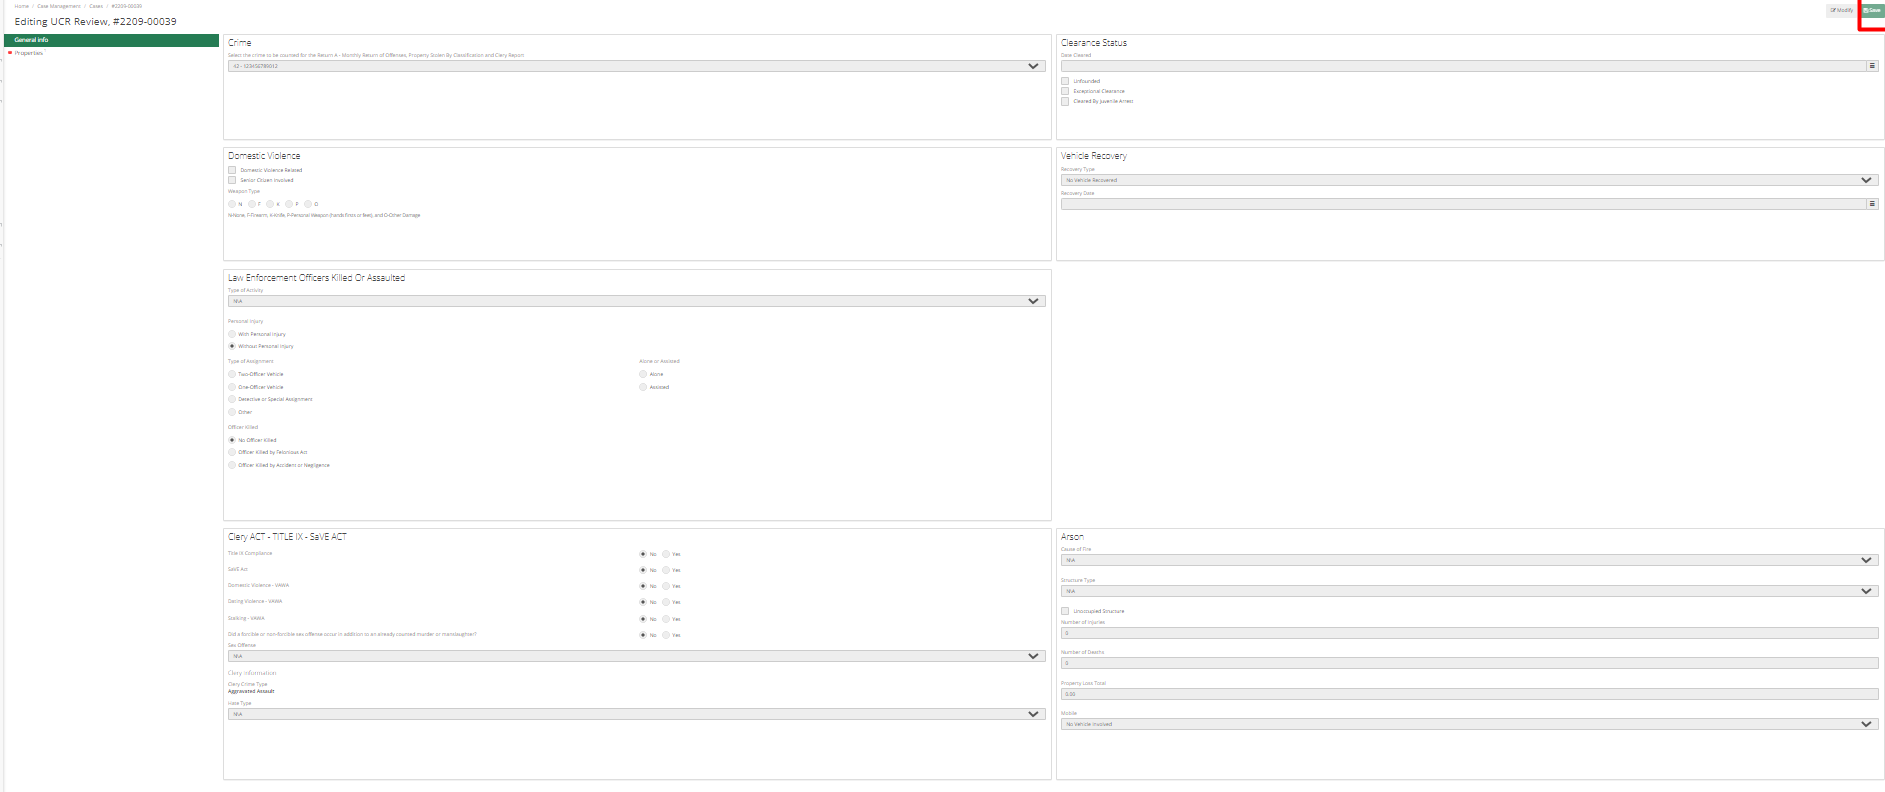
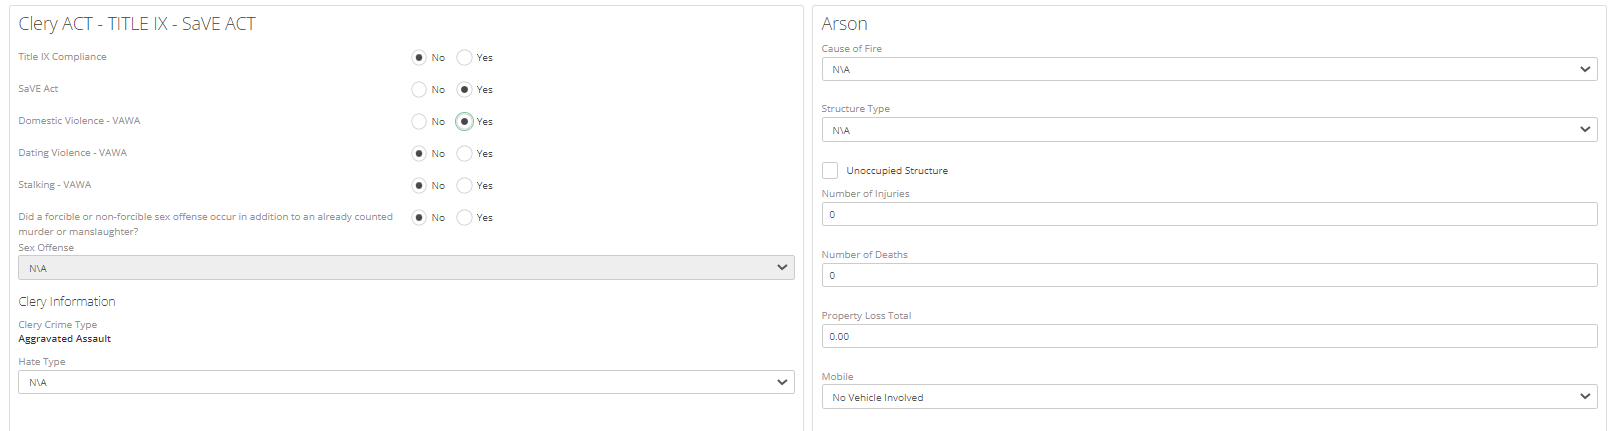
For CLERY go to the CLERY section as shown below screenshot and select what is applied to your Department.
Similarly, for NIBRS go to the NIBRS tab and hit the "Start New Review" button.
![]()
Crime Analysis and Categories
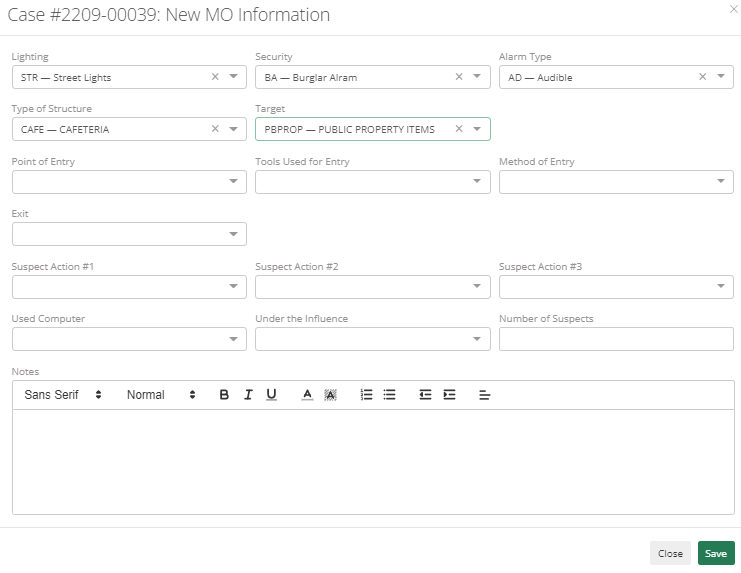
At the very bottom of the Menu, there is an option for Crime Analysis. After going to the Crime Analysis tab, hit the "Add MO Information" button. Here Officer can add details about the crime scene and what happened there.
![]()
Add Category
Below Crime Analysis there is an option to Add a Category.

Onclick of the "Add" Button officer can choose categories from the available options.

After saving the selection it will be visible beside Add button.
![]()
This is used for reporting and Querying in the system.
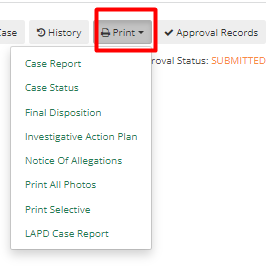
Officers can print the case by clicking on the top "Print" button. There are multiple options to select from.
|
Print Option |
Description |
|
Case Report |
It prints a complete case report, with all the information added by Officer. It can be downloaded. Supplements and all other parts will be printed. |
|
Case Status |
Prints out Case Status |
|
Final Disposition |
Prints out Final Disposition |
|
Investigative Action Plan |
Prints out Investigative Action Plan |
|
Notice Of Allegations |
Prints out Notice of Allegations |
|
Print All Photos |
Prints out all Photos. Any photos that are in the case can be printed with descriptions and other information in the photo. |
|
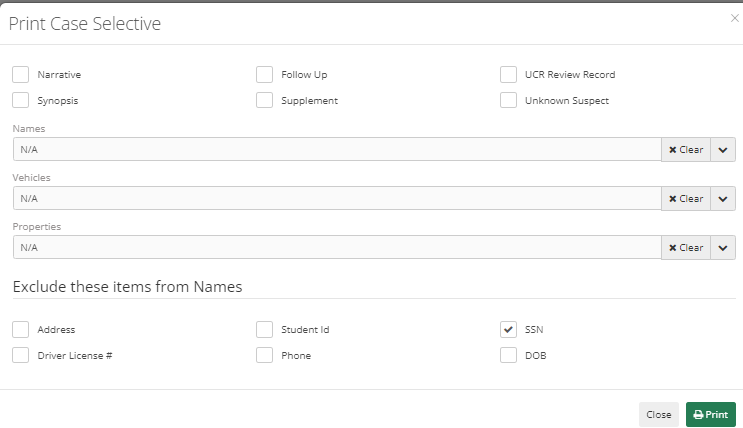
Print Selective or Print Case Selective |
Officers can pick and choose what prints out in the case report. They can include supplements, narrative, Follow up, Synopsis, etc. in the case report. They can also include vehicles, names, and properties. They can also exclude a few details from the case report like SSN, Address, DOB, Student Id, Driver's License, and Phone.
|
|
LAPD Case Report |
Prints LAPD Case report. |
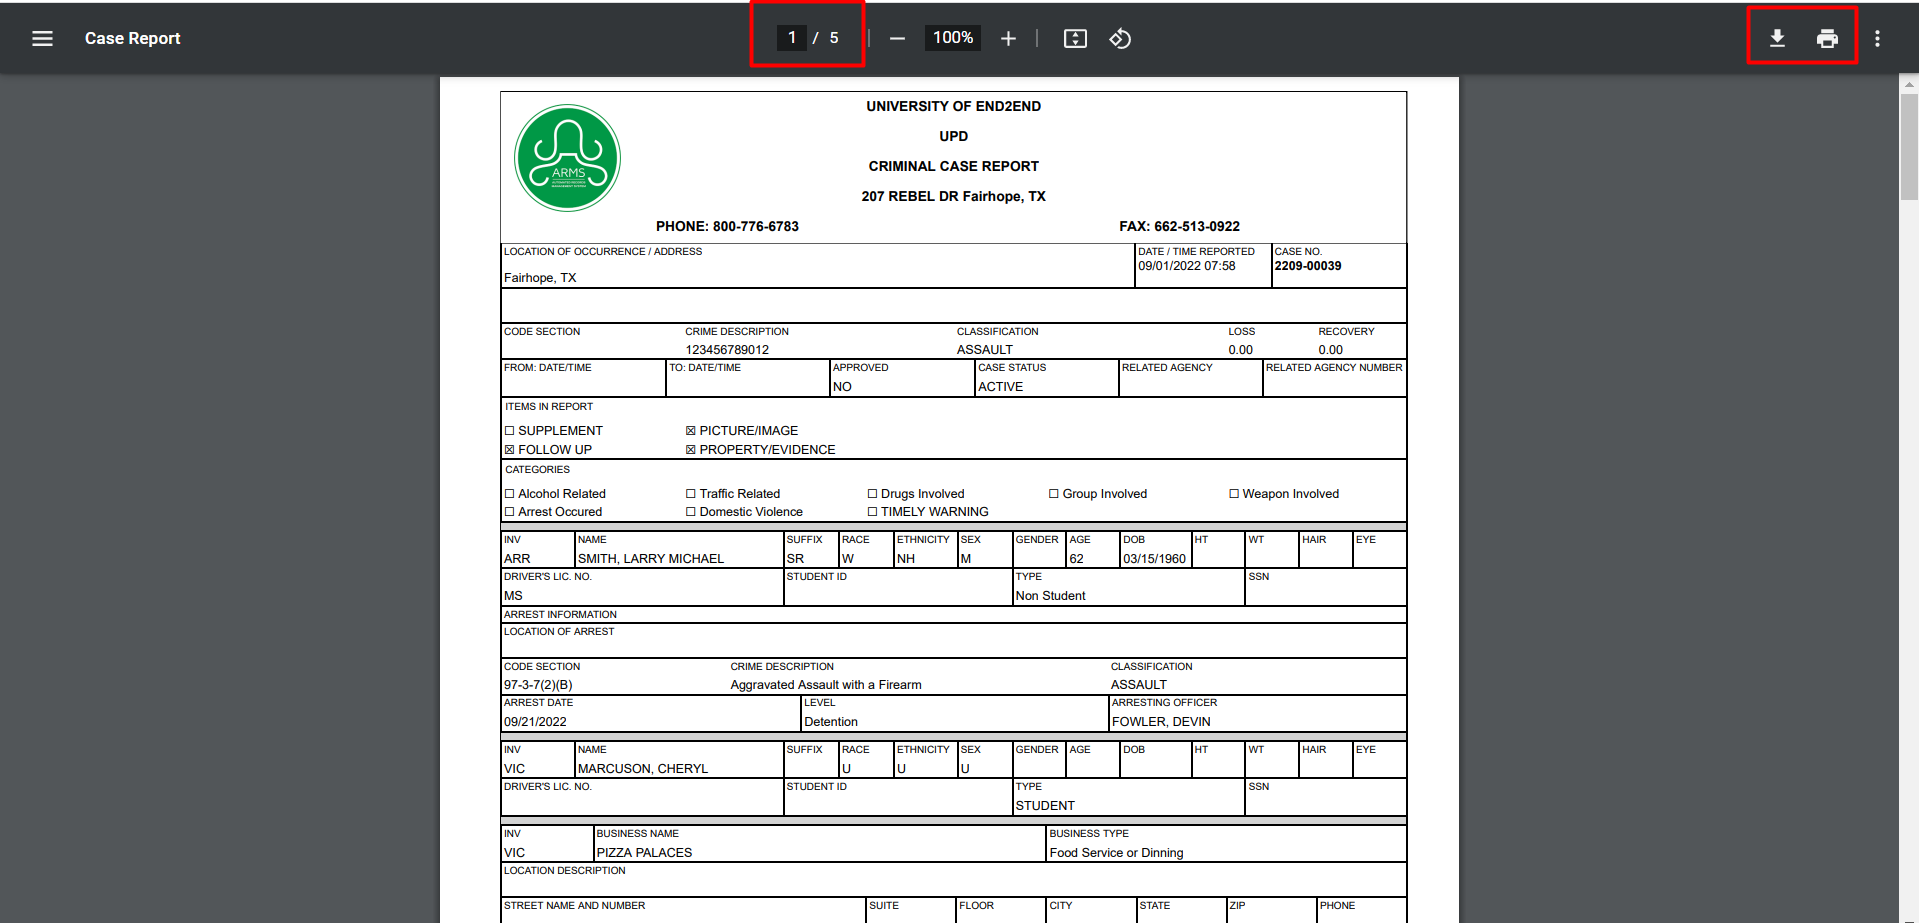
Example of Case Report:
ARMS Mobile Features
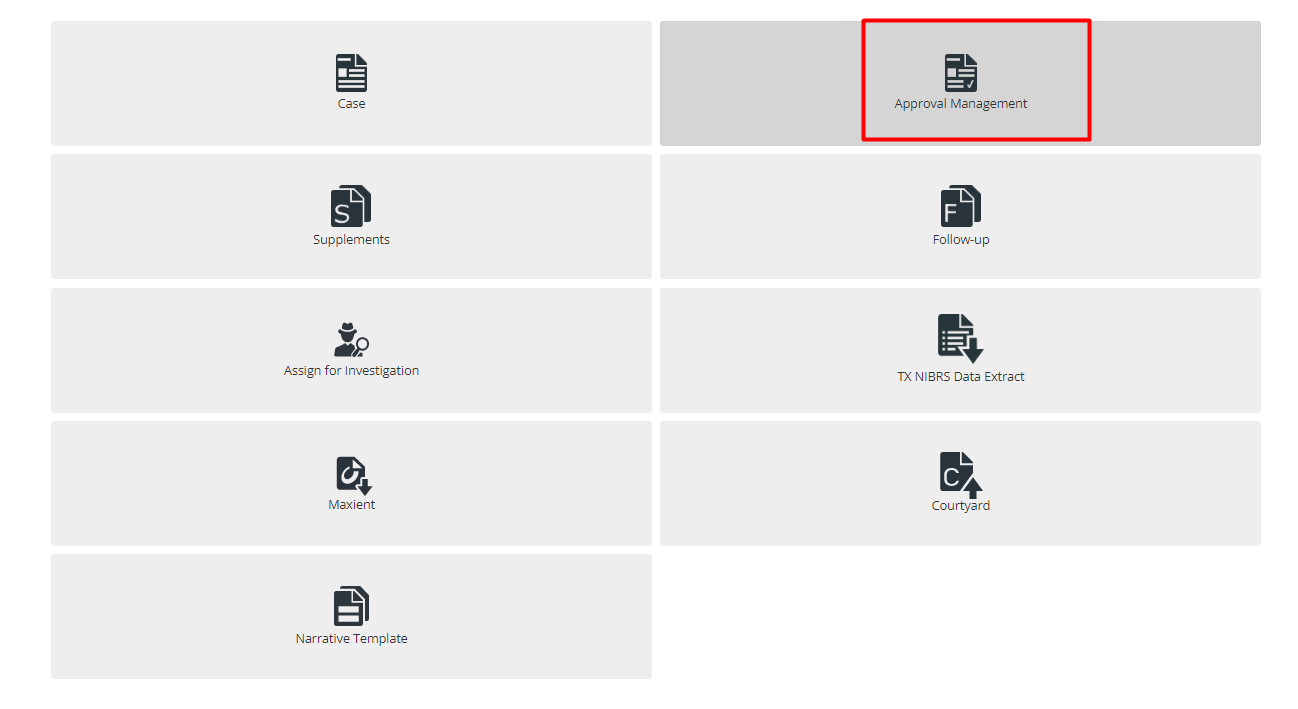
Approval Management
The management section in Case Management allows officers to check if they have received a Case that needs their approval or if their Case is Kicked Back to them.
It shows Case Log details, Approval Process, and Approval History

Officers can see cases as per Site or Submission type. These filters have multiple options to choose from.

Search Features
![]()
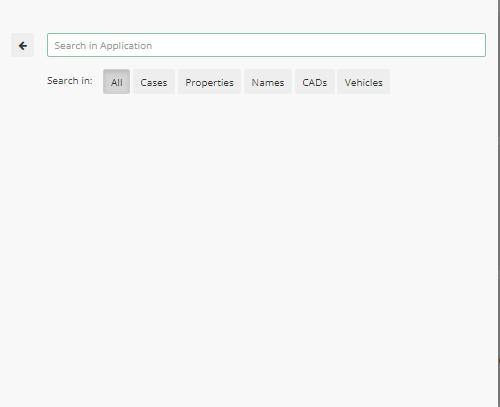
This allows you to Search by Cases, Properties, Names, CADs, and Vehicles. It can also allow searching by Narrative. If the officer knows some detail about the narrative, then they can search by that. On clicking on any section in the search result, it will bring Officer to that section.

Each tile on the home screen has separate search options in it. Names, Vehicle, Business, Property, Geo File Lookup, etc.
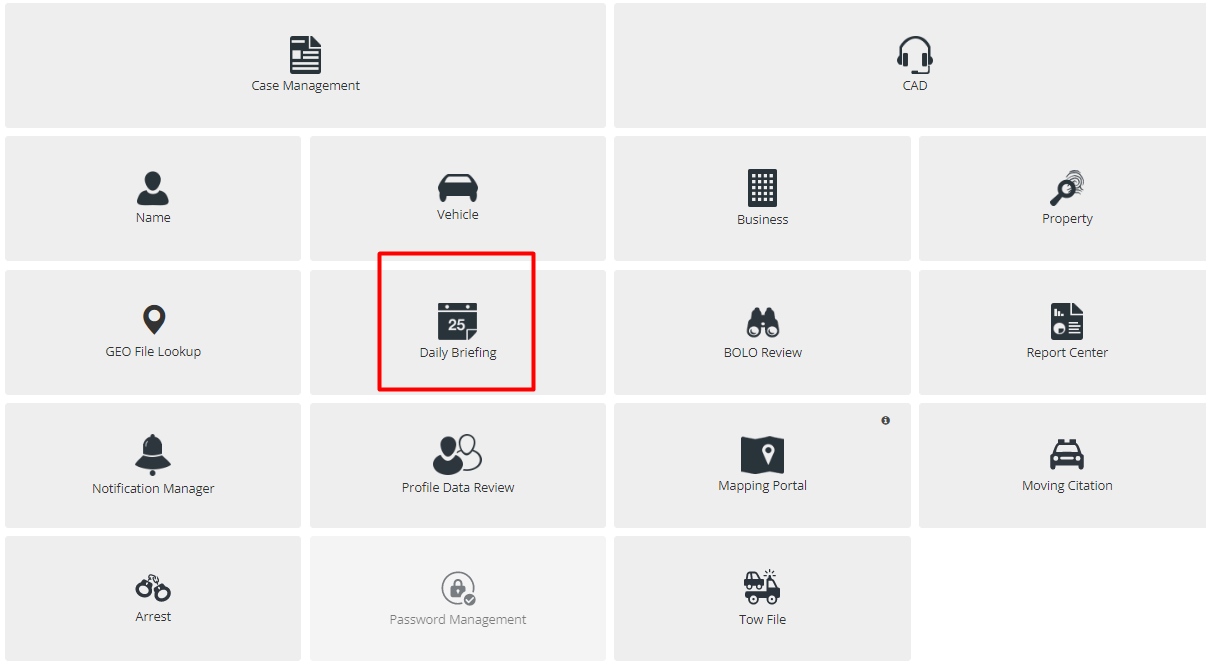
Daily Briefing
The daily Briefing tab displays the briefing report. By clicking on this tab, officers can see what has happened according to the date range they added, or of the Last 24 hours or Last 48 hours.
There is also the option to filter by Report type or by Site. Officers can view the search results in List View or Detail View.
In Daily Briefings, officers can view crime codes for CAD reports and case reports that have been marked for viewing by department admins.

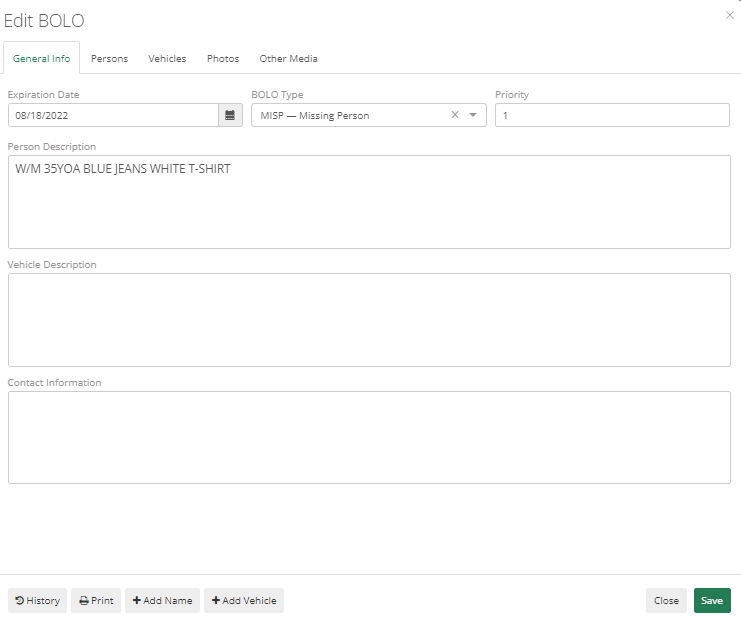
BOLO Review
Bolo Review is an option for officers to see if any BOLO (Be on Lookout) has been added by the Dispatchers. This is a way to review anything that an Officer should be on the lookout for.
Officers can search by Date Filter, BOLO Type, Priority, and Expiration Filter. Date Filter has three options Quick Filter, Exact Date, and Date Range. Officers can search by Quick Filter i.e. by 24 hours,48 hours, 72 hours, or 7 days.

Double-clicking BOLO from the search result displays all the details added by the dispatcher regarding that BOLO. Like General Info, Persons, Vehicles, and Other Media.
Moving Citations and Profile Data
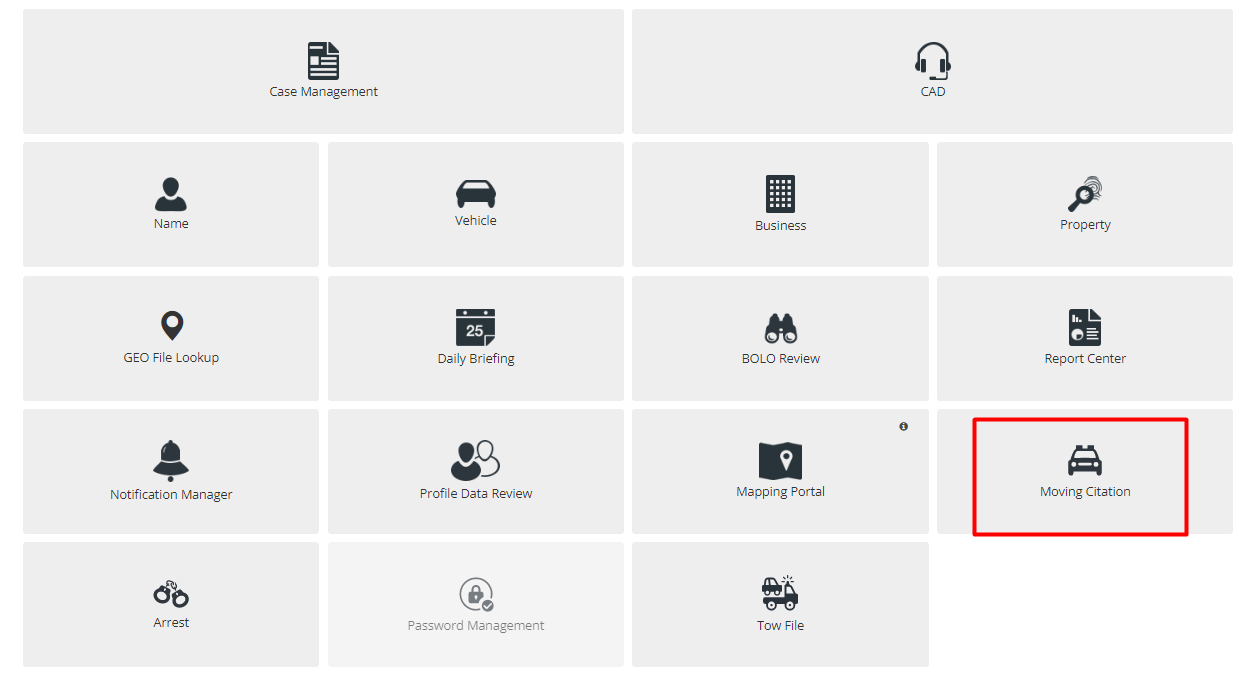
As with all other tabs in ARMS, Moving Citation also have a search on the top and adds a new button. Add new button allows the officer to add new moving citation details and by searching, Officer can search from the existing data.
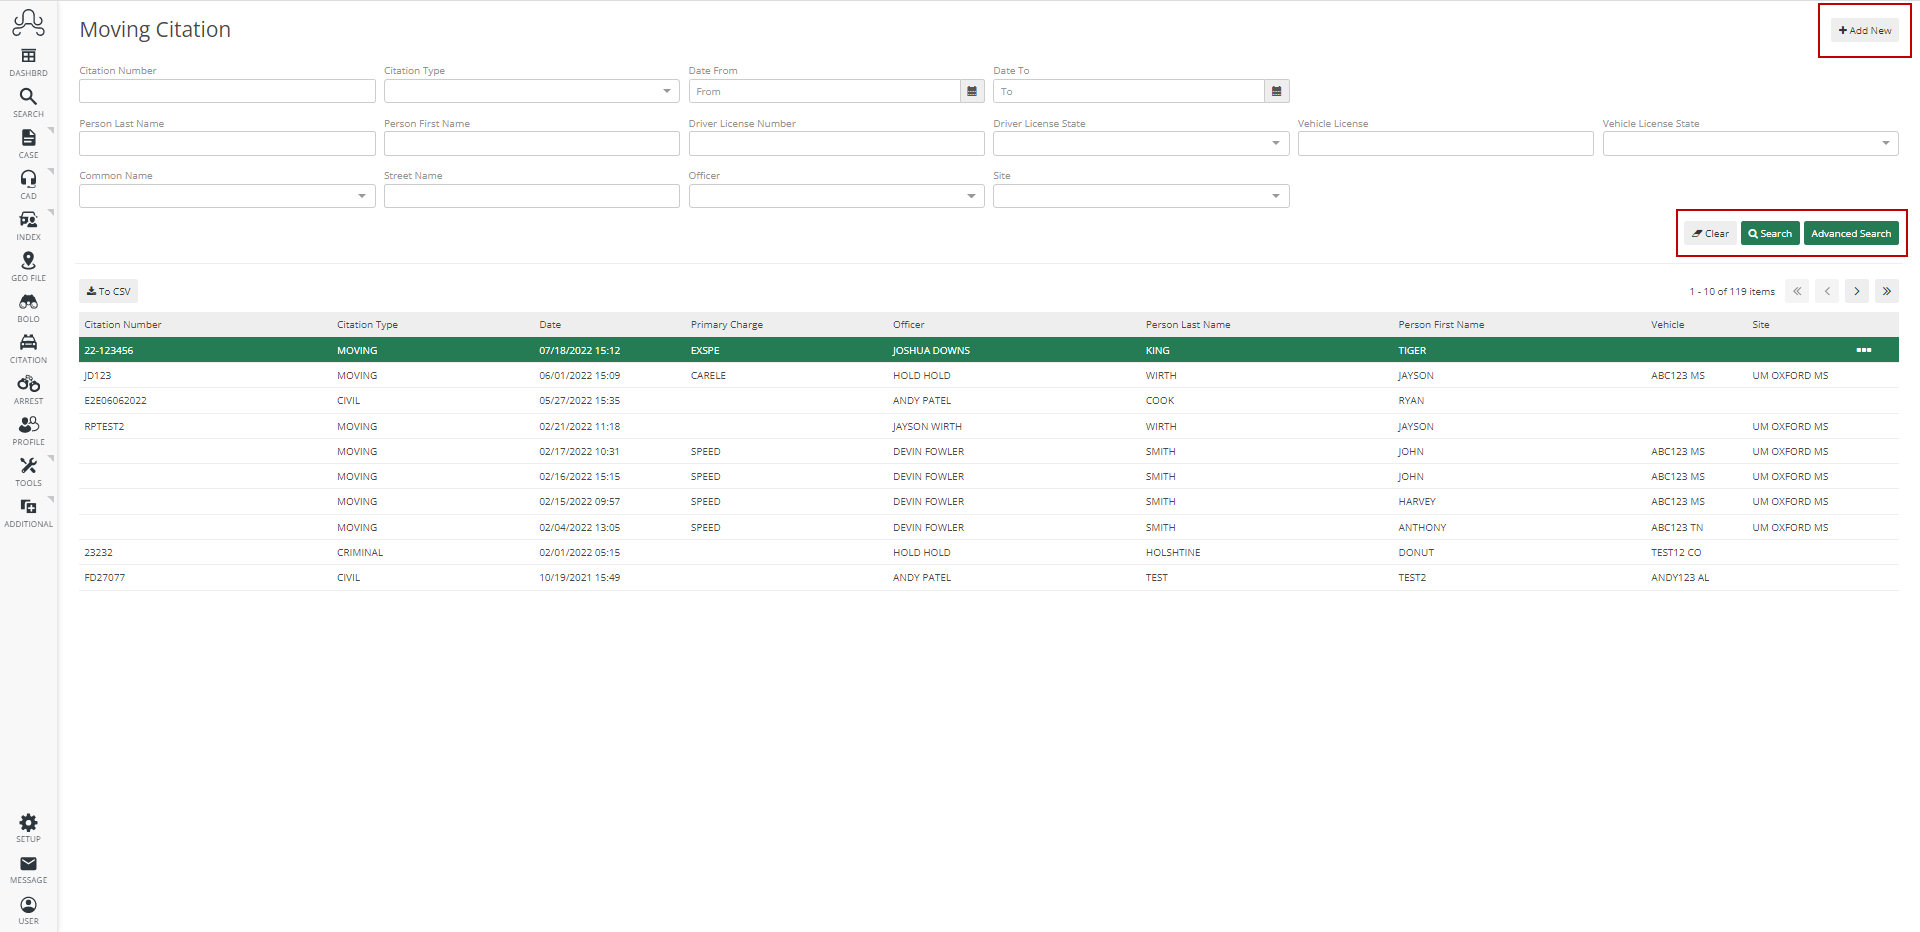
It contains all the fields required to gather information regarding moving citations. The first tab is for General which contains general info like Citation Type, Reference #, Date, Citation #, Officer, Common Name, Street#, Street Name, City, State, Zip, Country, MPH, Zone, Road Type, Road Citation, Visibility, Void, Court Date and Notes. The person tab can be used to add person details that were involved, the vehicle tab can be used to add Vehicle details, the charges tab allows one to enter charges related to that citation, and the Tow tab to add Tow information if there are any.

Profile Data
It is possible that some departments do not report Profile Data, so this section may not apply to all departments. The Profile Data can be added to a Case, CAD Event, or Field Interview. ARMS default settings keep it in Moving Citation or a Field Interview, it can be turned on by Admin, by changing it from System Defaults. But it's good practice to keep it in Moving Citation to avoid duplicity.

Officers can edit profile data, by clicking three dots at the end. It has Edit and Removes option.

All basic information to report profile data is in the first tab i.e., Stop Information.

If some required dropdowns do not show any data, then the department admin has to add data to that list by going to Code List.
Added Profile Data can be reviewed by navigating to the "Profile Data Review” tab from Home Screen.